Adding an Accident Report
To add an accident report, there are two options:
Click the + button on the page displaying the list of accident reports.
Click on the police module in the right menu, then select add an accident.
The image below illustrates these two possibilities.
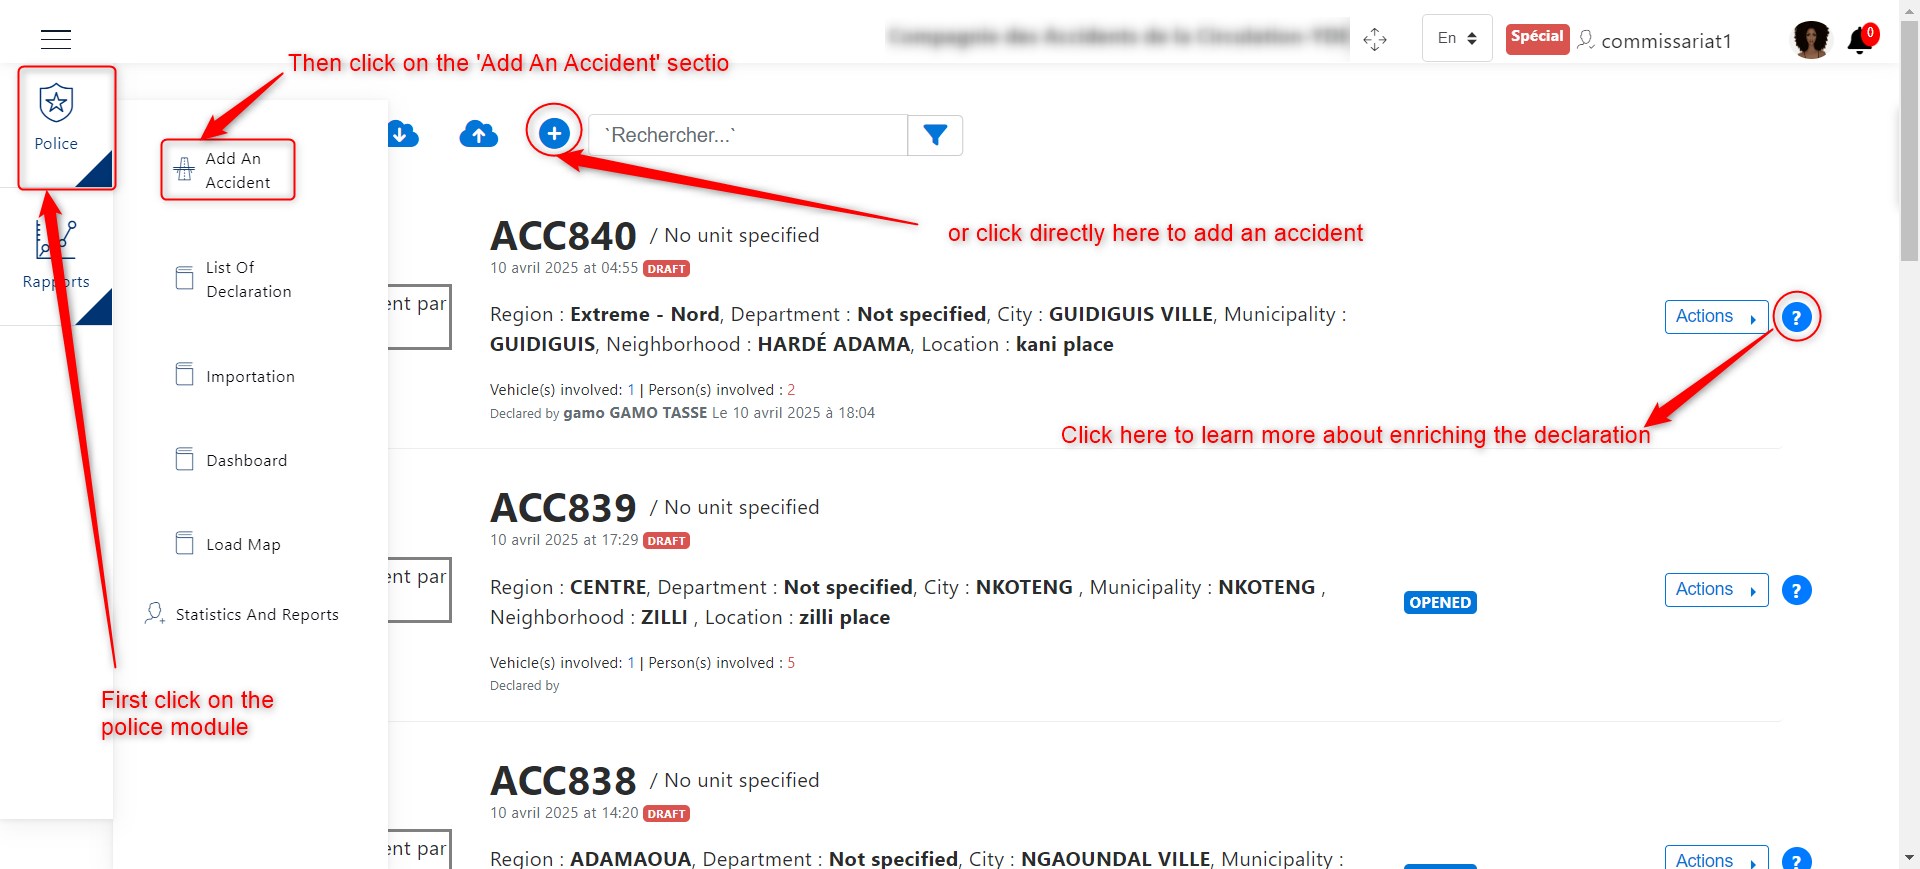
Police/Gendarmerie Home
After clicking on the add accident report icon, several steps will be presented to enter accident details. The information to be provided includes:
A detailed explanation of the accident report procedure follows:
Inspector
This is the first section to fill out; it involves entering the identification details of the inspecting officer or officers if multiple agents are handling the report.
The interface for this step is shown below:
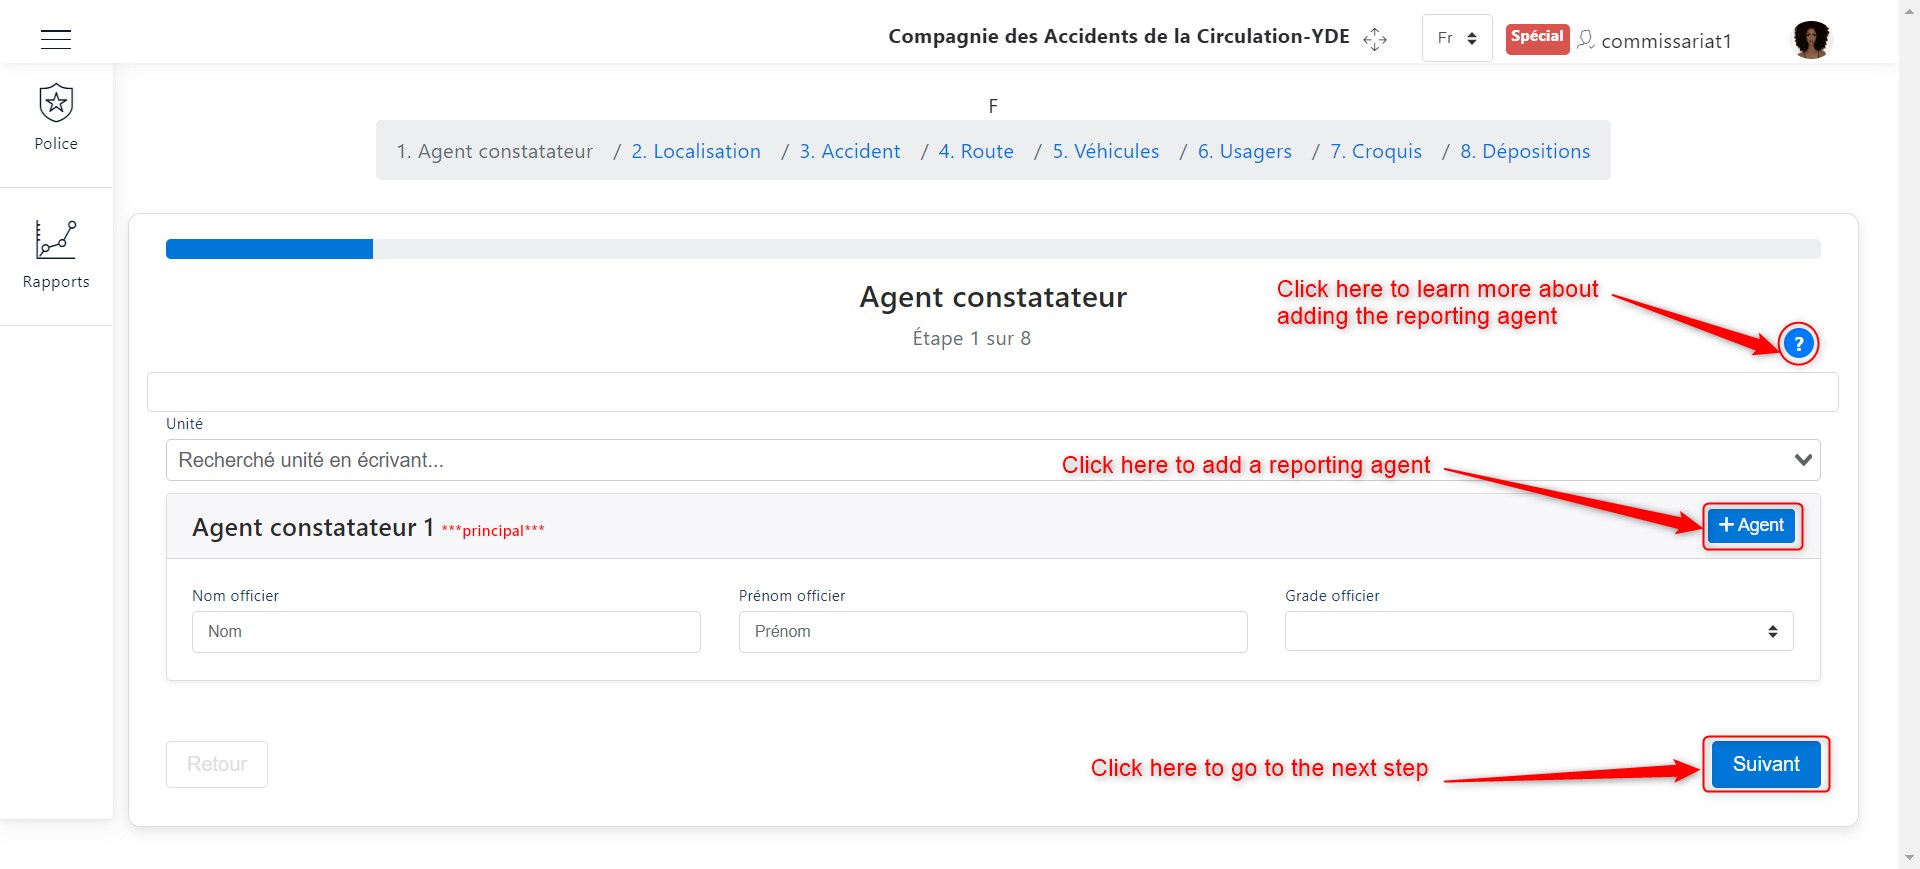
Inspector Information
As illustrated above, you can add multiple inspectors by clicking the + Agent button.

Second Inspector
Proceed to the next step by clicking the Next button.
Location
To enter the accident location, there are two methods:
Method 1: Enter location details manually
Manually input the following details:
Region
Department
City
Municipality
Neighborhood
Landmark
Latitude
Longitude
Then, click Next to complete this step and proceed.
Method 2: Select on the map
For those preferring to use the map, locate the accident zone, select the position, then click Next to proceed.
The image below illustrates both methods.
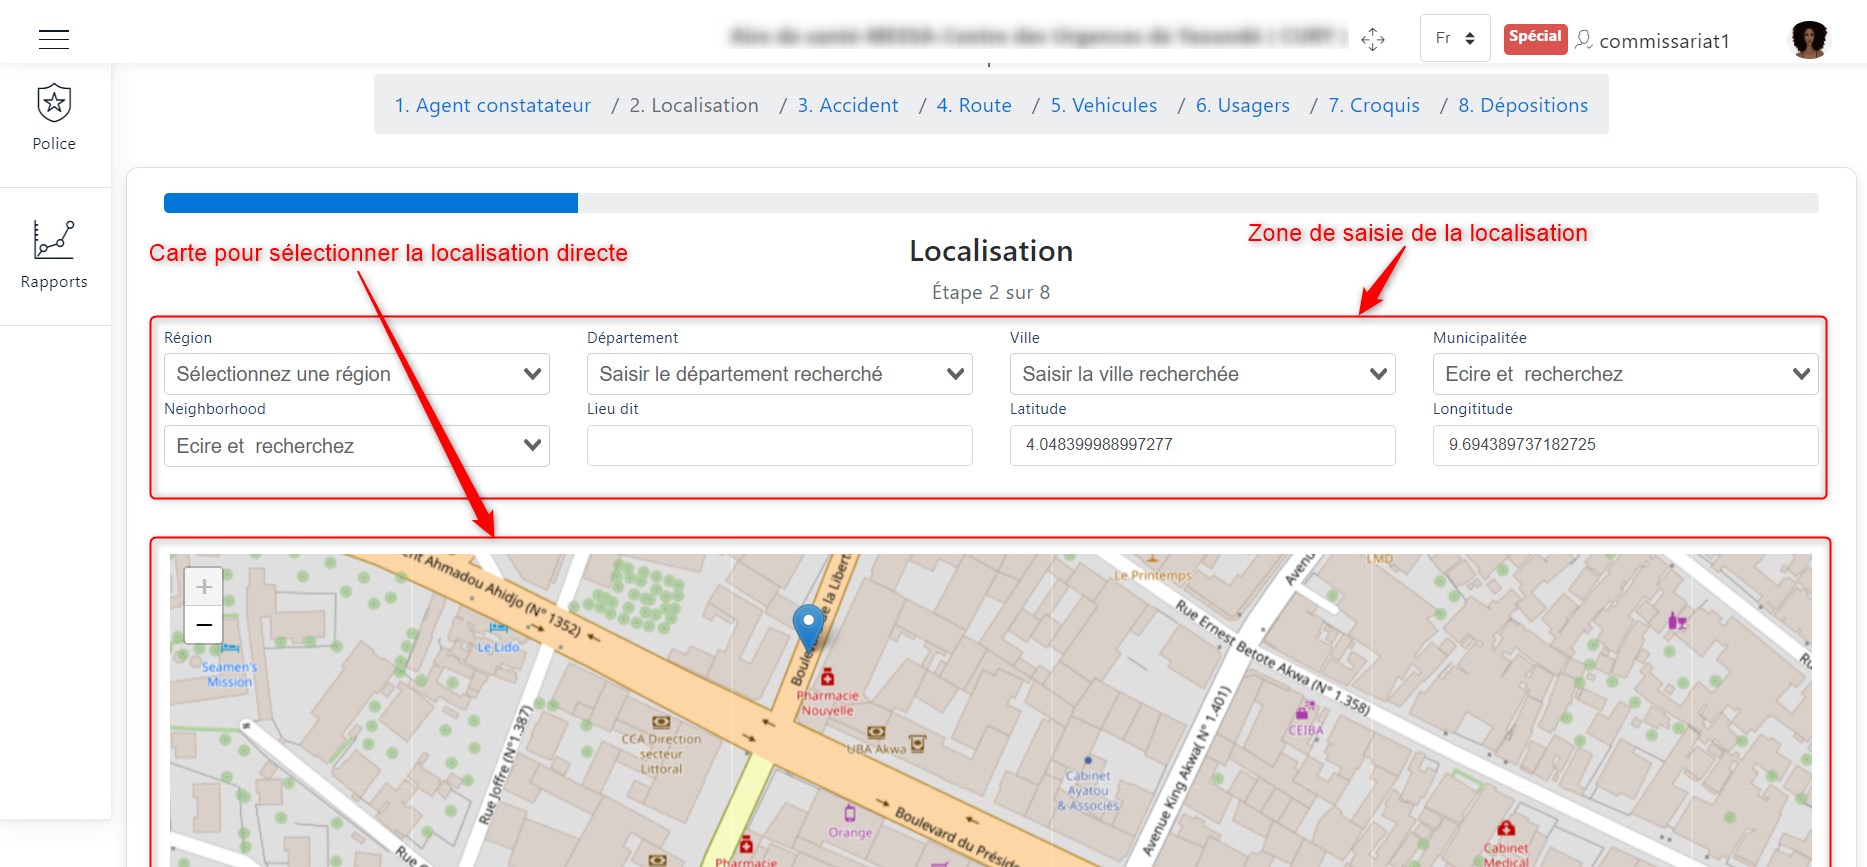
Location Information
Proceed to the next step by clicking Next.
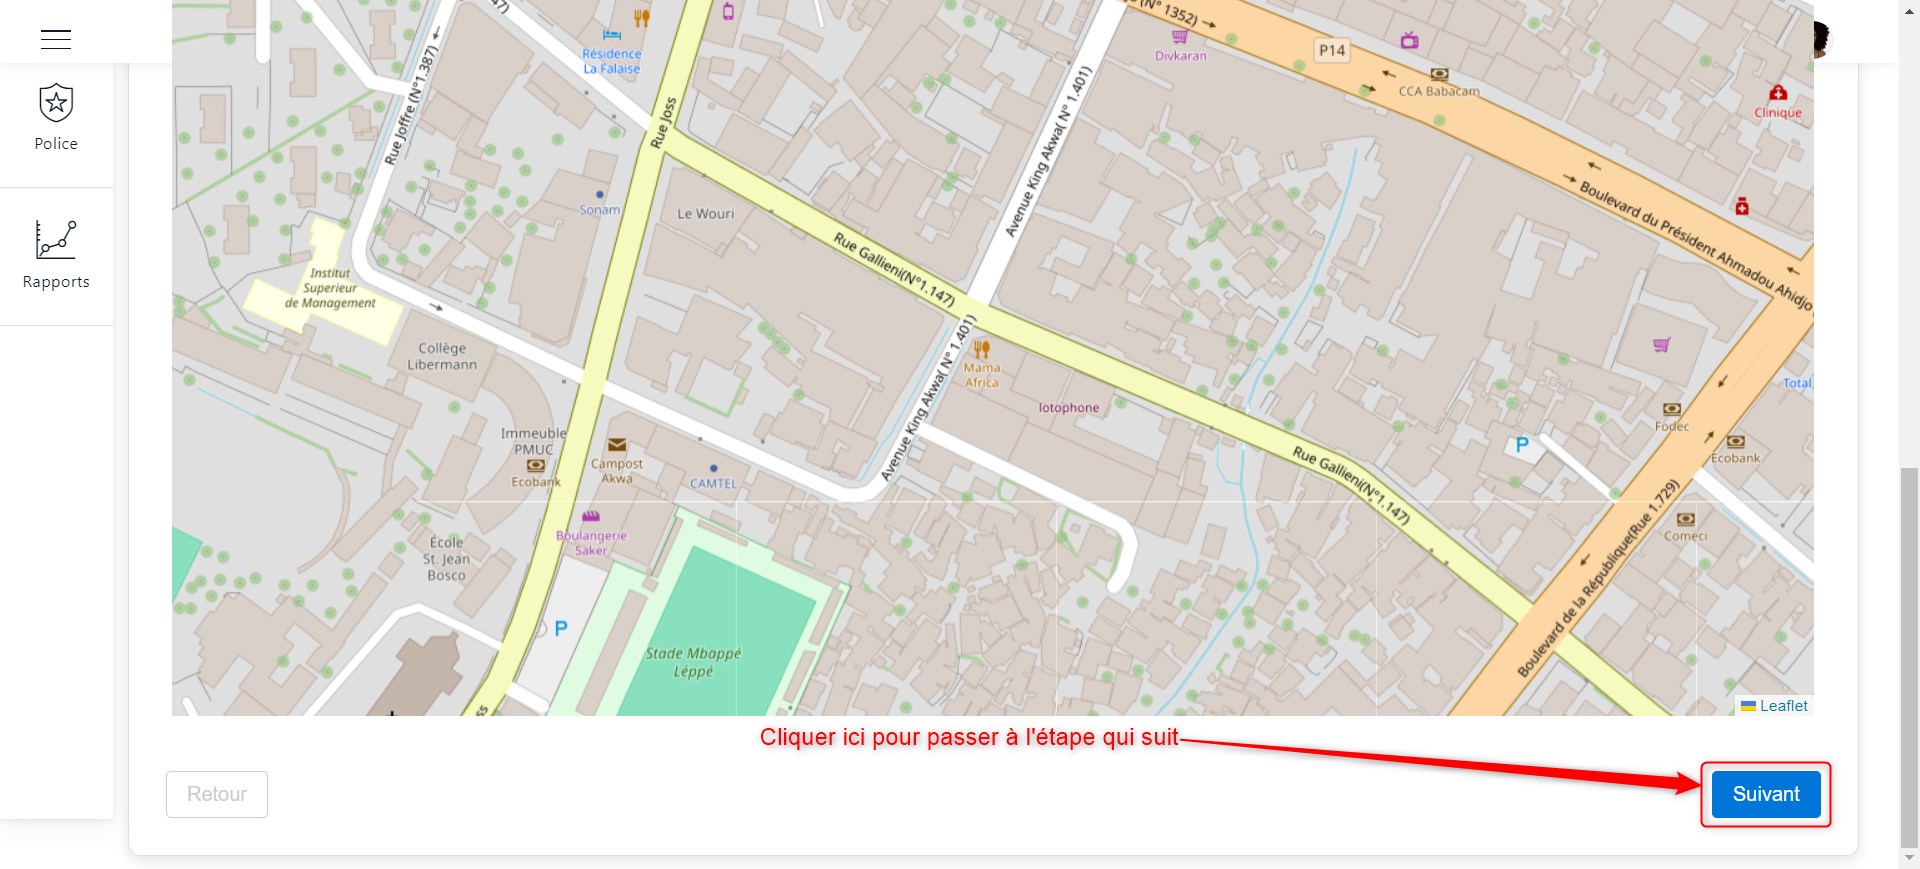
Next button
Accident
Now, it’s time to add the accident details. Upload accident photos and fill in all required fields.
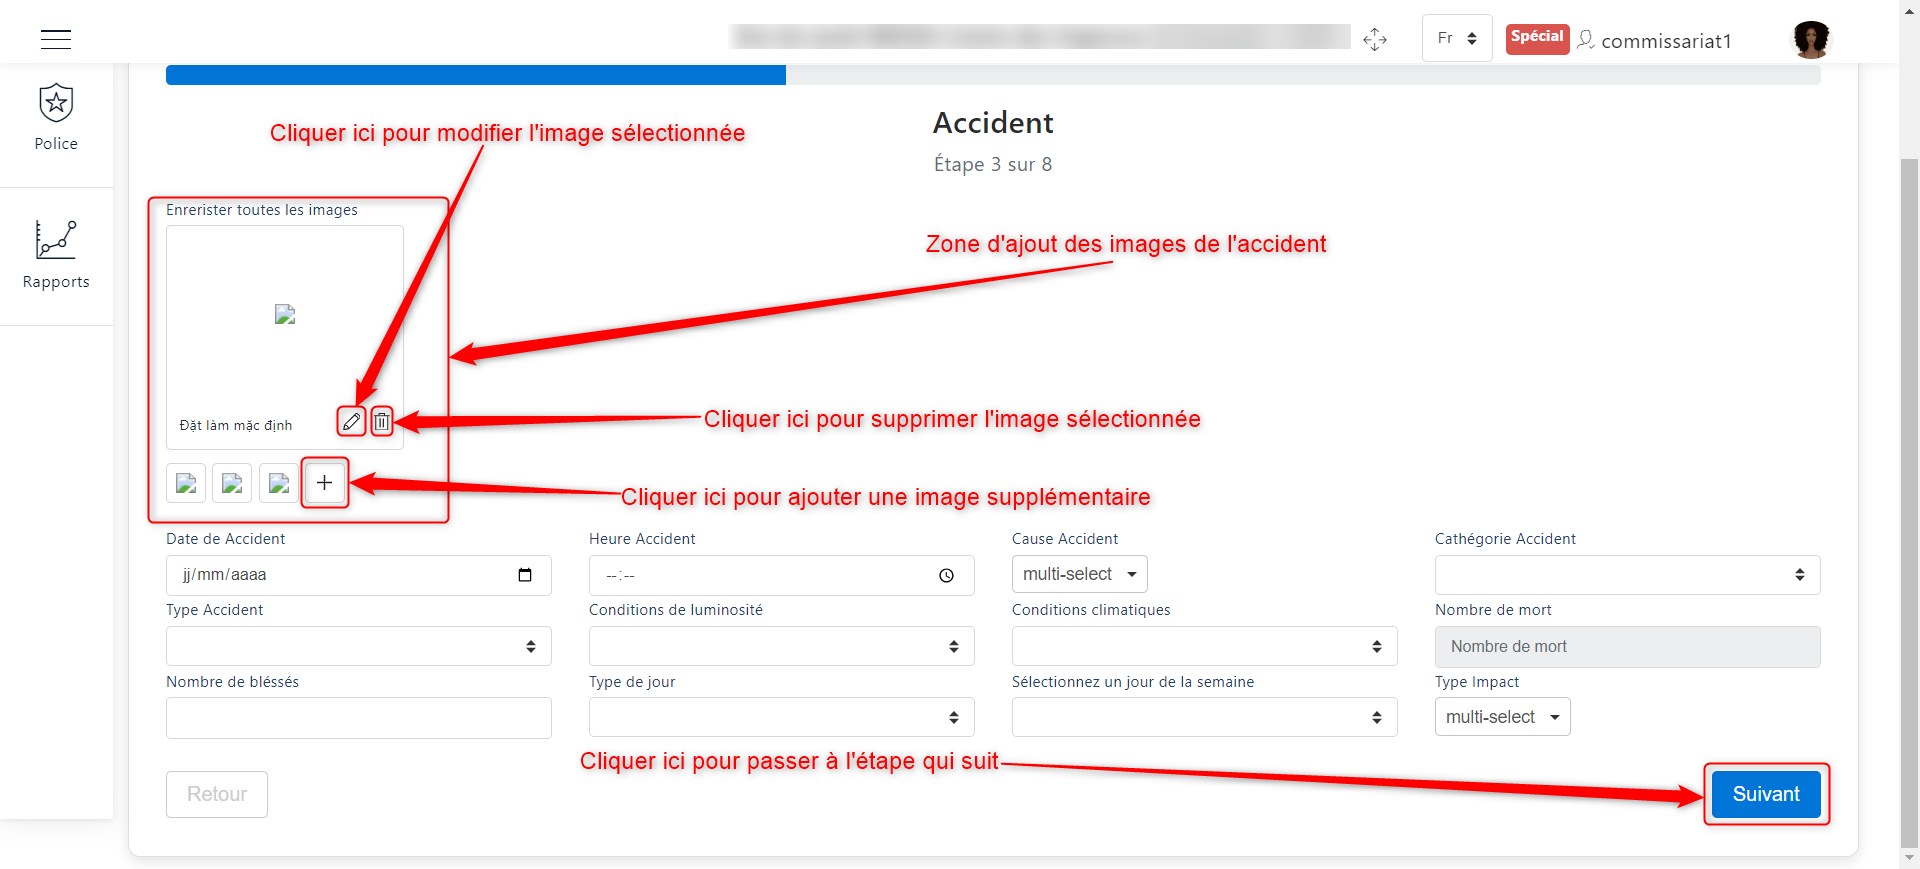
Accident Section
Proceed to the next step by clicking Next.
Road
At this stage, enter road-related details. Fill in the necessary fields to identify the road.
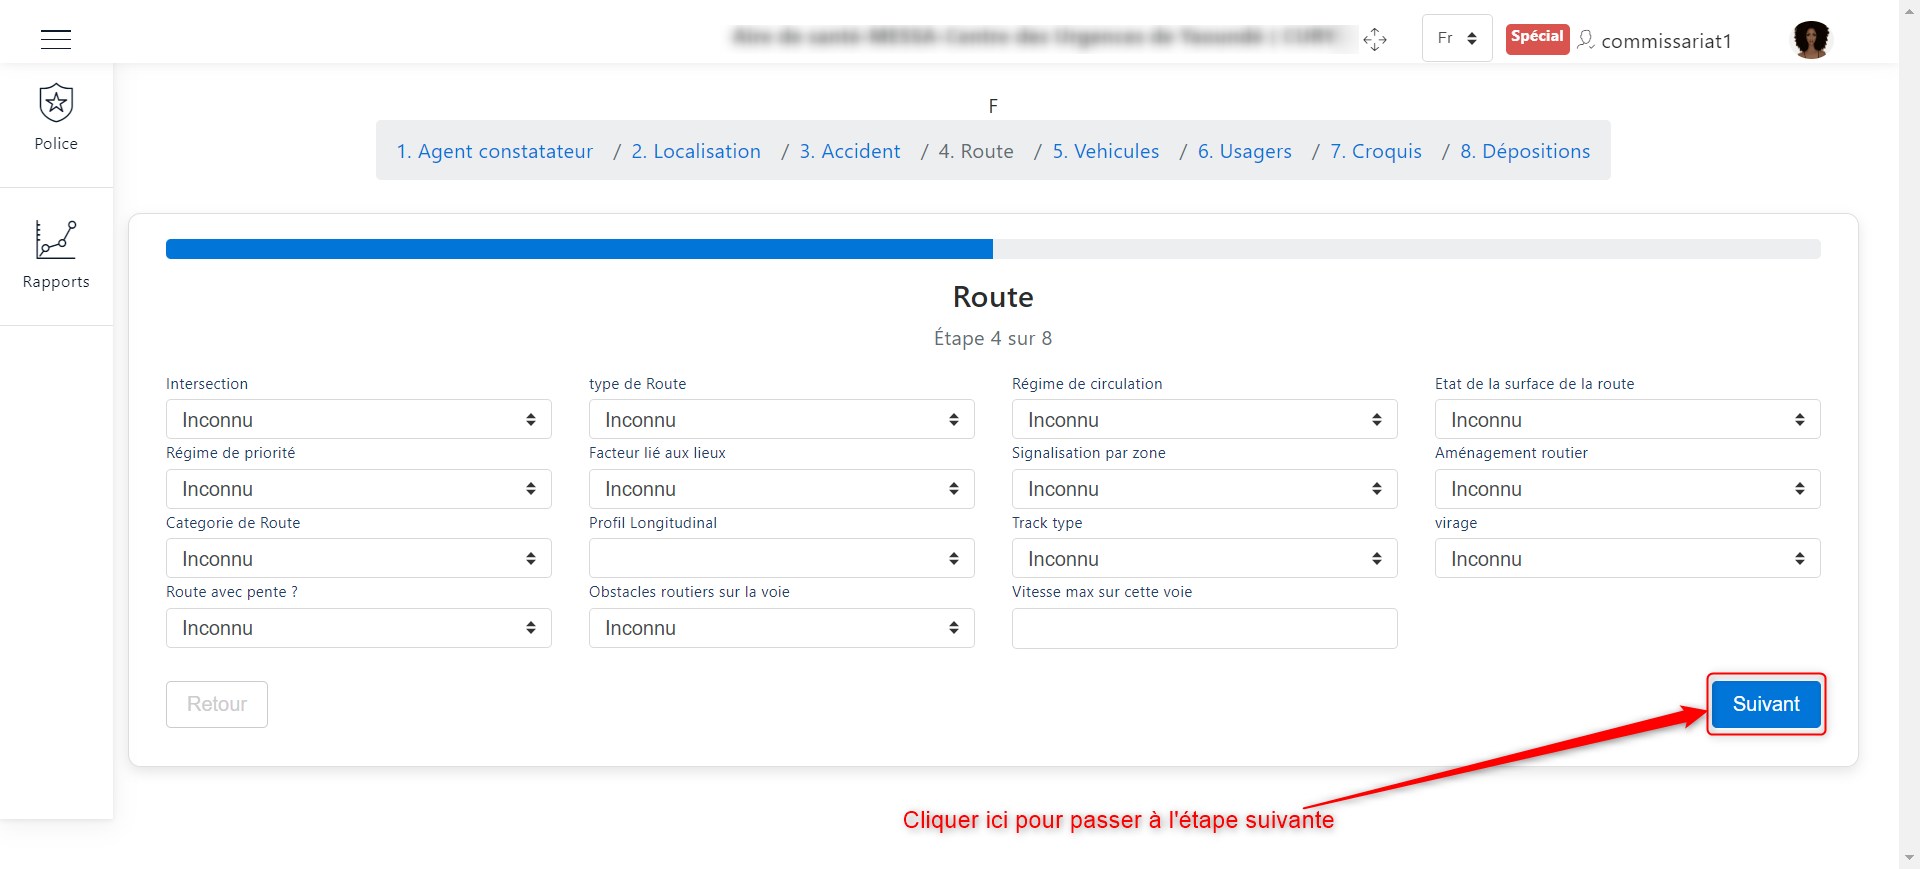
Road Information
Proceed to the next step by clicking Next.
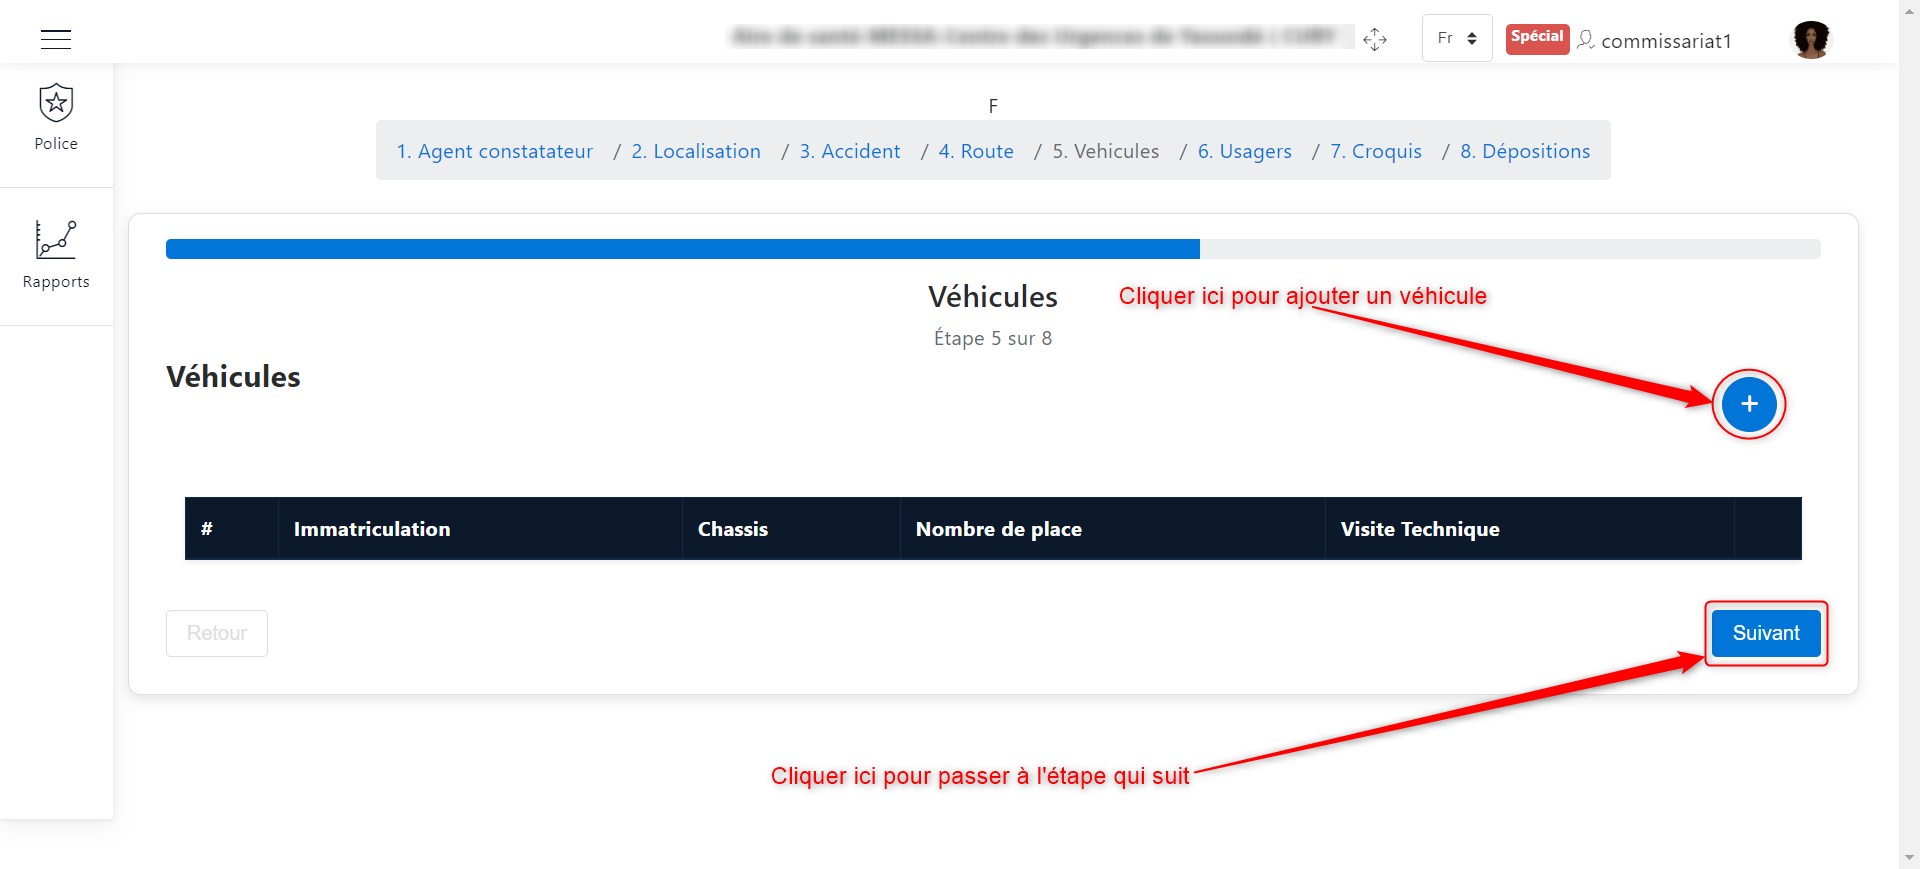
Involved Vehicles
Here, you need to enter details about the vehicles involved in the accident. Click the + button, as shown in the image below, to add a vehicle.
Enter details of involved vehicles
Once you click the + button, fill in the vehicle details as shown below.
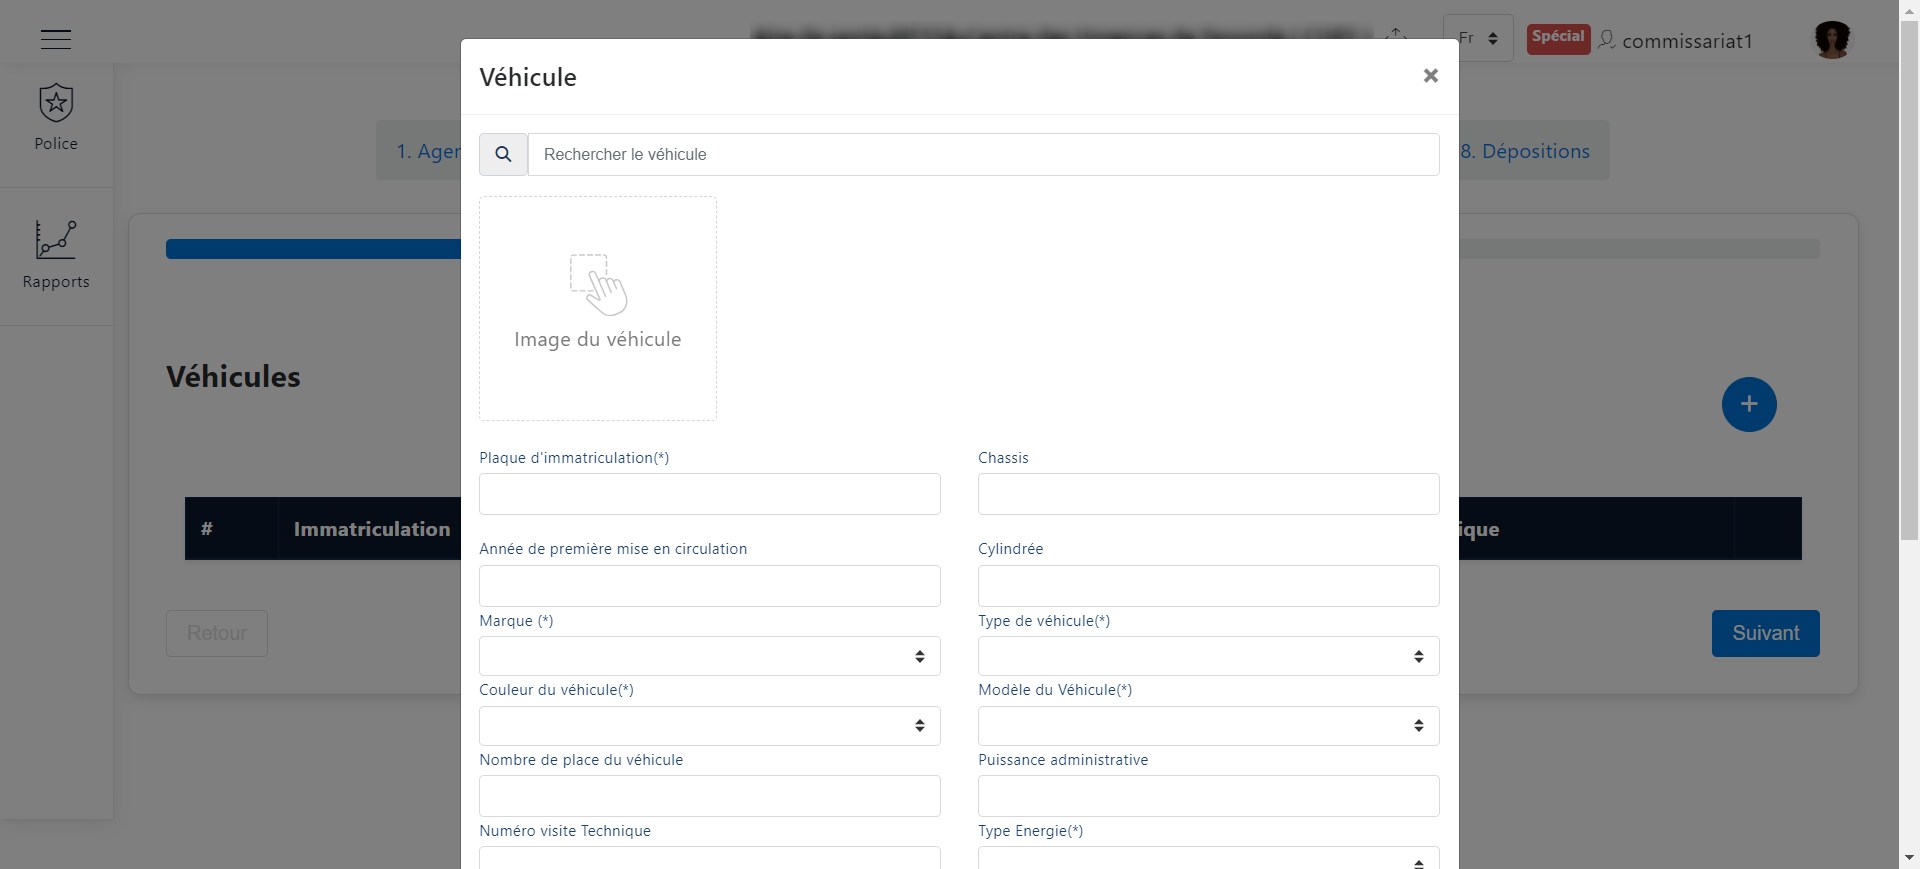
Enter vehicle details
After filling out the form, save the details as shown below.
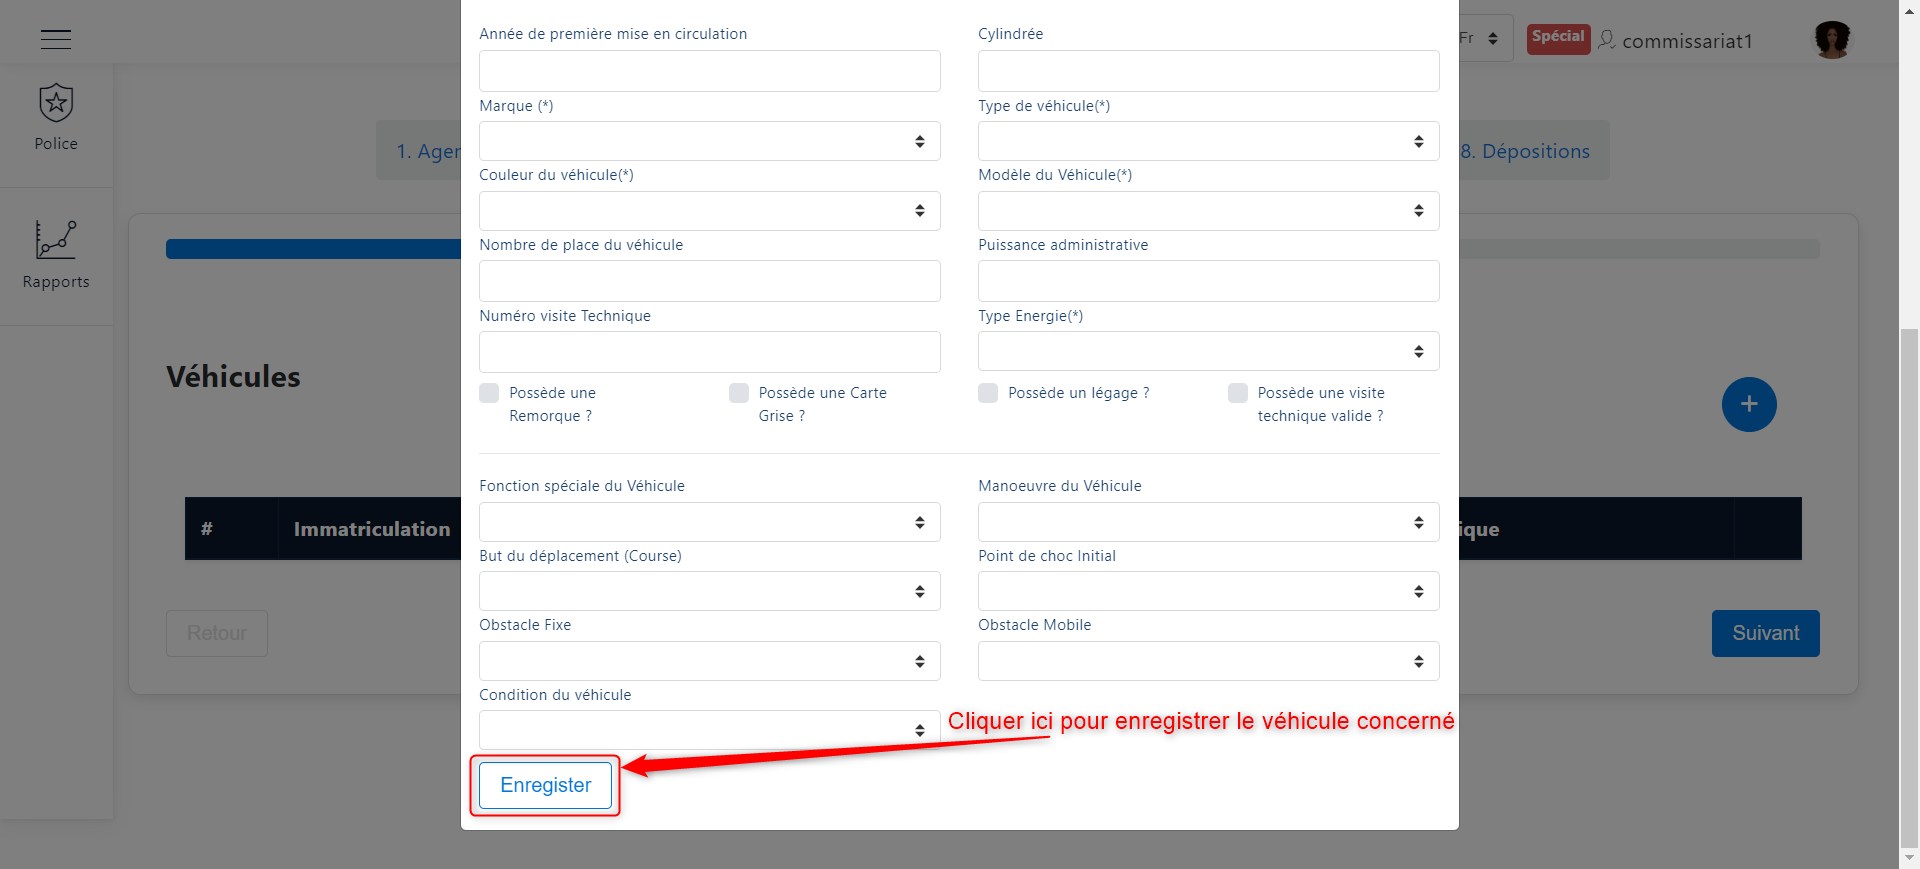
Save vehicle details
Once a vehicle is added, its summary appears in the table below.

Summary of involved vehicles
Proceed to the next step by clicking Next.
Involved Users
Here, you need to enter details about the users involved in the accident. Click the + button, as shown in the image below, to add a user.
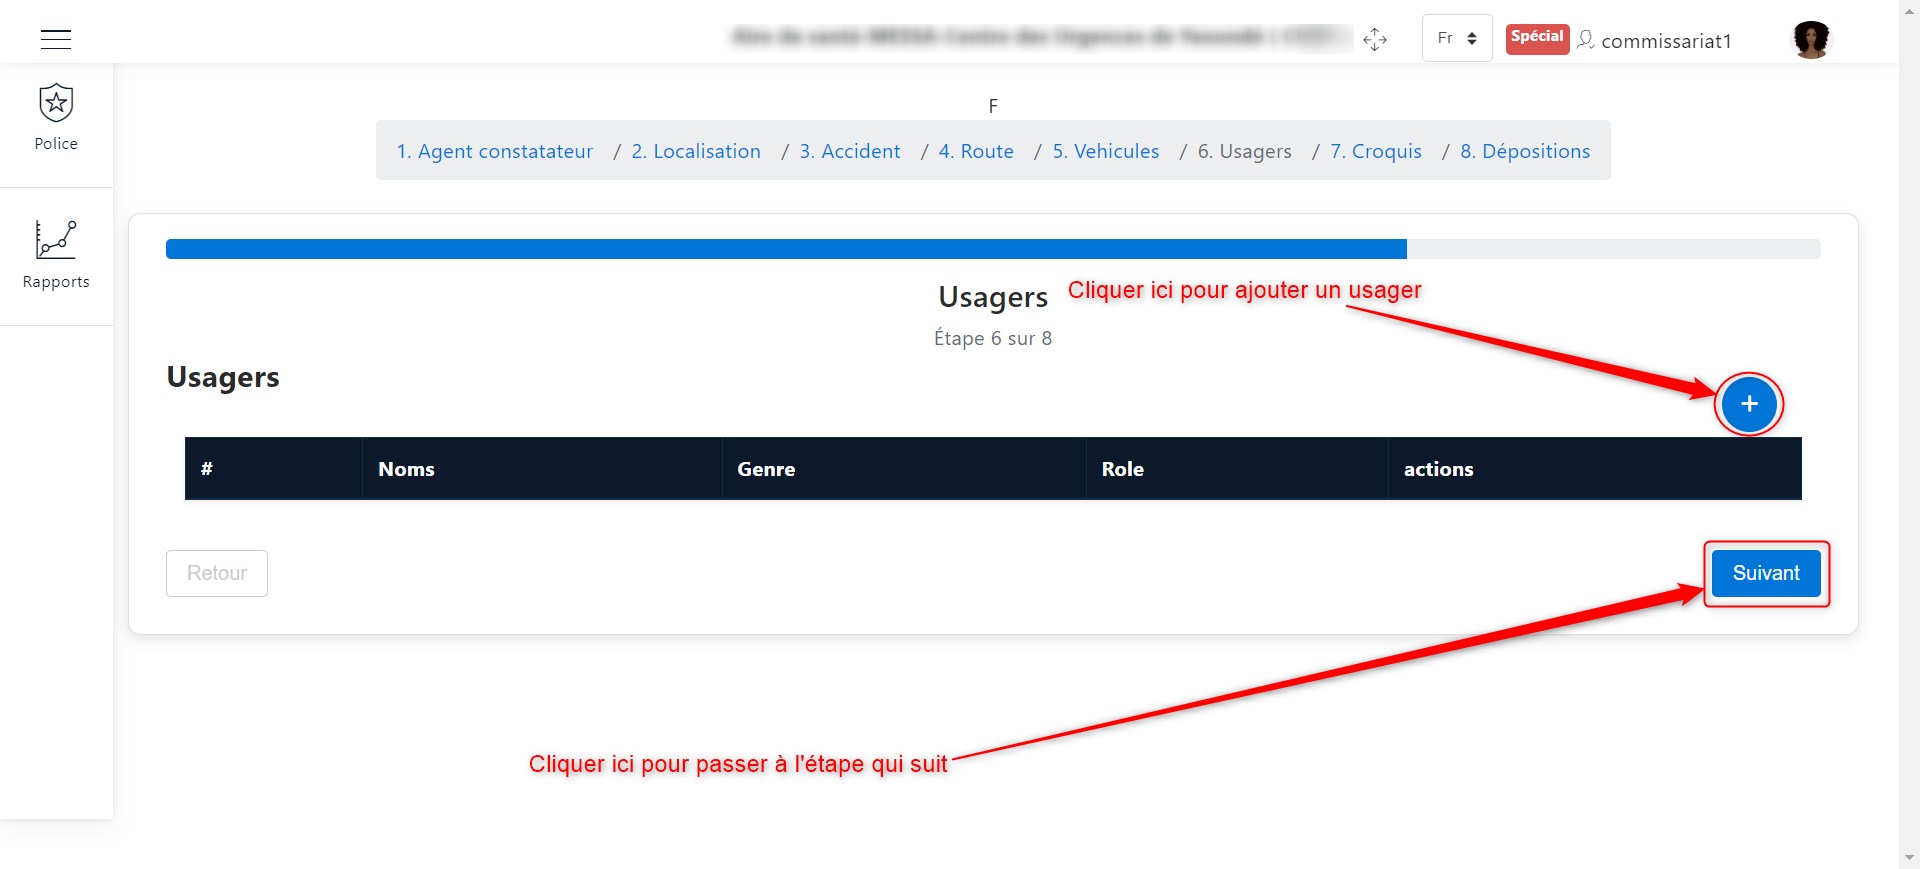
Enter details of involved users
Once you click the + button, fill in the user details as shown below.
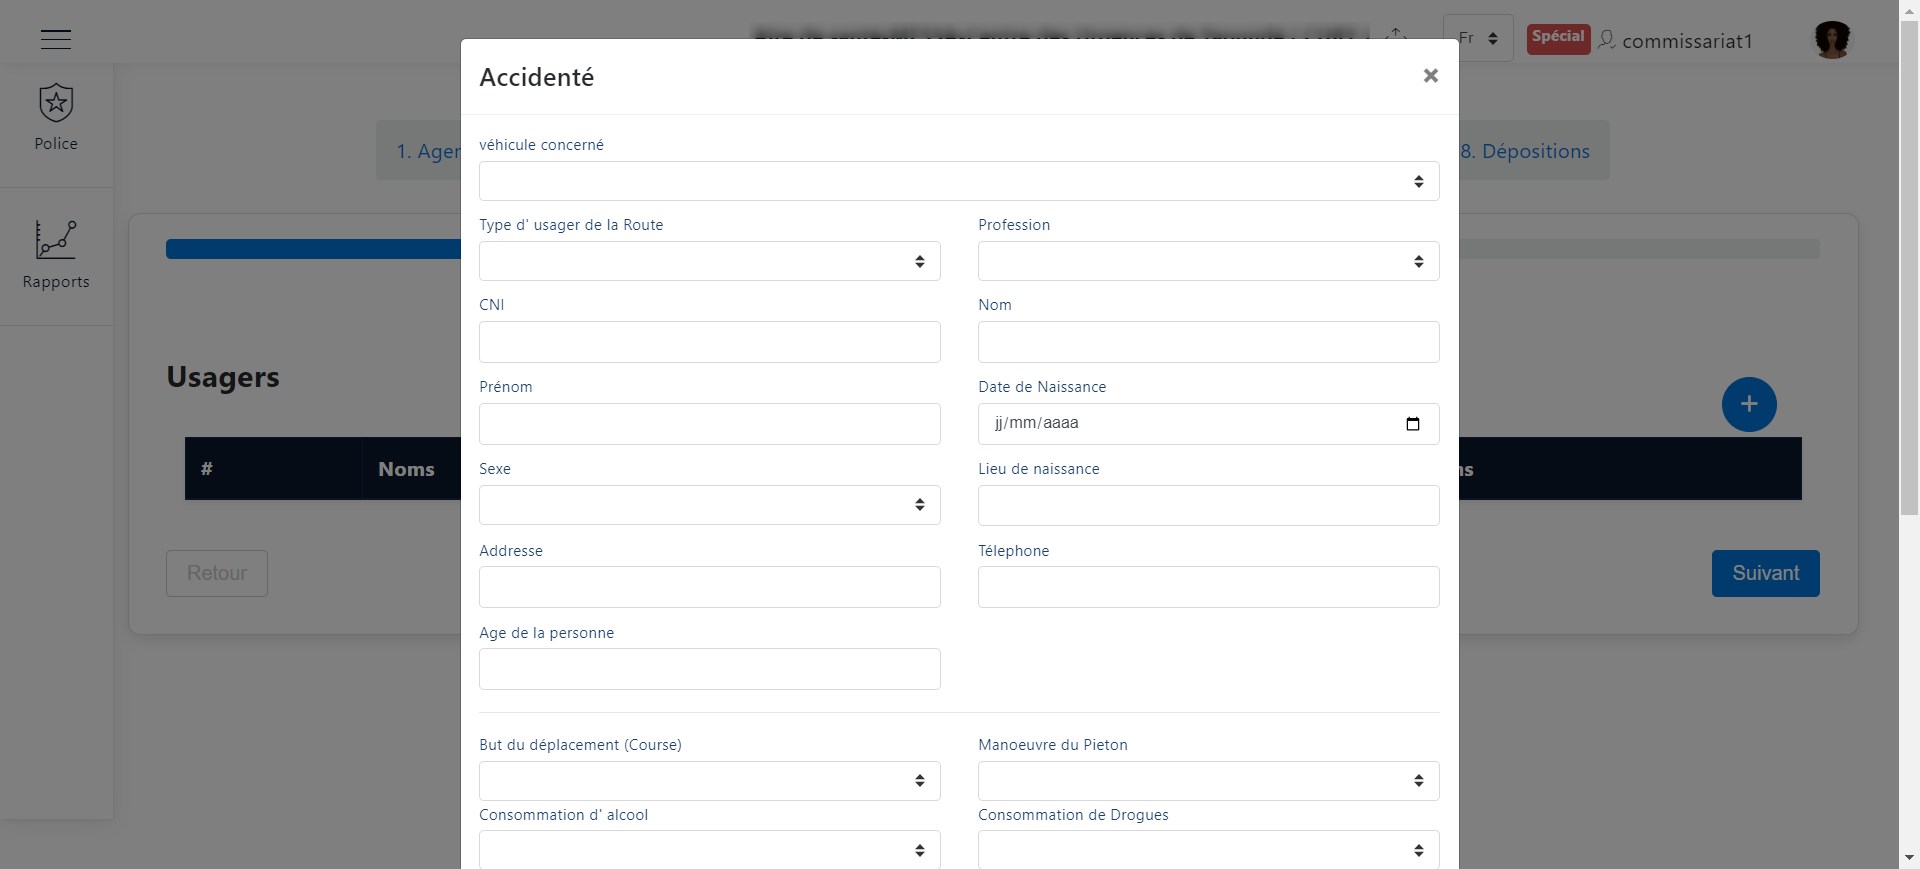
Enter user details
After filling out the form, save the details as shown below.
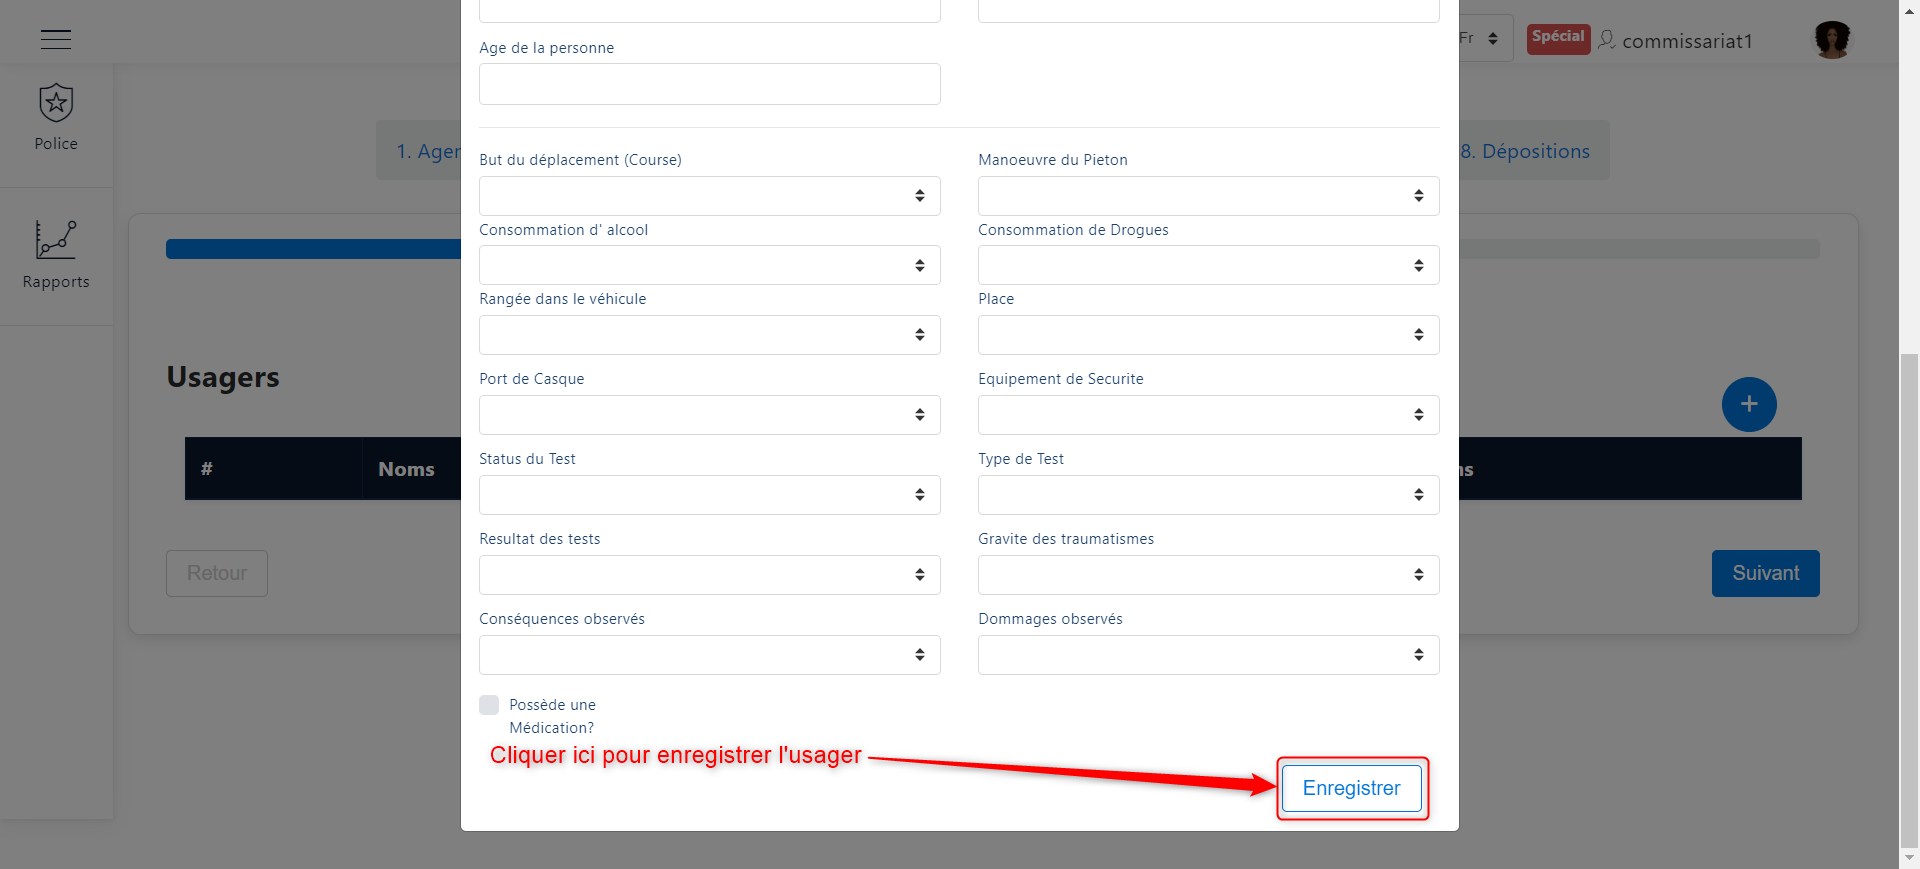
Save user details
Once a user is added, their summary appears in the table below.

Summary of involved users
Proceed to the next step by clicking Next.
Sketch
To insert the accident sketch, two options are available:
Draw the sketch directly within the application.
Upload an image of the sketch.
The image below illustrates both methods.
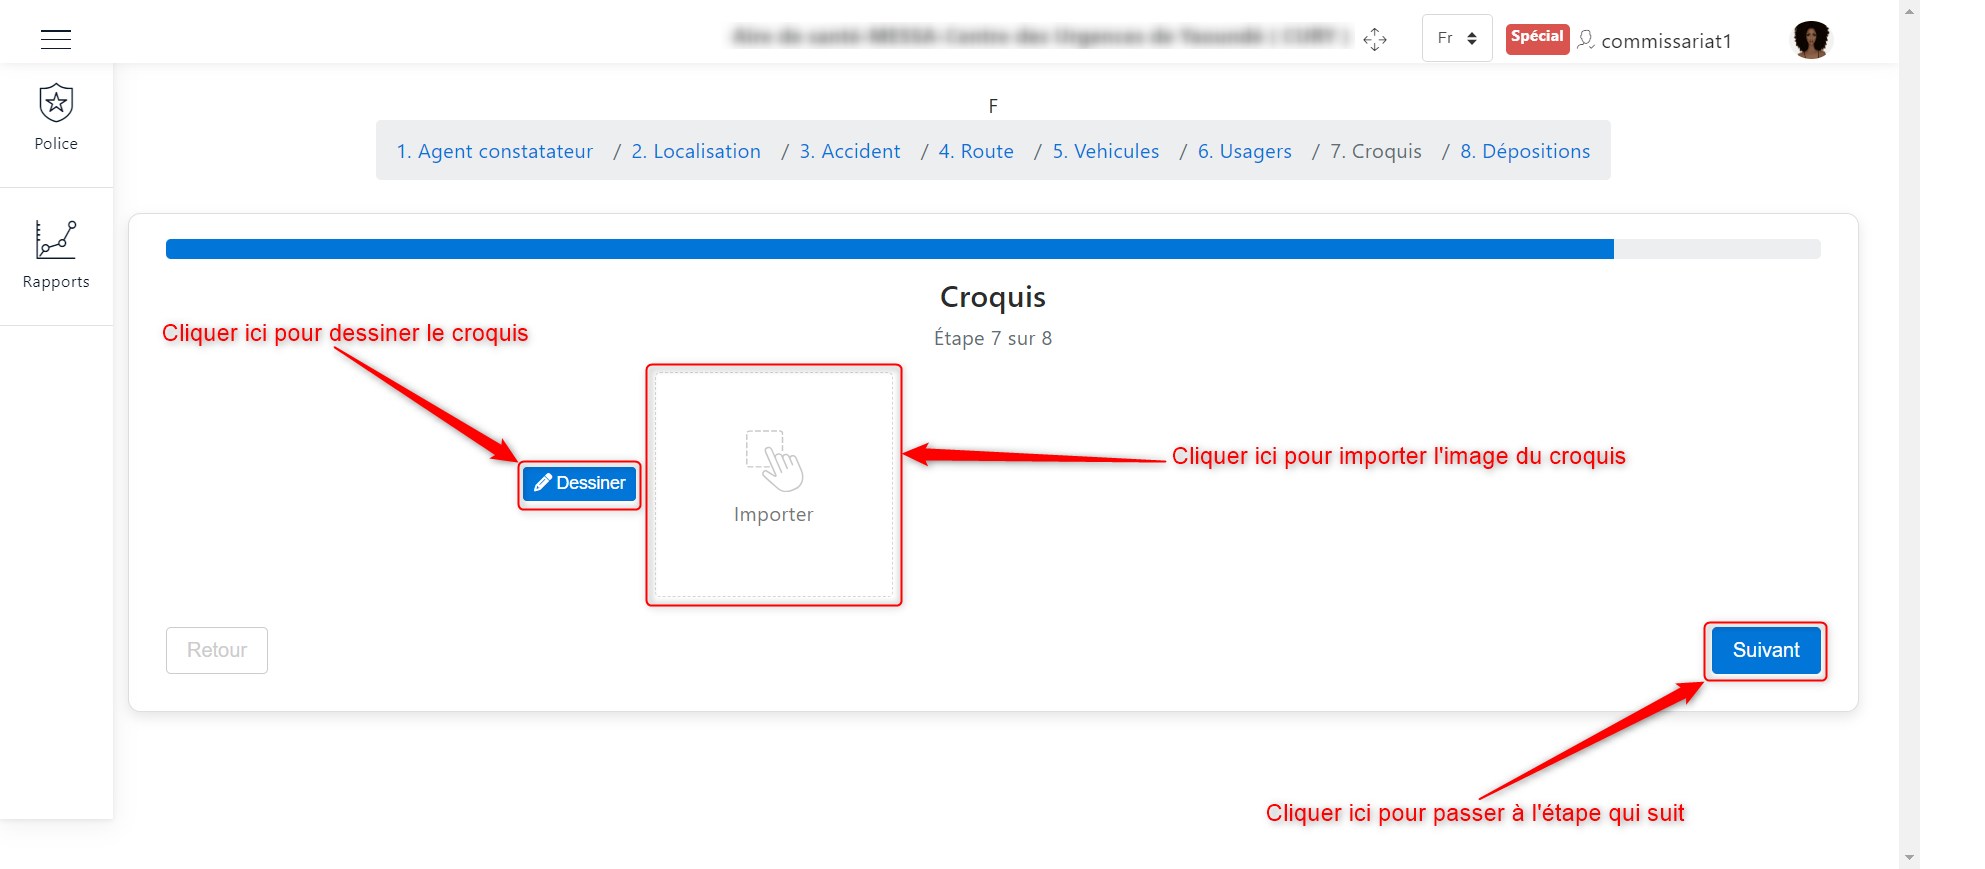
Insert a Sketch
Method 1: Draw within the application
To draw within the application, click the Draw button, as illustrated above.
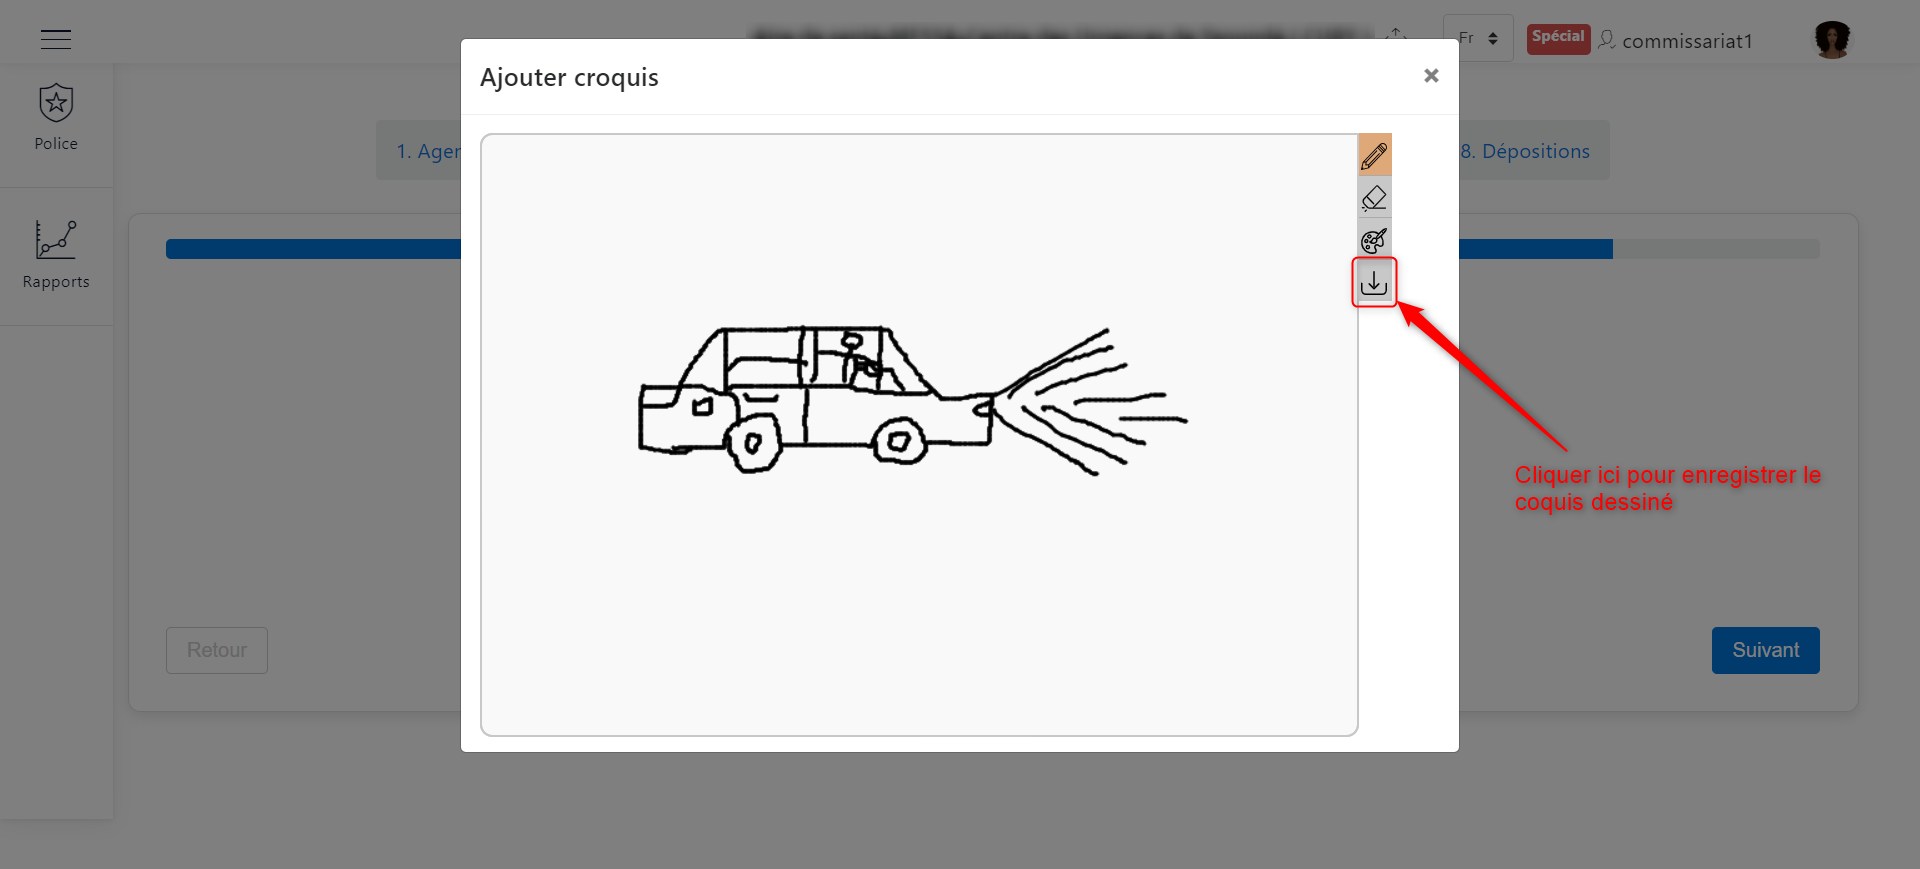
Drawing Area
Proceed to the next step by clicking Next, as indicated in the following image.
Method 2: Upload an image
To upload a sketch image, click the upload button, as shown in the following image. A window will appear to search for and import the sketch image.
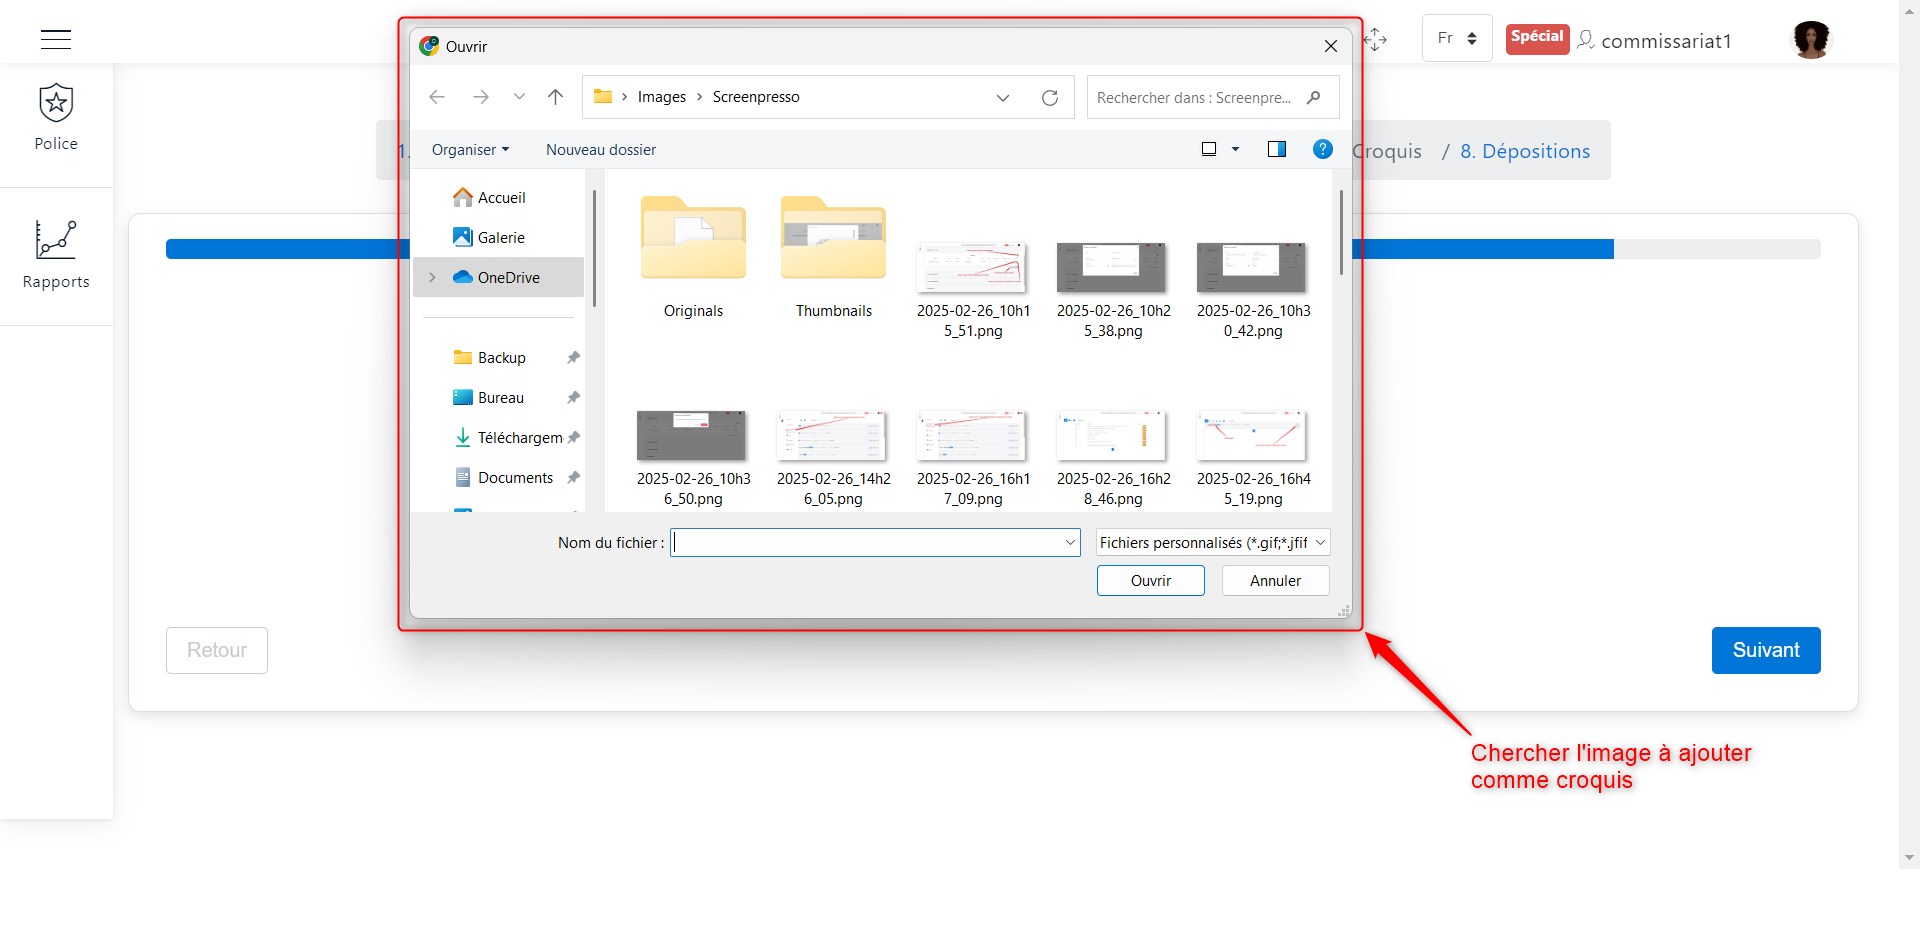
Upload sketch image
Proceed to the next step by clicking Next, as indicated in the following image.
Depositions
Upon reaching the deposition creation section, the interface below appears. Here, you can create a new deposition by clicking the + button, as shown in the image below. Additionally, you can enter observations on the right and remarks on the left.
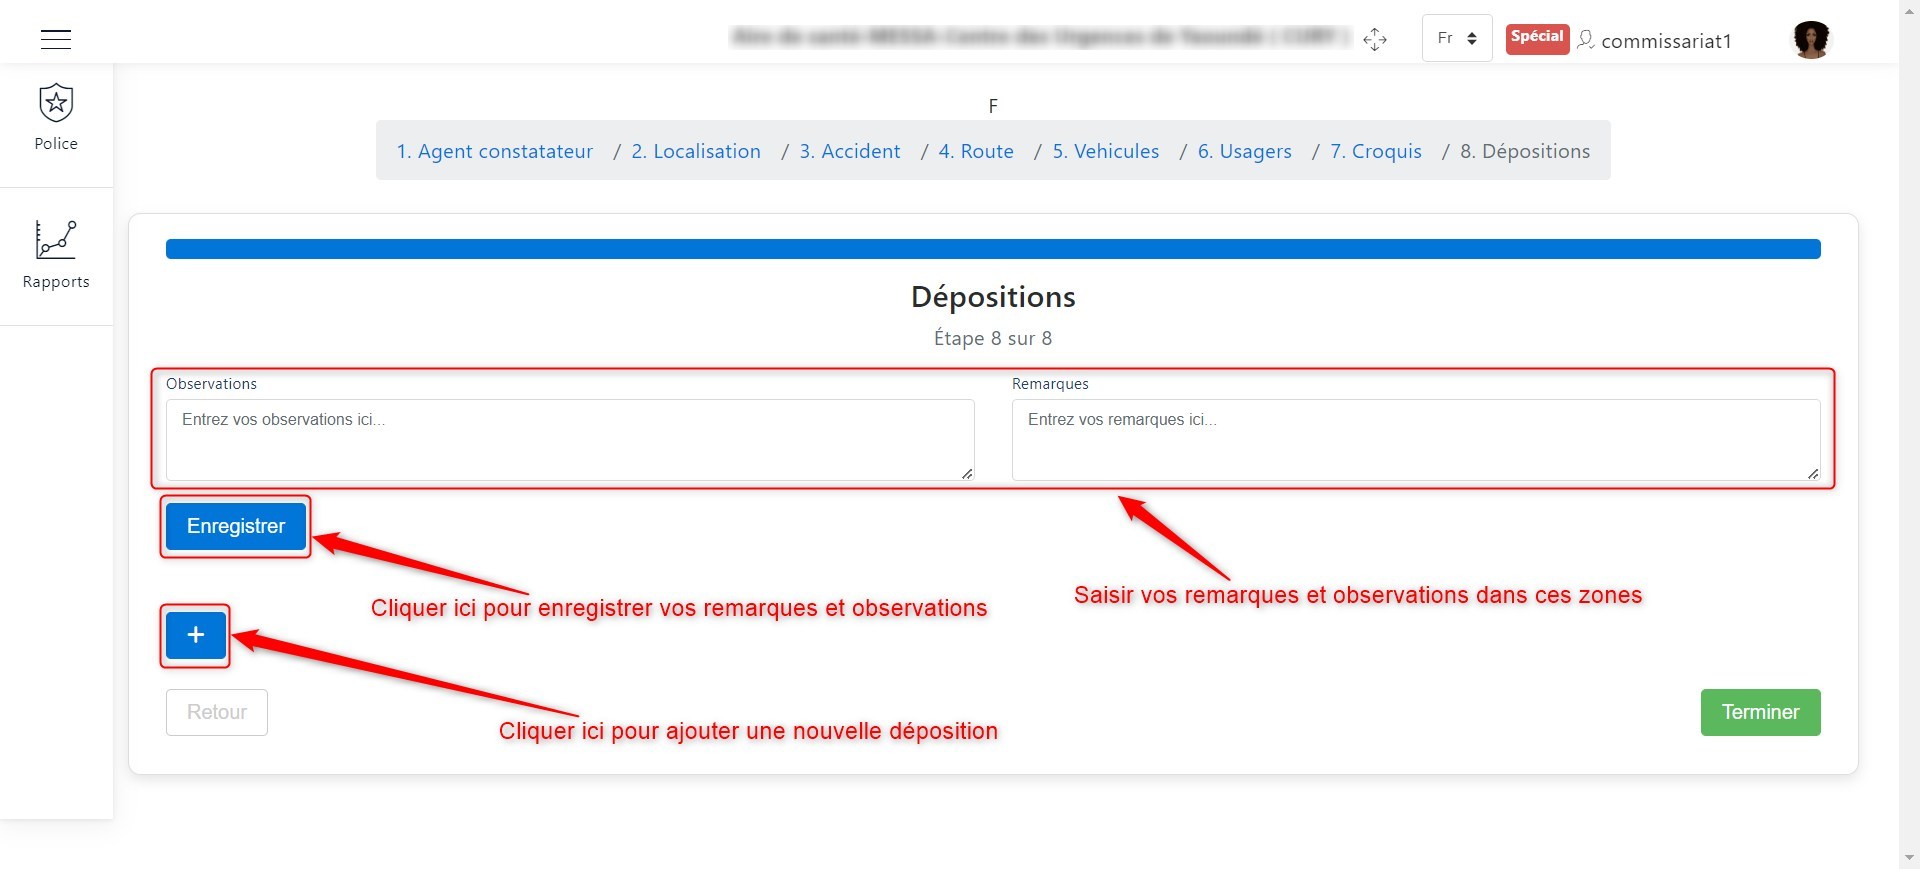
Create a Deposition
Clicking the + button brings up a window where you must enter the deponent’s information, the deposition date, and the questions asked along with their responses.
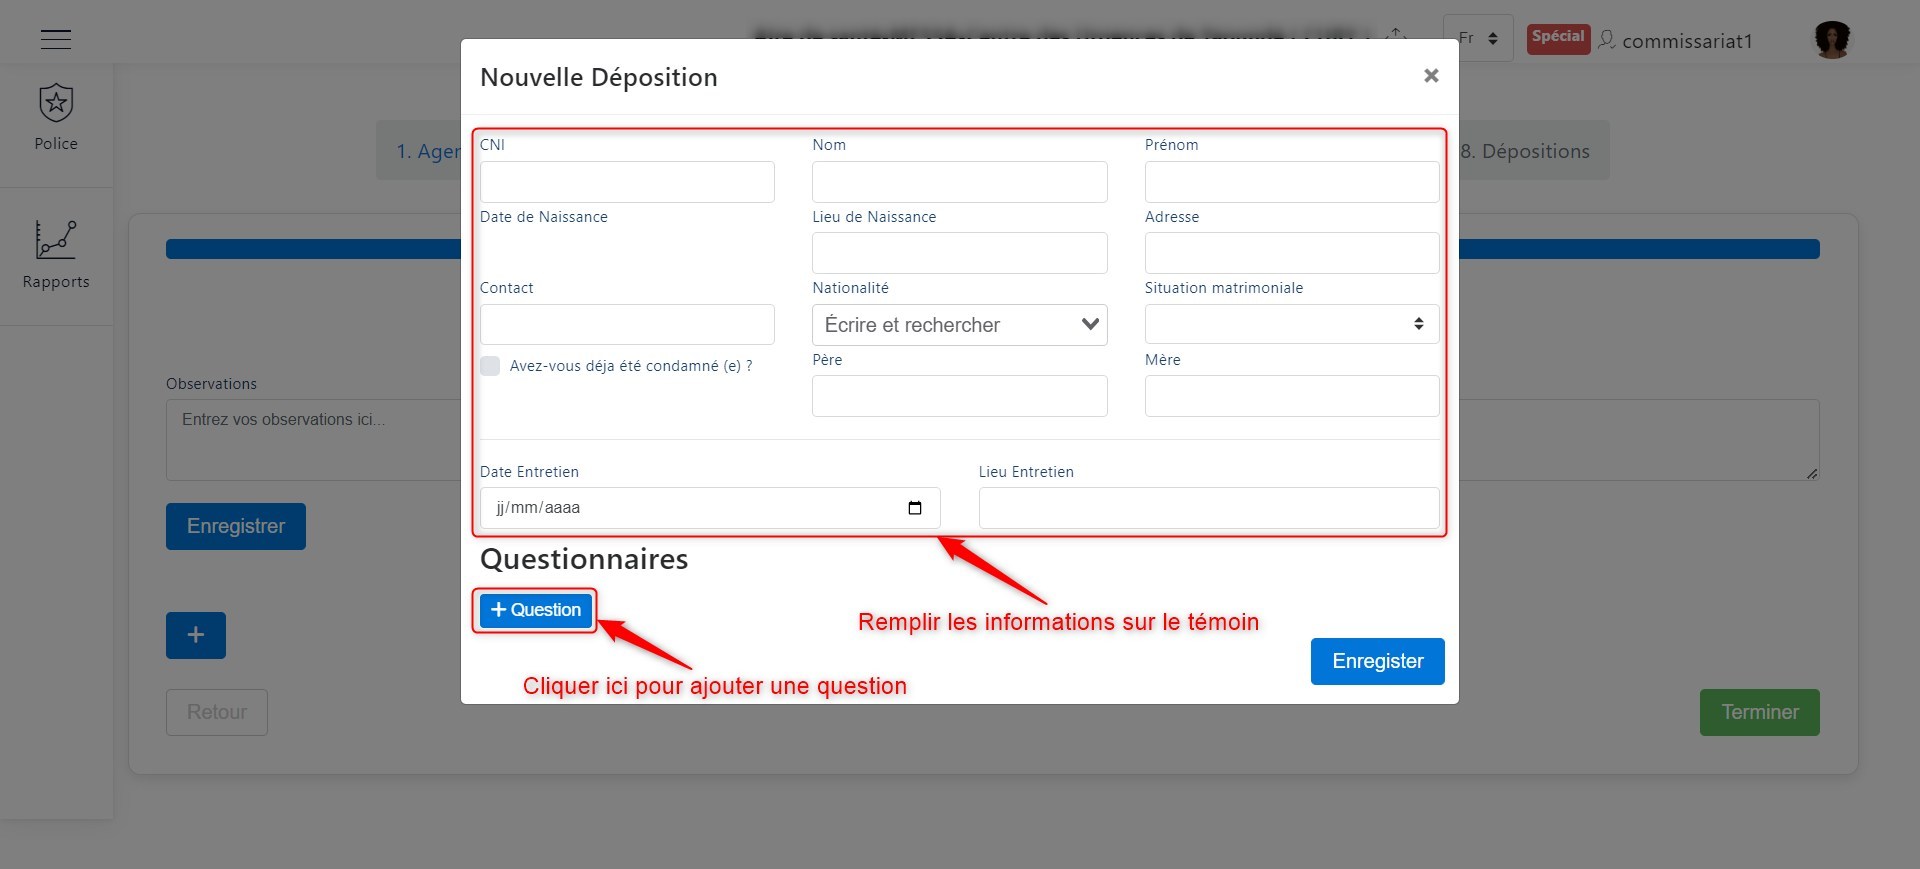
Enter deposition details
To add interview questions and responses, click + Question. A section for filling in the details appears as follows. After completing all information, click Save to finalize the deposition.
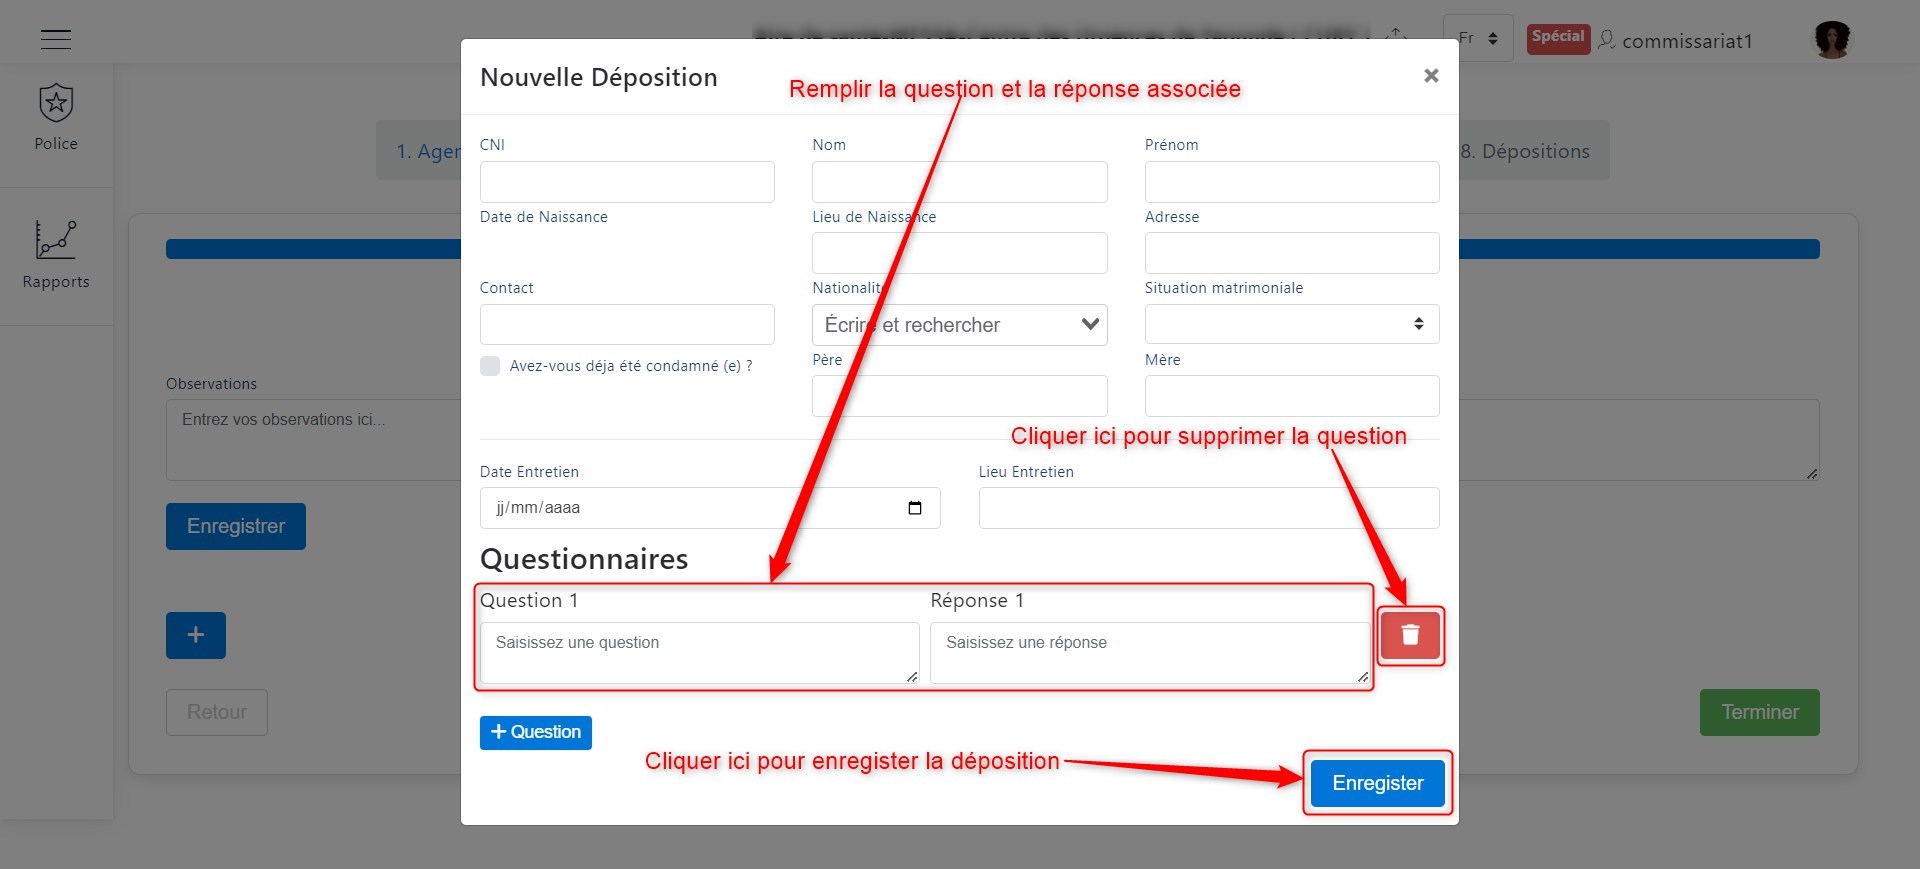
Add questions
Once a deposition is added, it appears as follows:
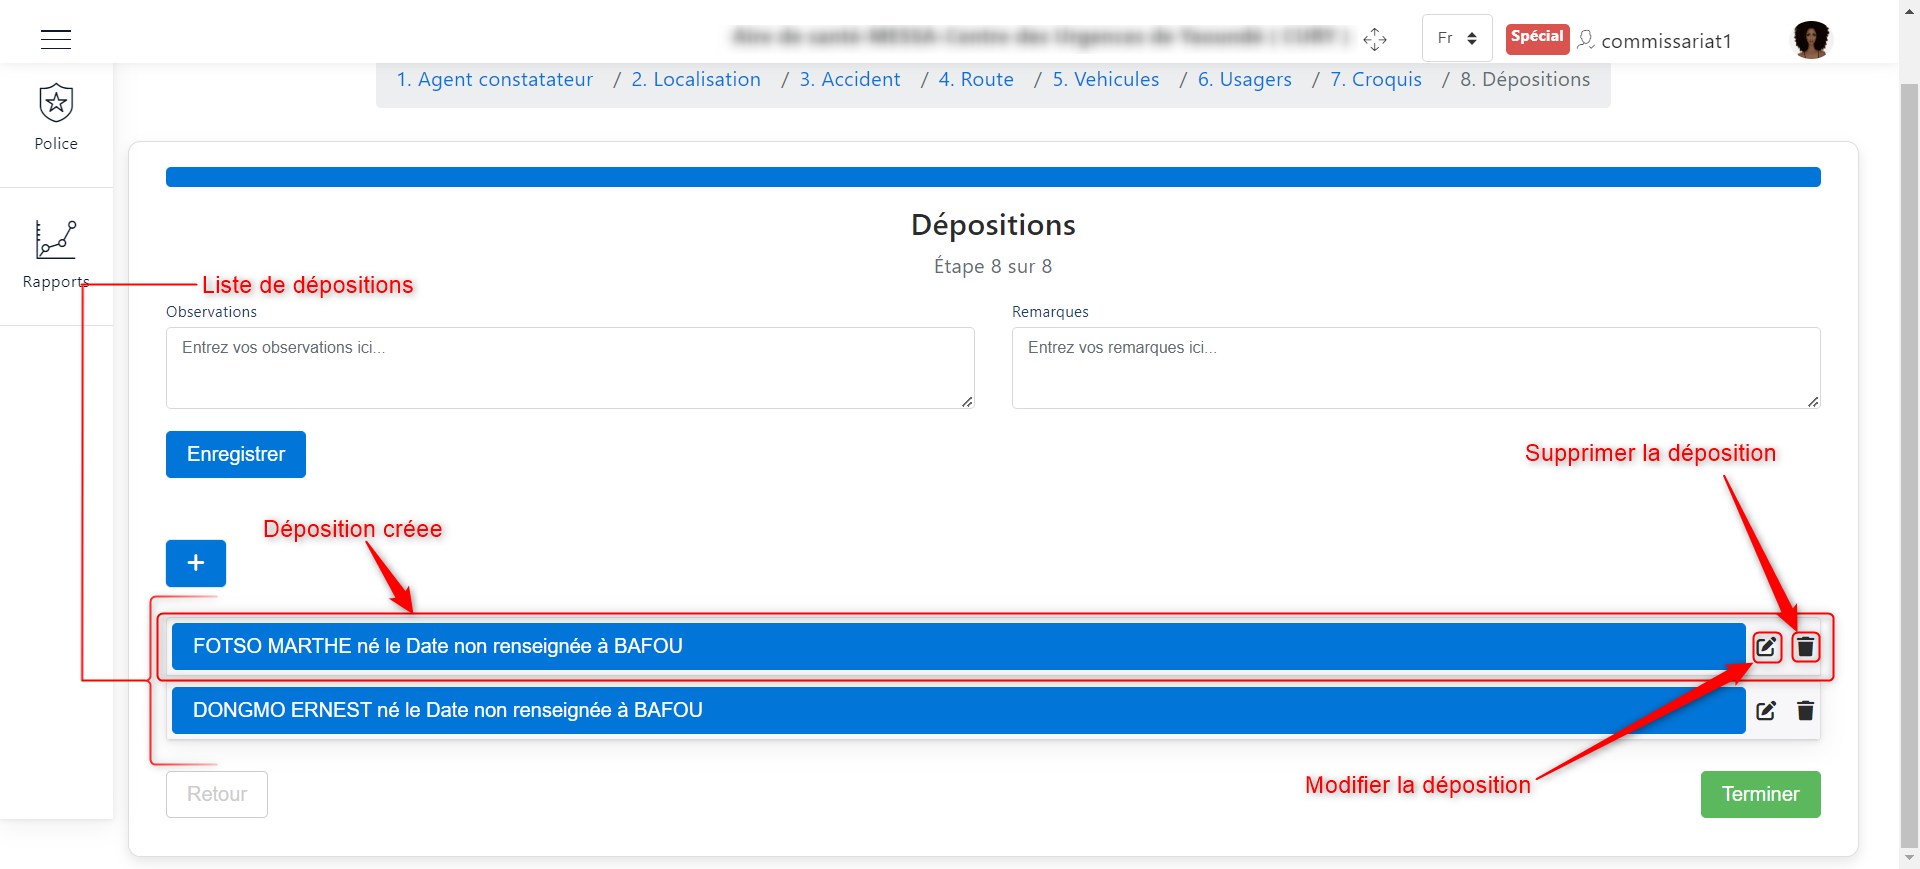
List of depositions
Clicking the witness’s name in the deposition display allows you to view the entire interview.
Once all depositions have been entered, click Finish to save all depositions.
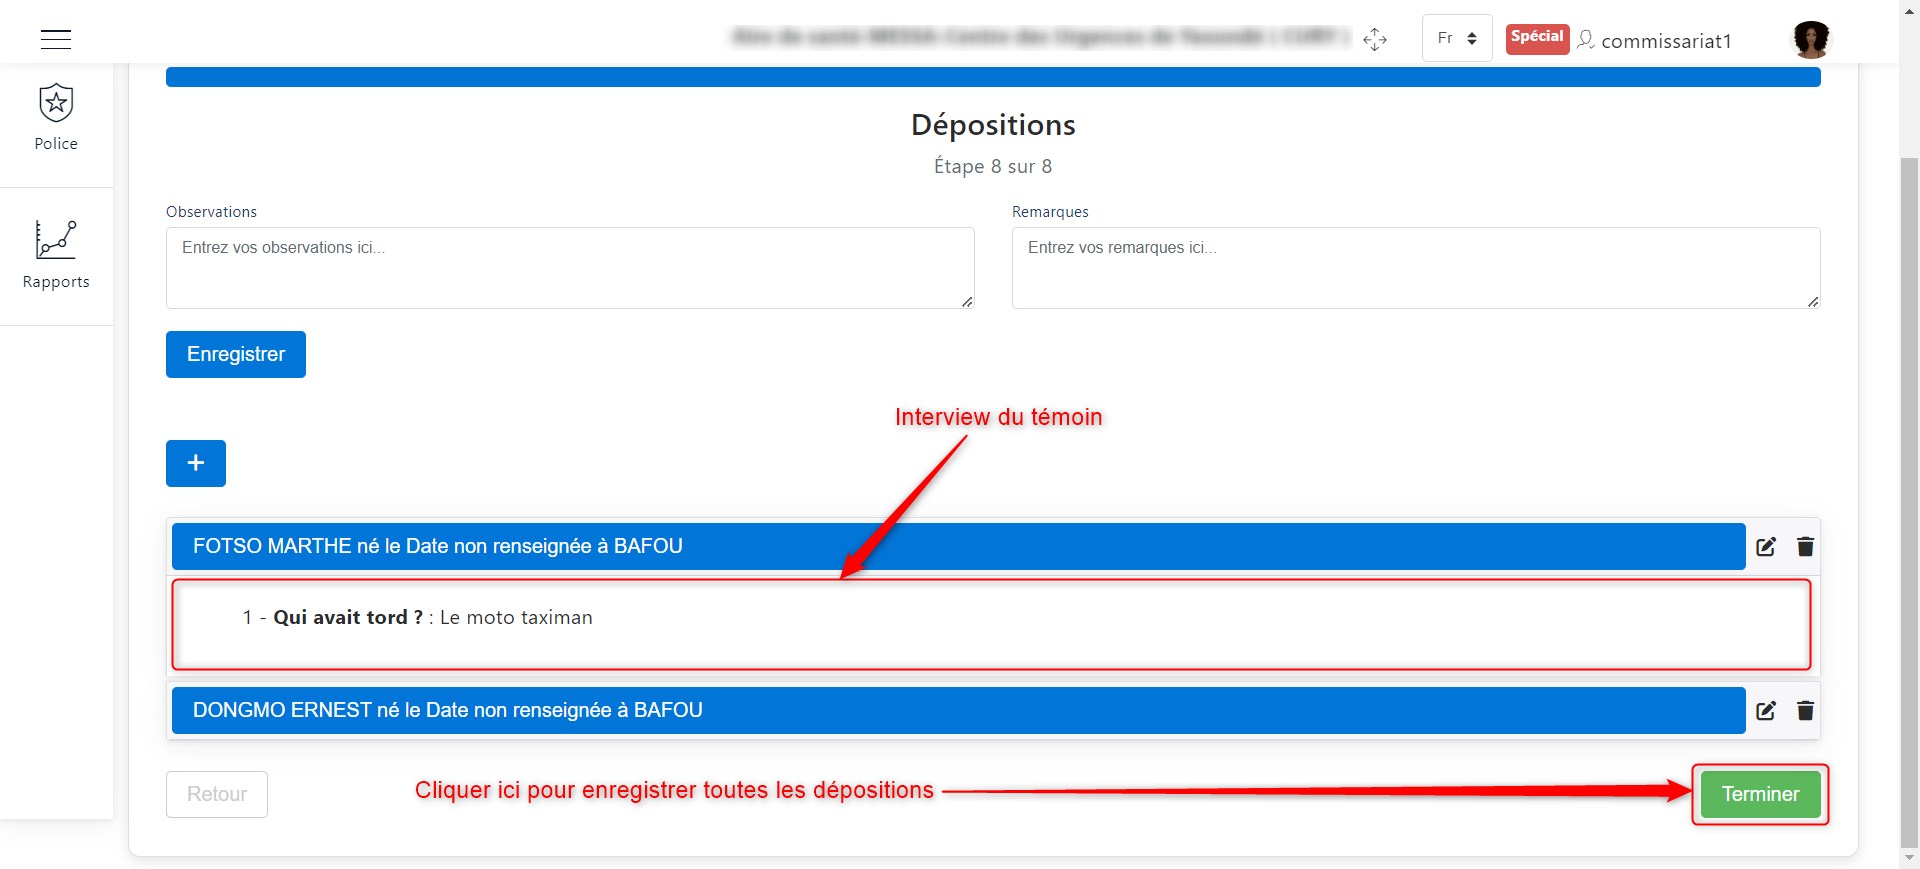
Witness interview