Enhancing the Declaration
After completing the accident declaration process, the accident status changes to “OPENED” and will be displayed in the declaration list. Click here to learn more about declaration statuses.
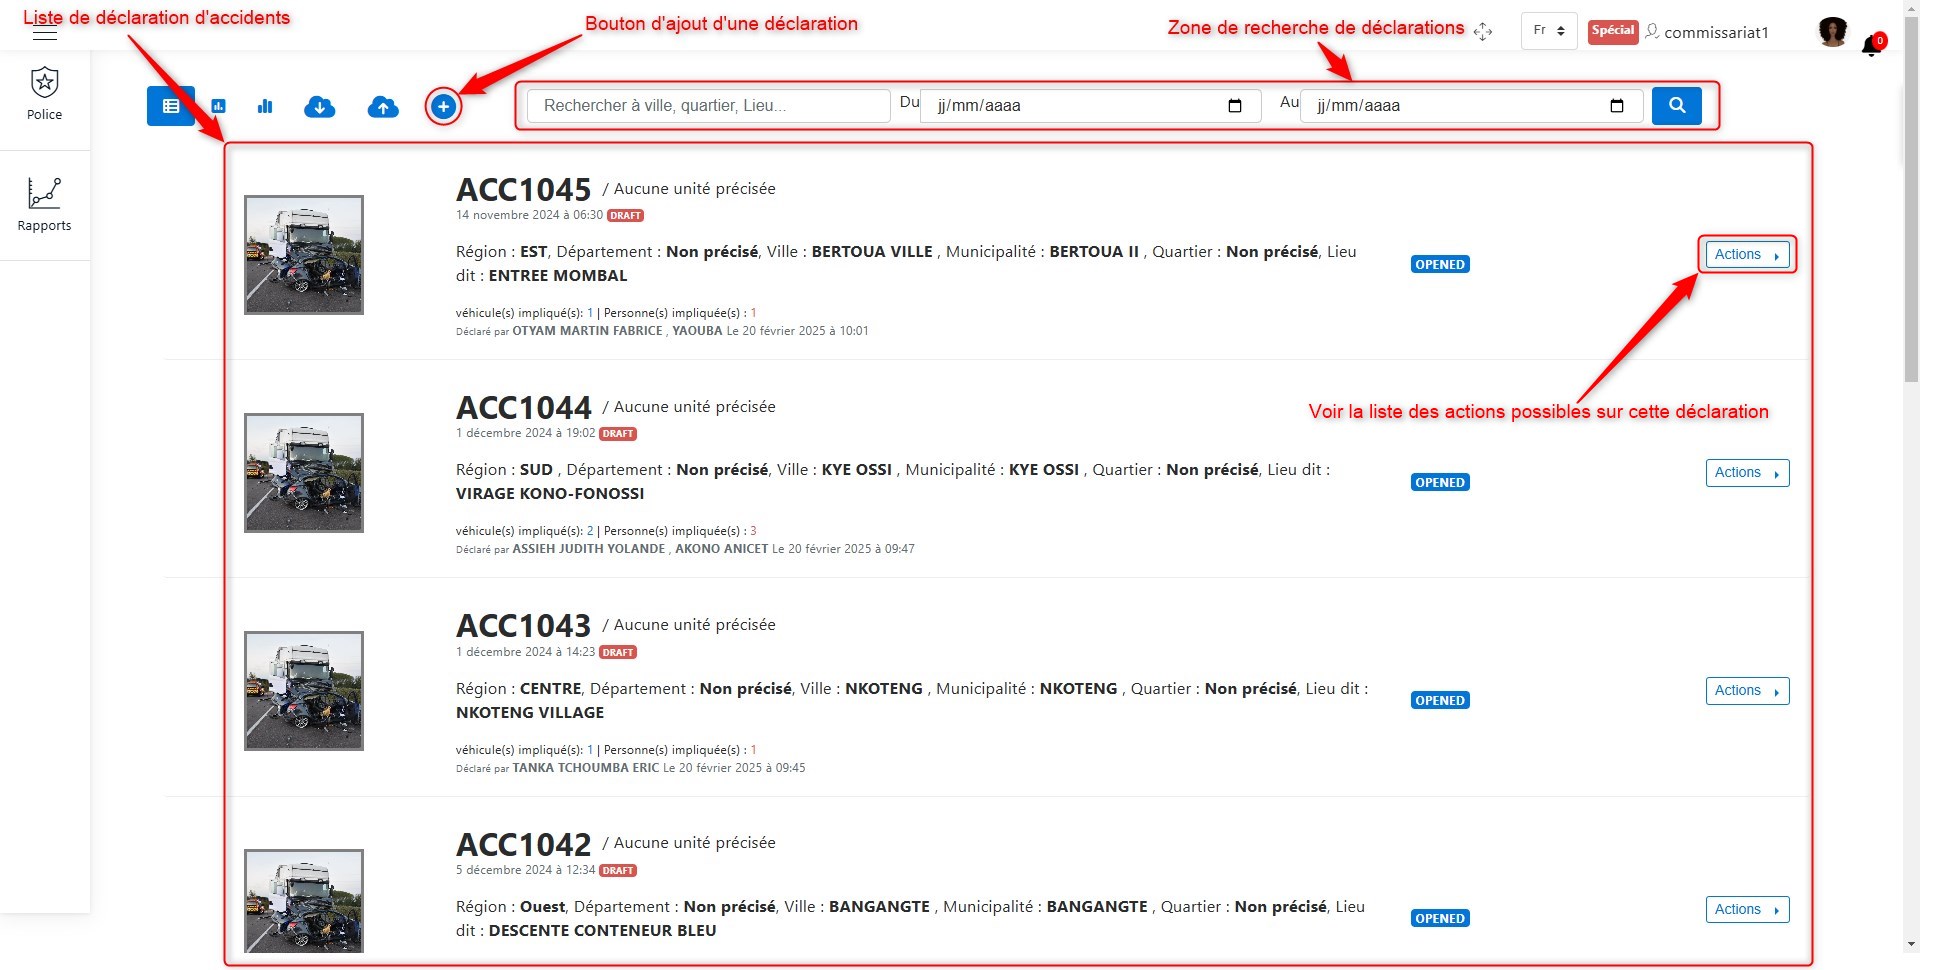
List of declarations.
By clicking on the Actions button, as shown above, you can see the list of possible actions for declarations. These actions include:
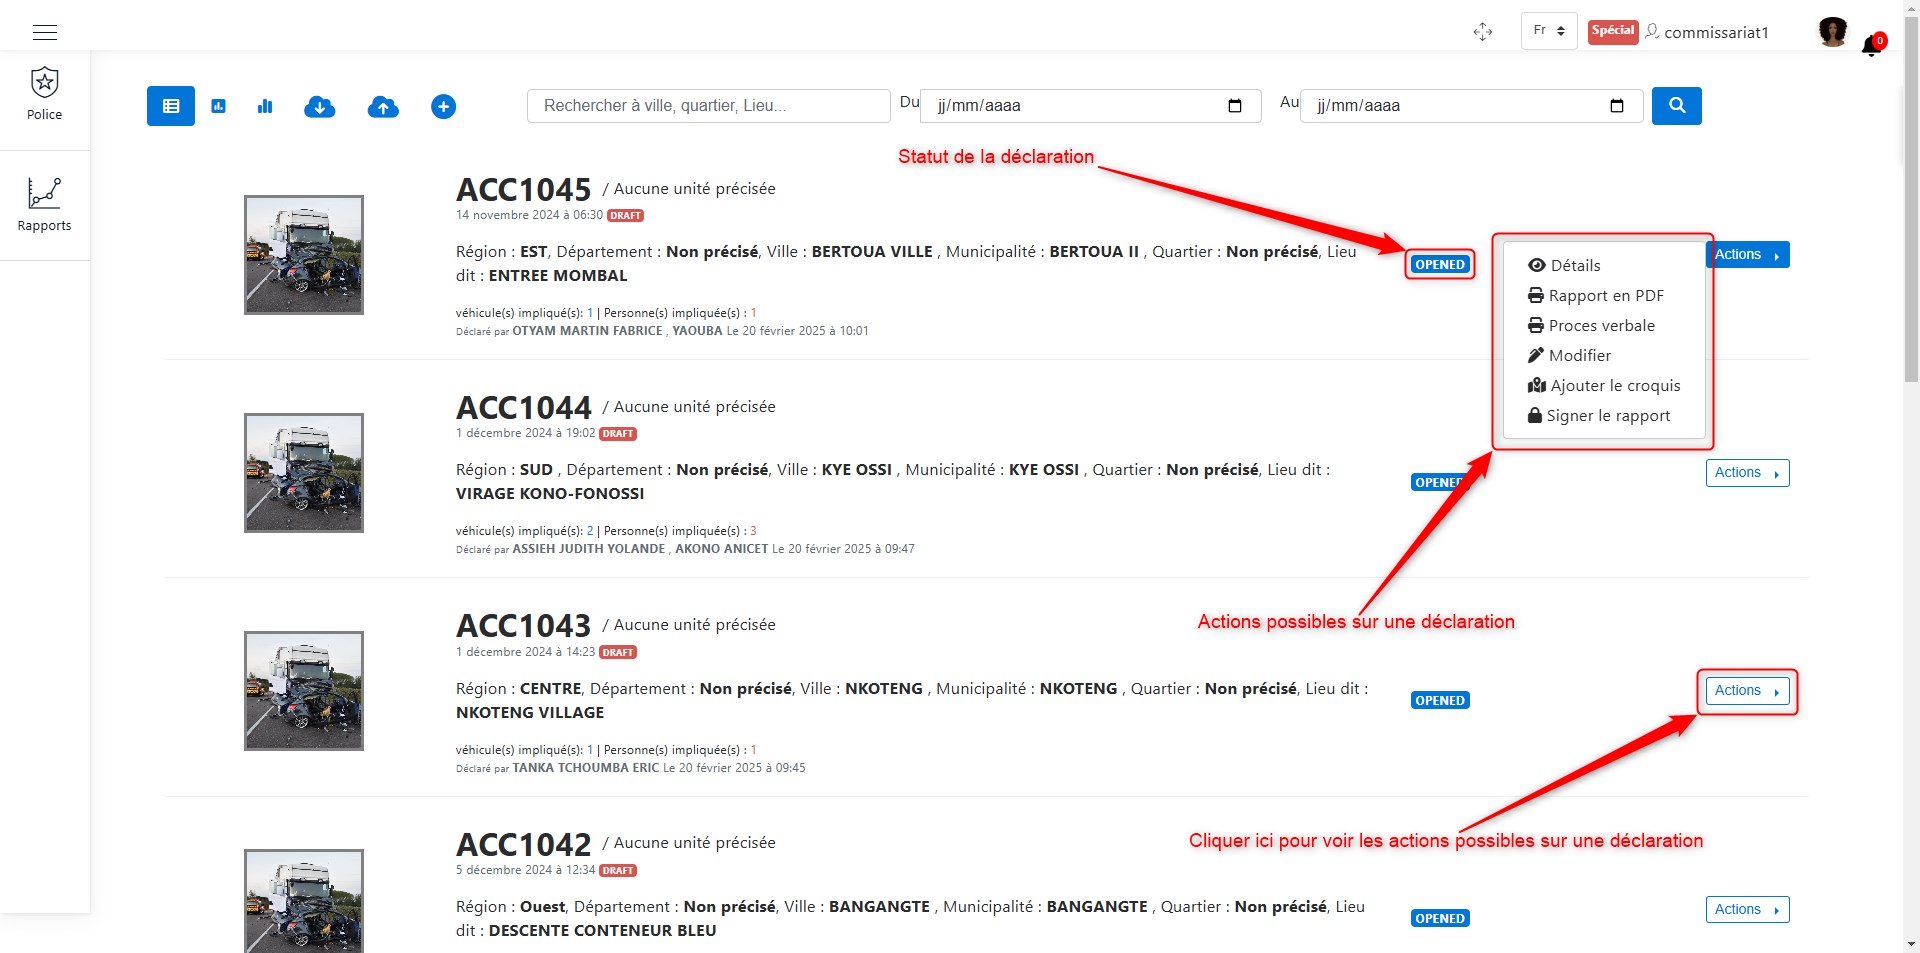
Available actions on a declaration.
Viewing Declaration Details
To view the details of a declaration, click on Details in the list of available actions for an accident declaration. Once you click on Details, as shown here, the following interface will be displayed:
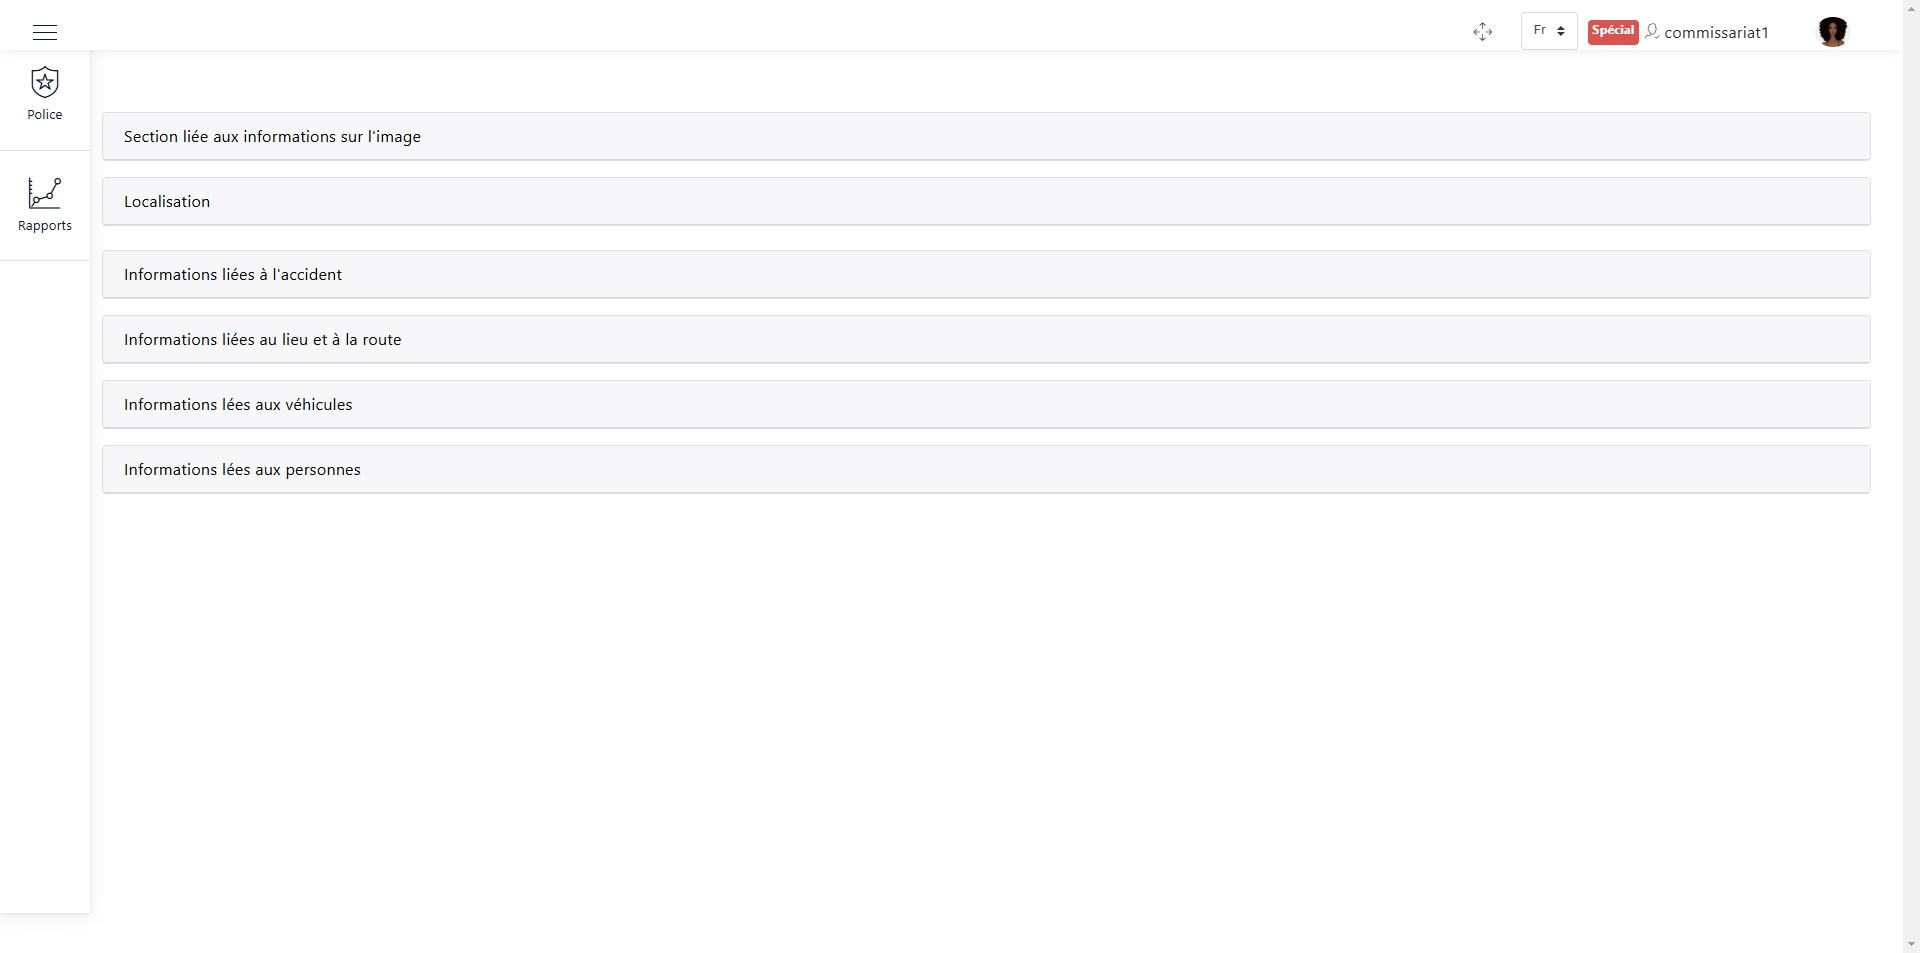
Sections of a declaration.
For each of the following sections, click on the section name to view its details.
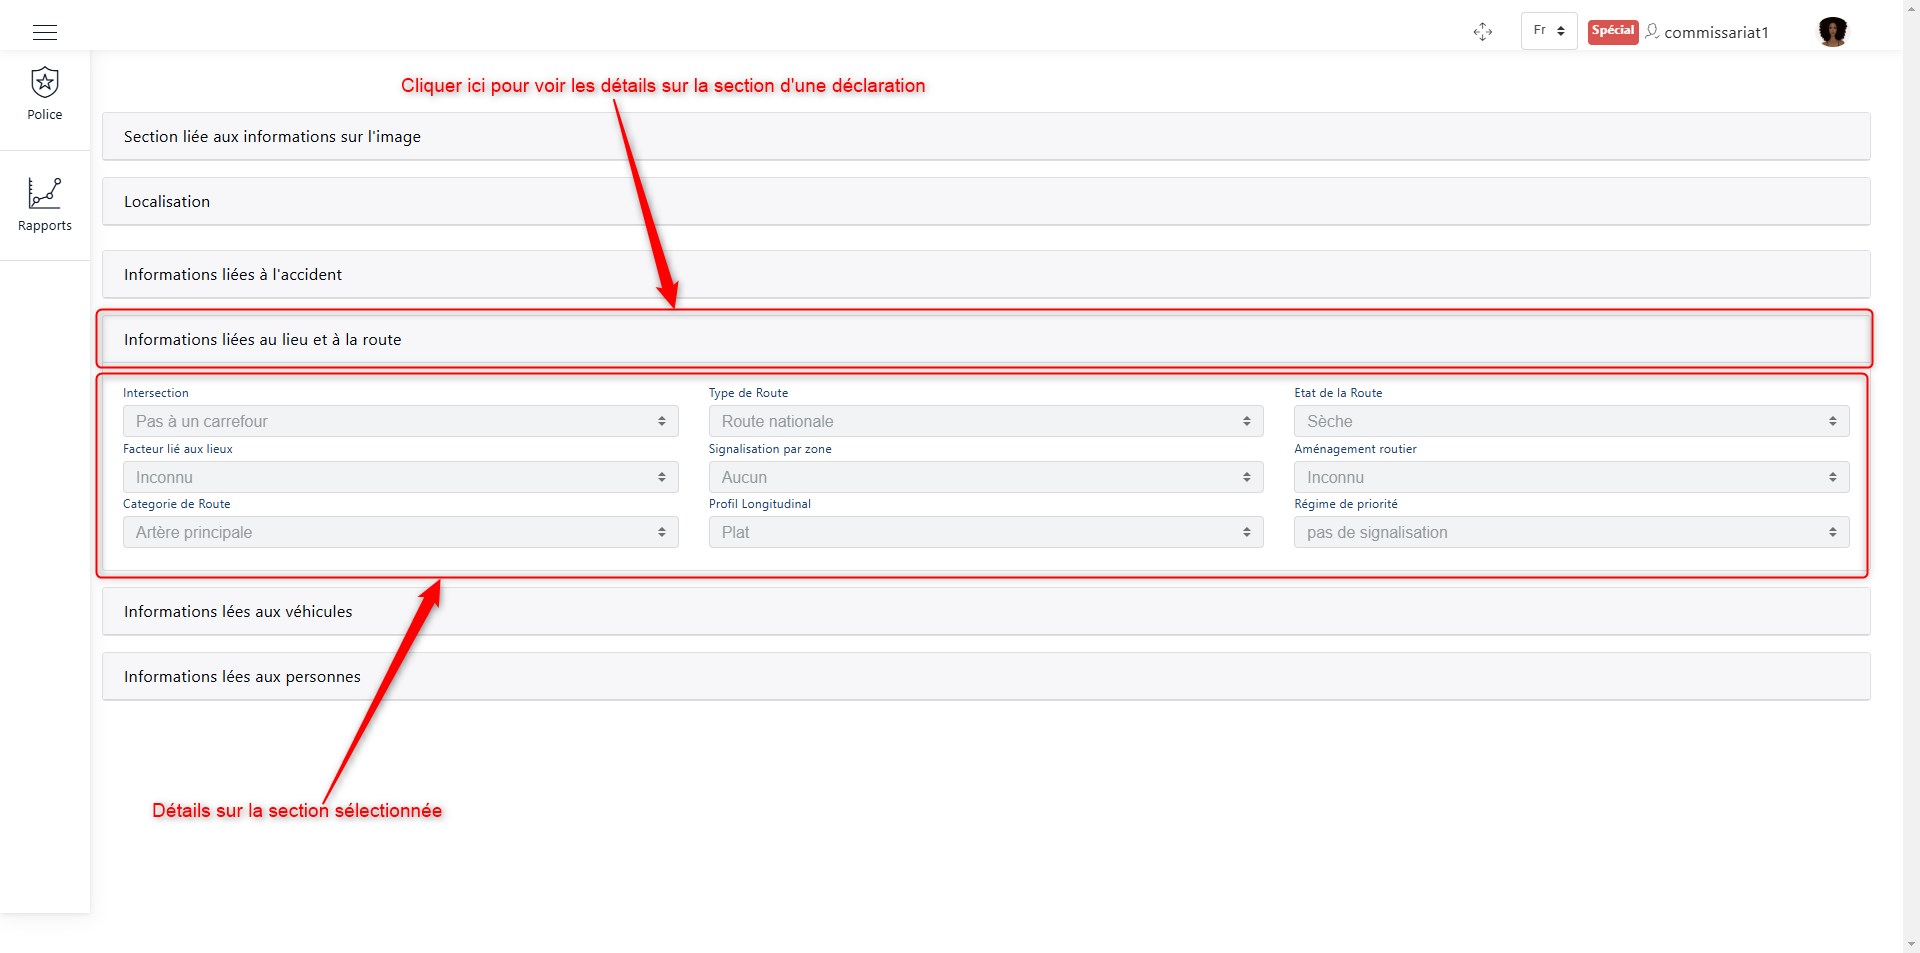
View details of a declaration section.
PDF Report
To obtain the PDF report of a declaration, click on PDF Report in the list of available actions for an accident declaration. Once you click on PDF Report, as shown here, the following interface will be displayed:
Official Report
To obtain the official report of a declaration, click on Official Report in the list of available actions for an accident declaration. Once you click on Official Report, as shown here, the following interface will be displayed:
Editing the Declaration
To edit a declaration, click on Edit in the list of available actions for an accident declaration. Once you click on Edit, as shown here, the following interface will be displayed:
List of editable sections in a declaration.
The sections that can be modified include:
The section related to image information
The location
Information related to the accident
Information about the location and road
Information about vehicles
Information about people
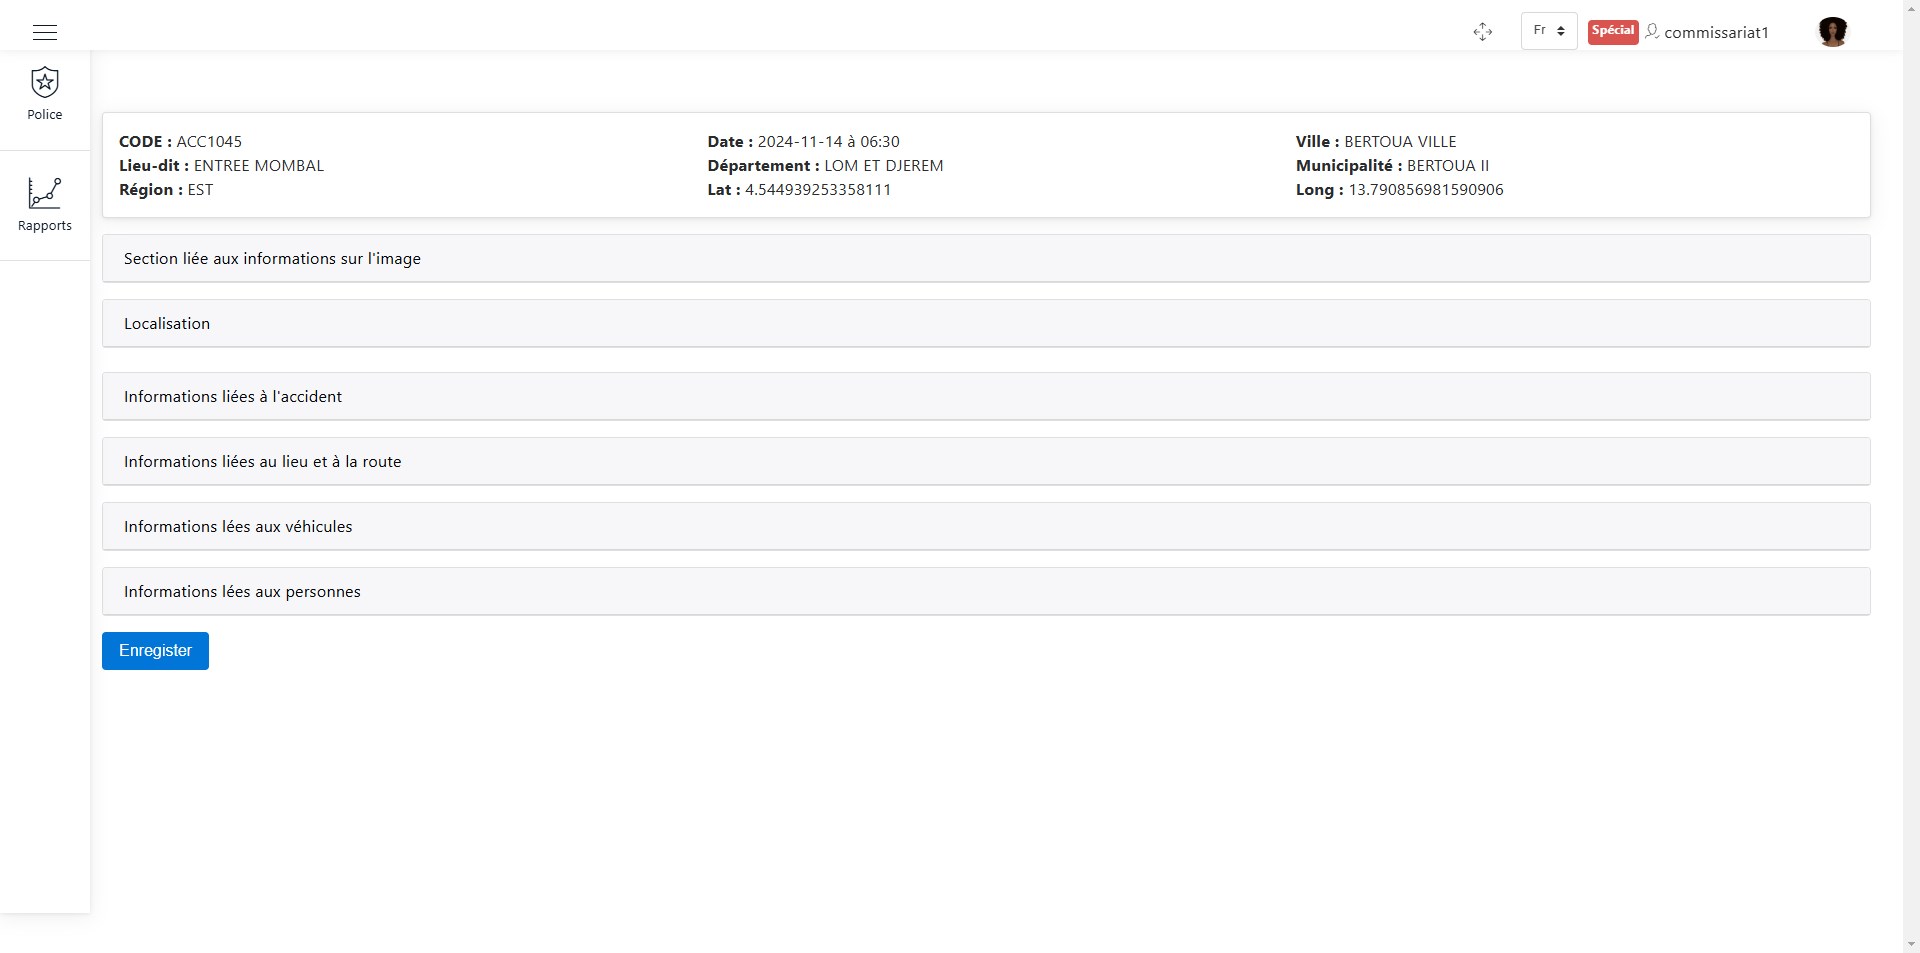
Editing Image Information
The following image shows how to modify existing images or add a new image if it does not exist.
Modify the image.
Select the image and confirm.
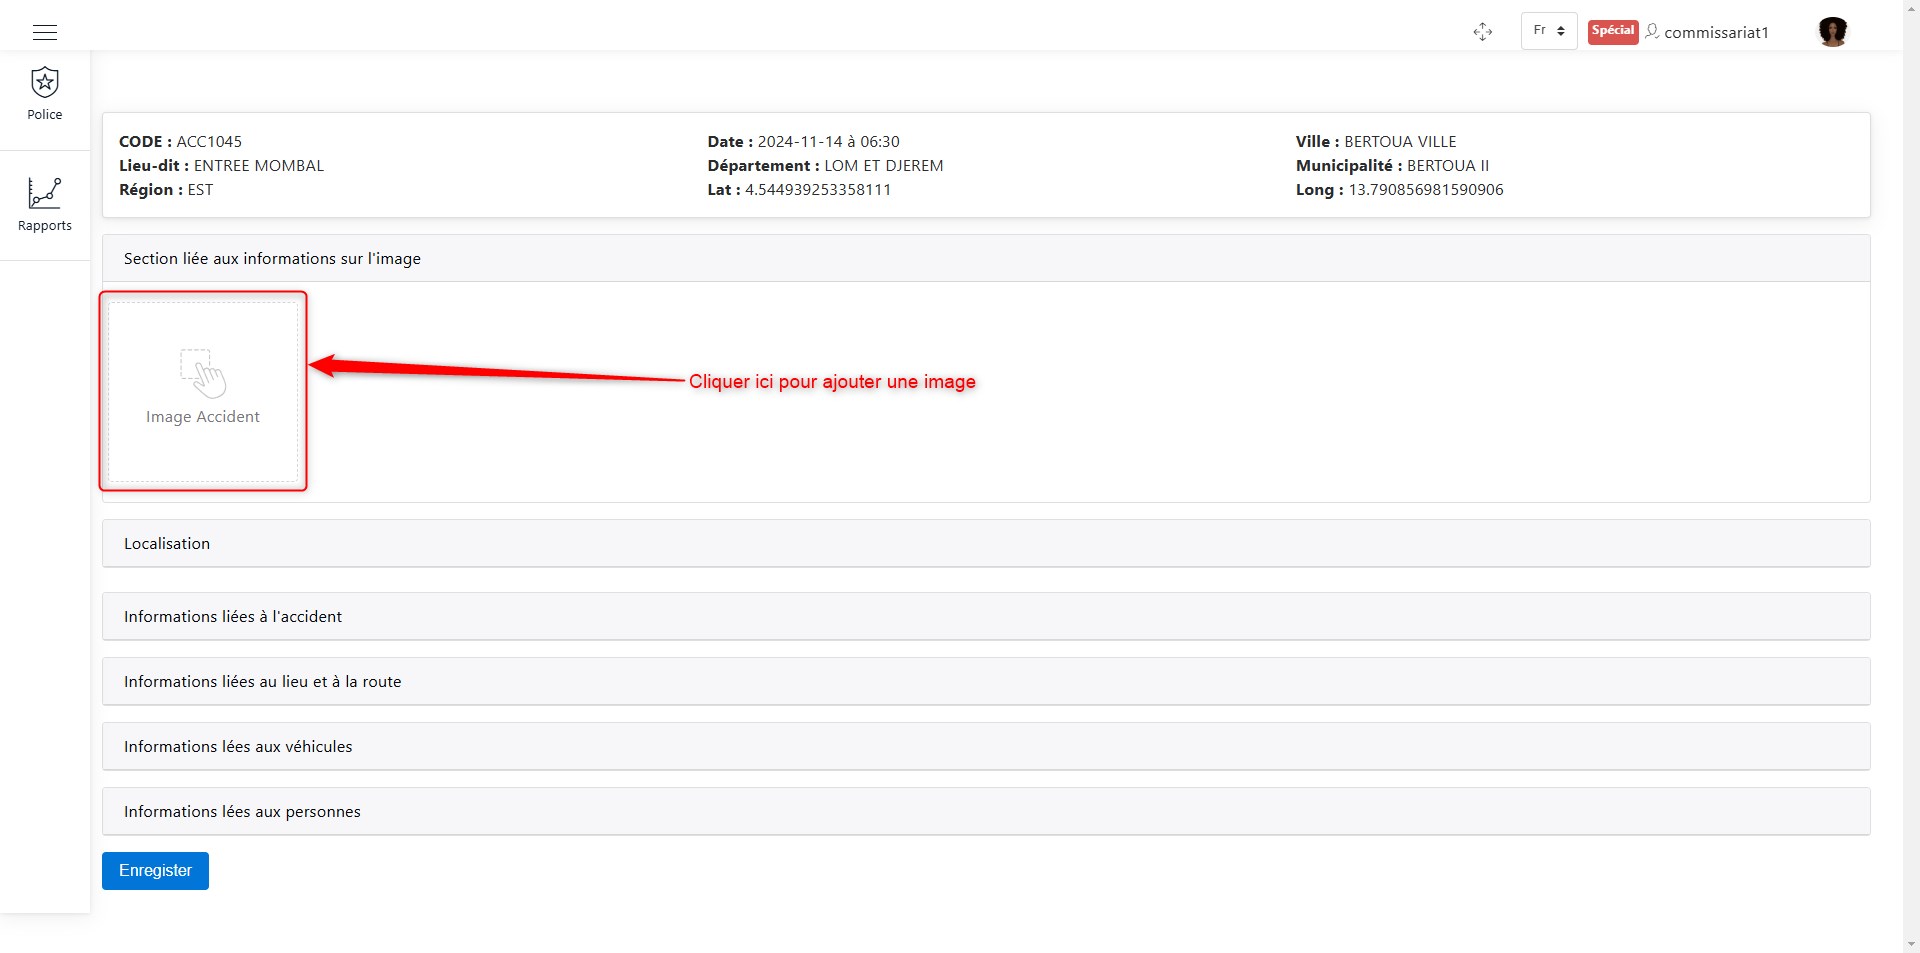
Editing Location
You can modify the location by entering the latitude and longitude manually or by selecting the location on the map, as shown below.
Modify the location.
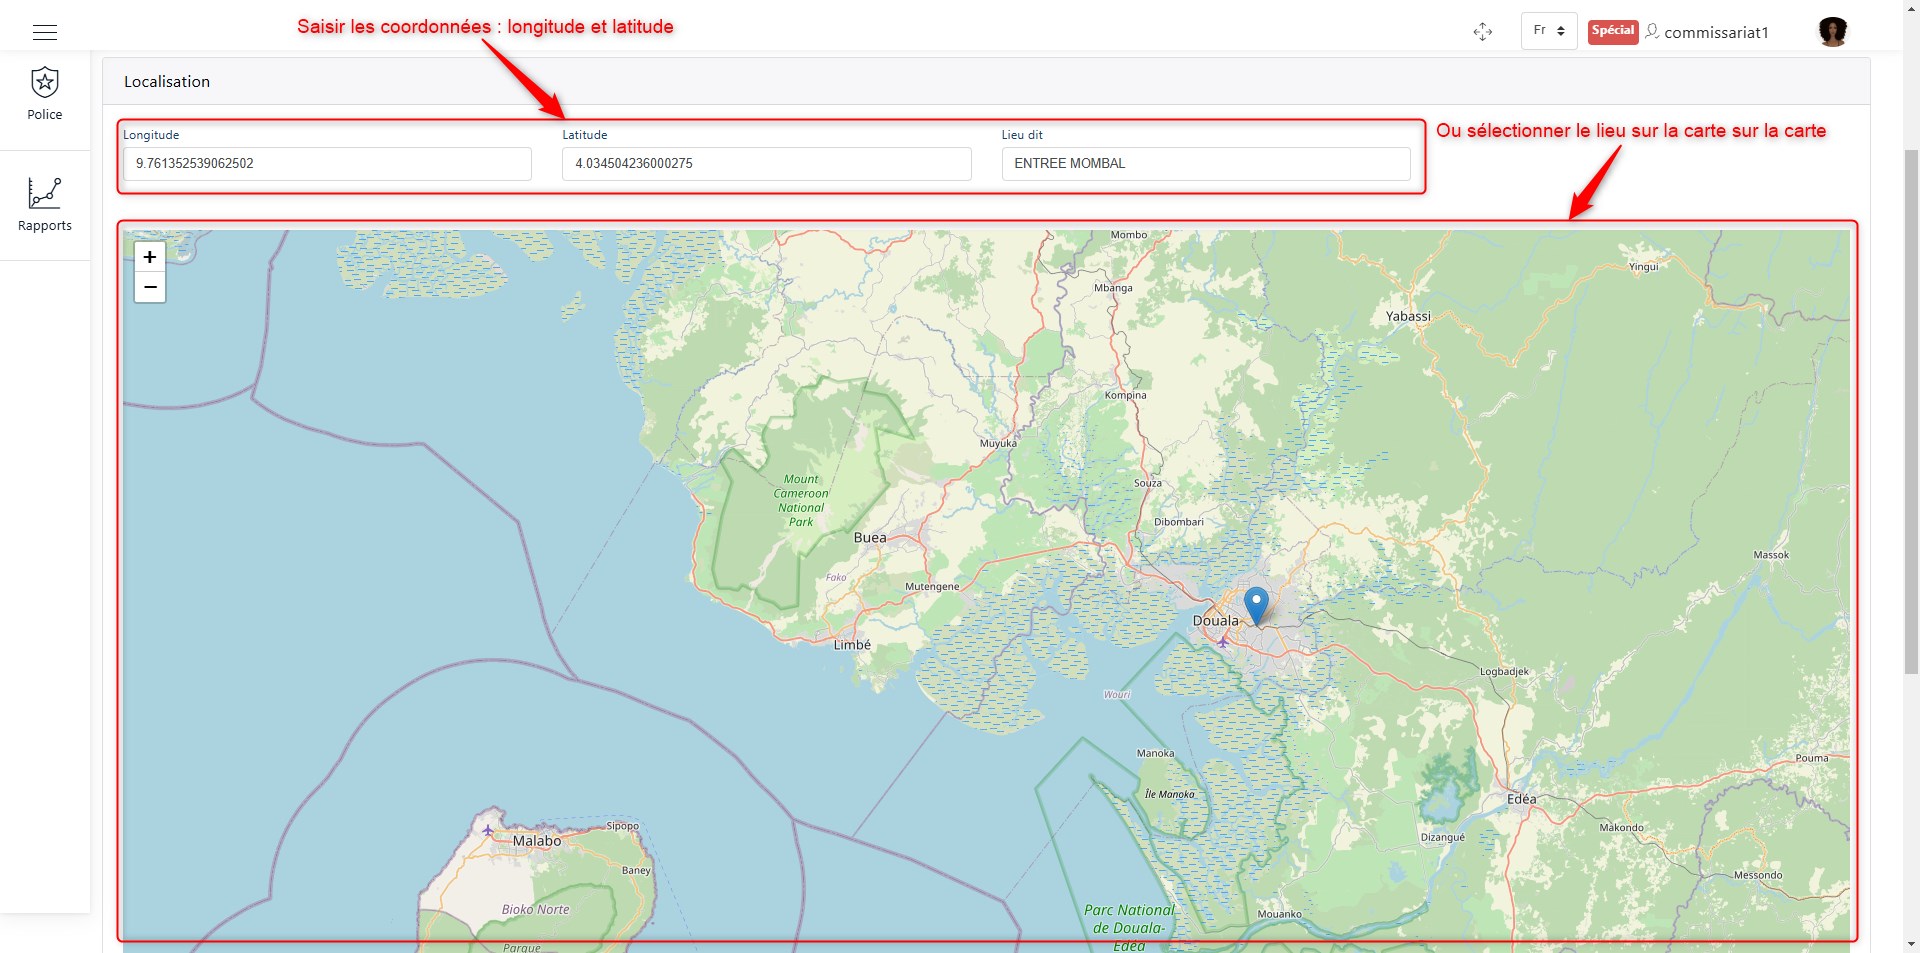
Editing Accident Information
Modifying this section simply involves updating the relevant fields.
Modify accident information.
Editing Location and Road Information
Updating this section involves modifying the required fields.

Modify location and road information.
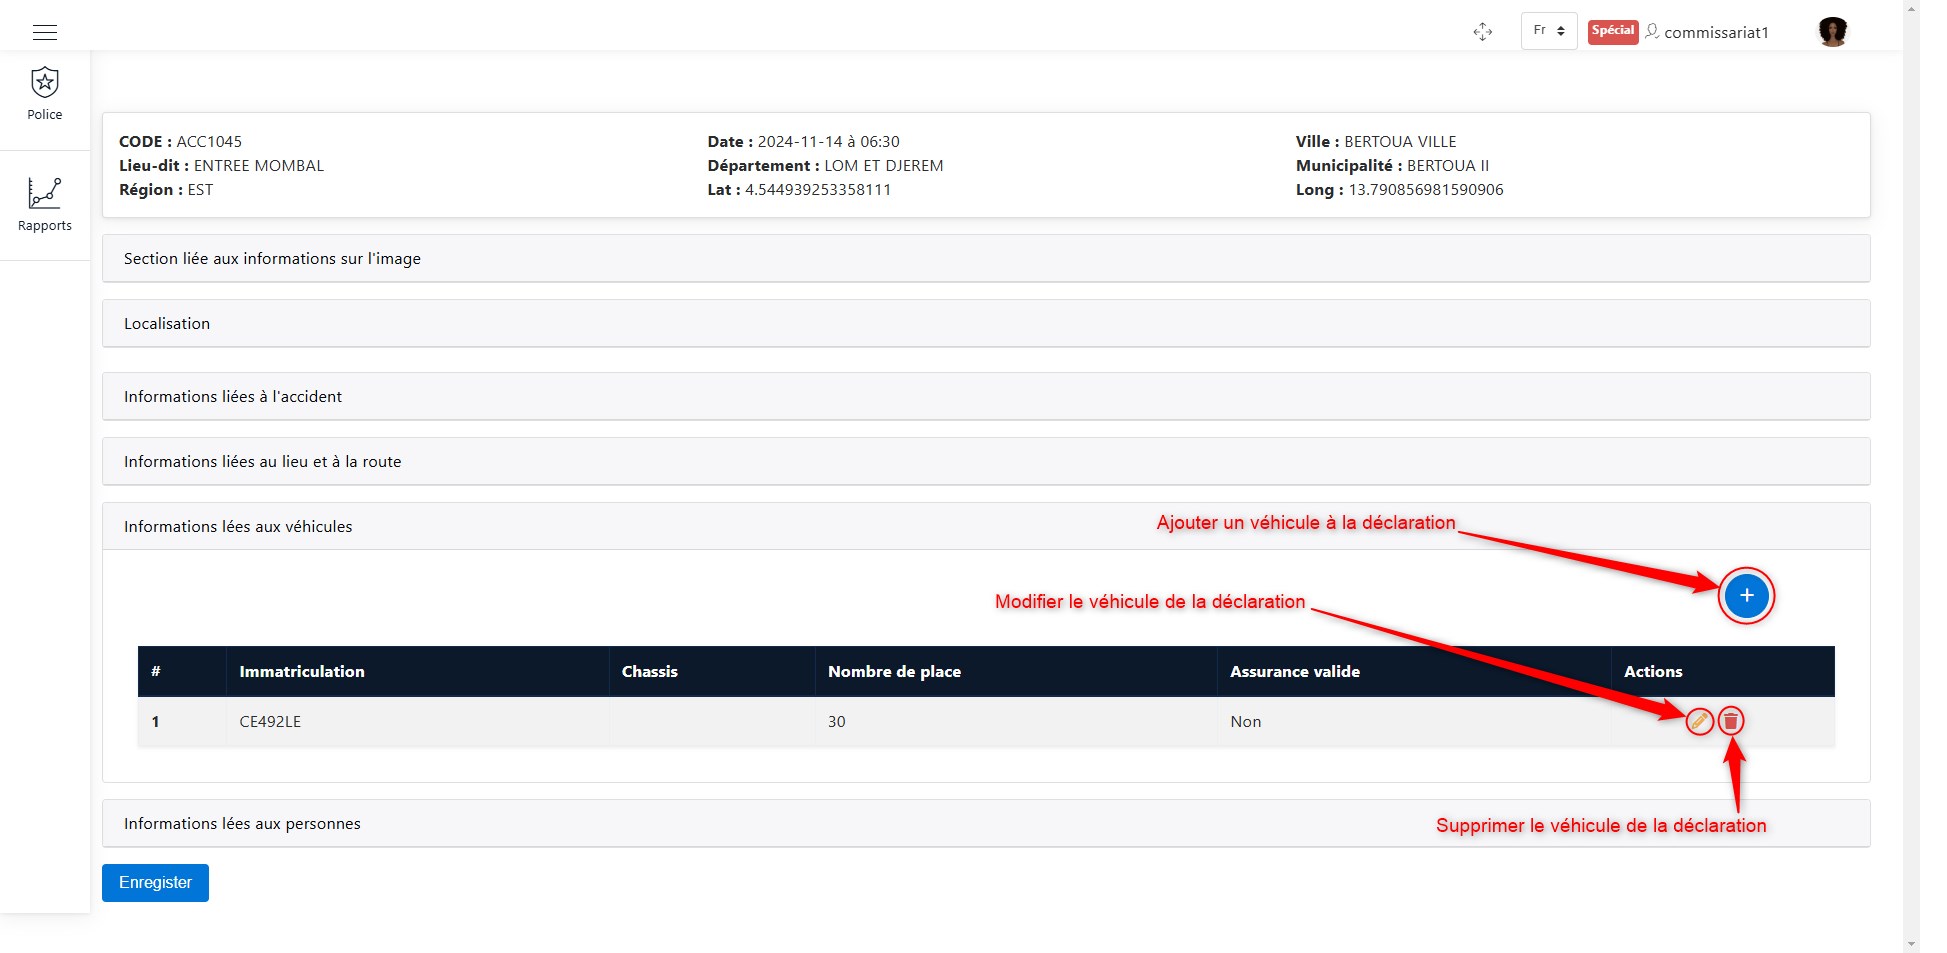
Editing Vehicle Information
Here, you can modify the vehicles from the initial declaration and add new vehicles to the declaration.
Modify vehicles in the declaration.
Learn more about adding, deleting, and modifying vehicles.
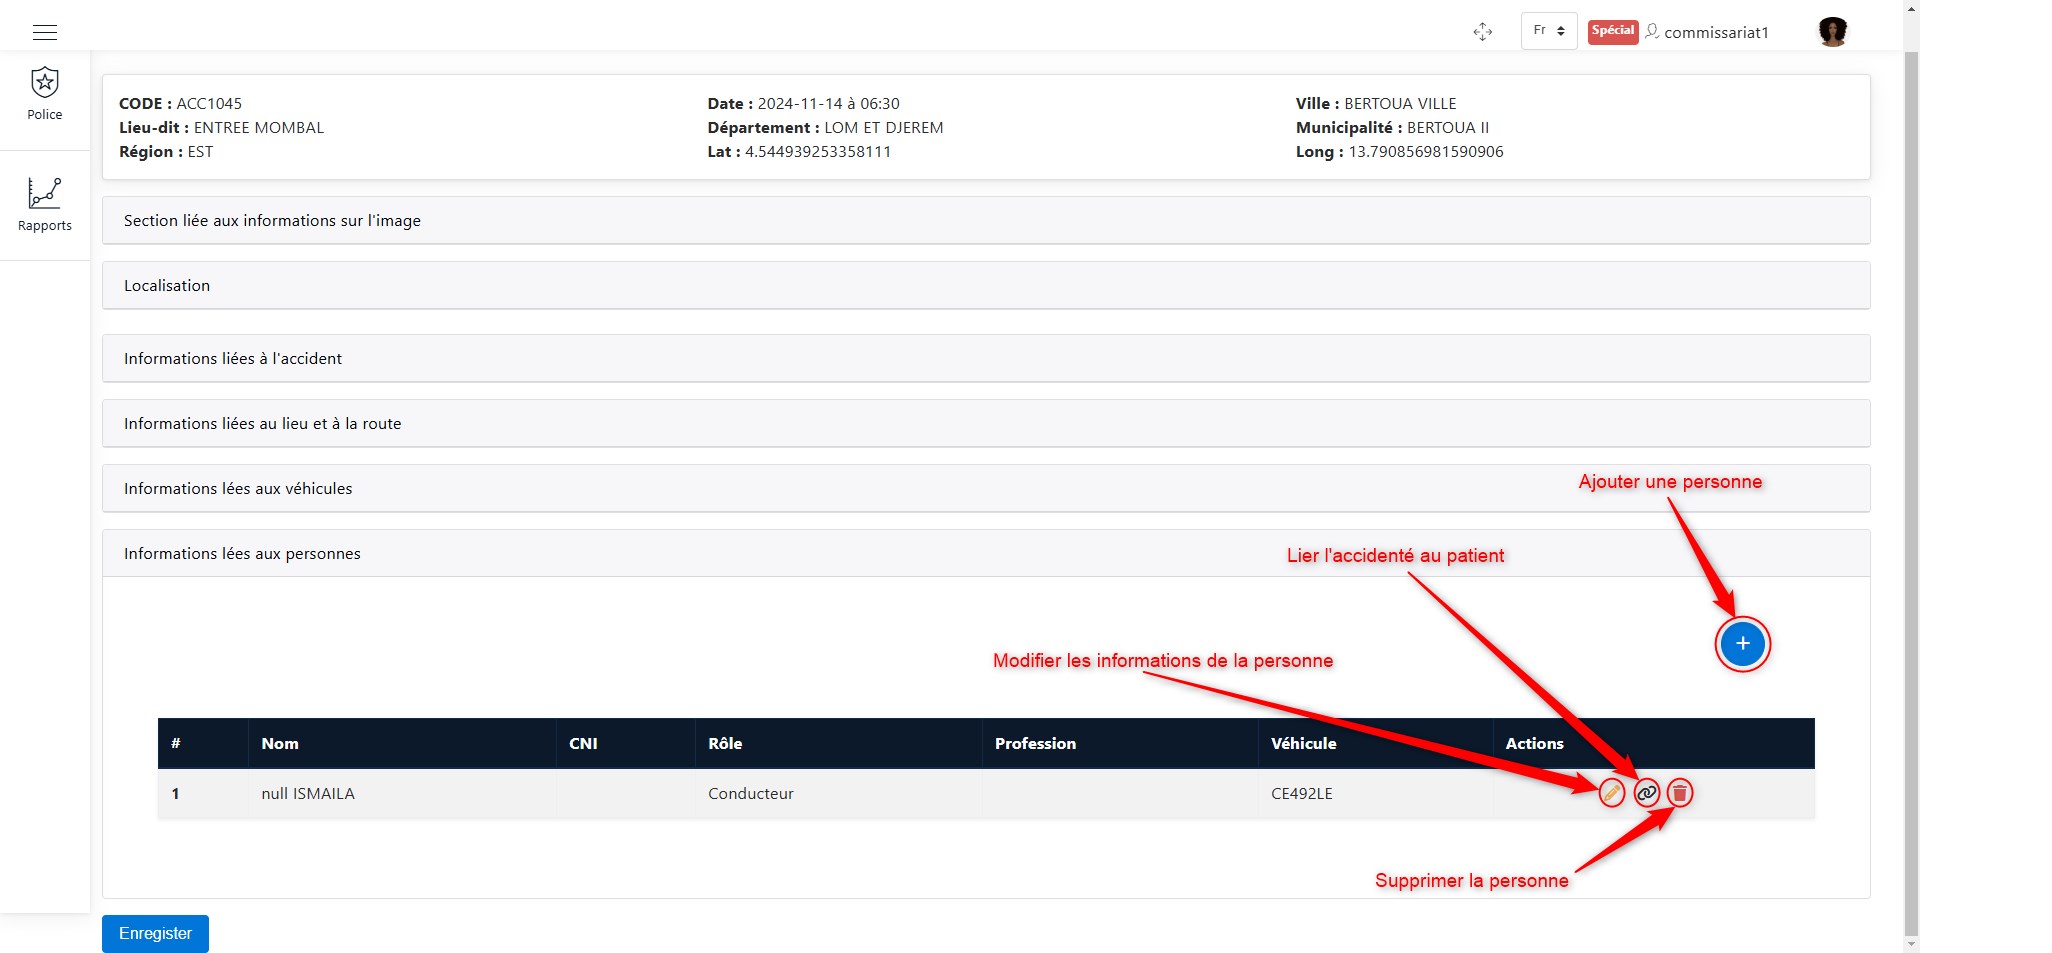
Editing Person Information
Here, you can modify the people recorded in the initial declaration and add new individuals to the declaration.
Modify people in the declaration.
Learn more about adding, deleting, and modifying individuals.
To link an accident victim to a patient, click on the link button shown above, then search for the patient using the search bar, which will appear as follows.
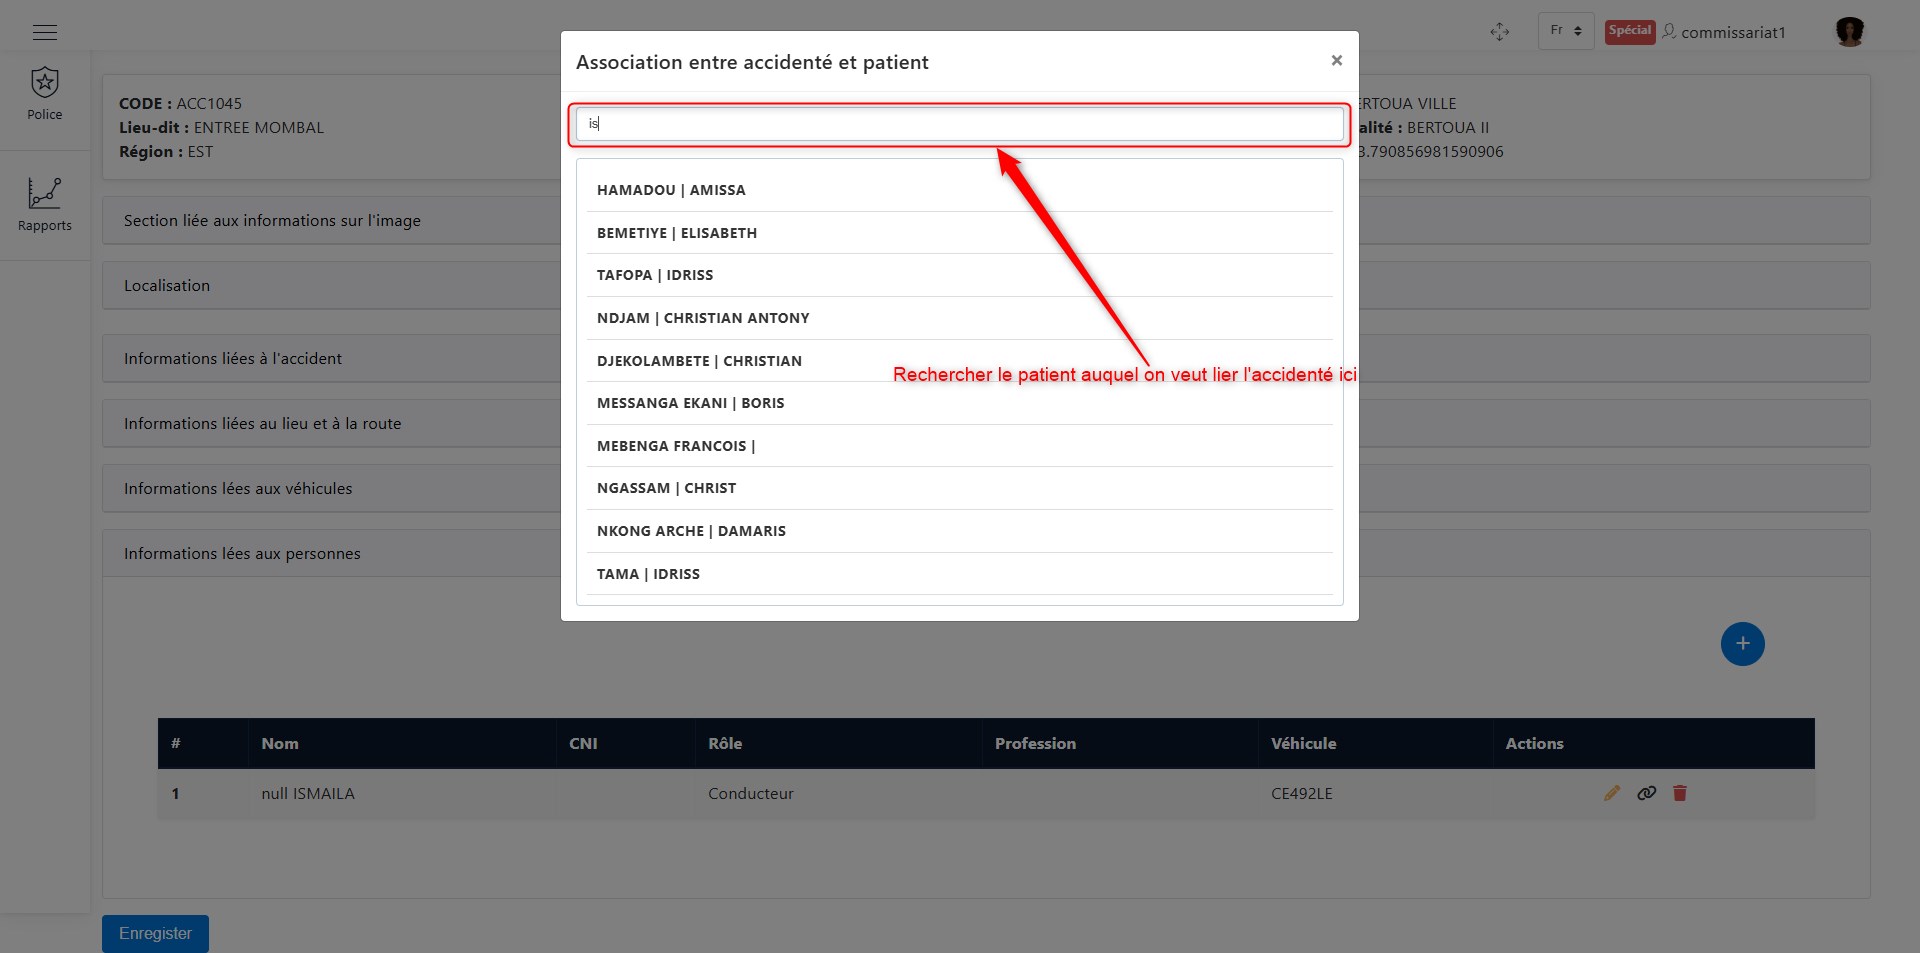
Linking the accident victim to a patient.
Once you find the patient, simply select them.
When you have finished making the necessary modifications to the accident declaration, click the Save button at the bottom of the page, as shown below.
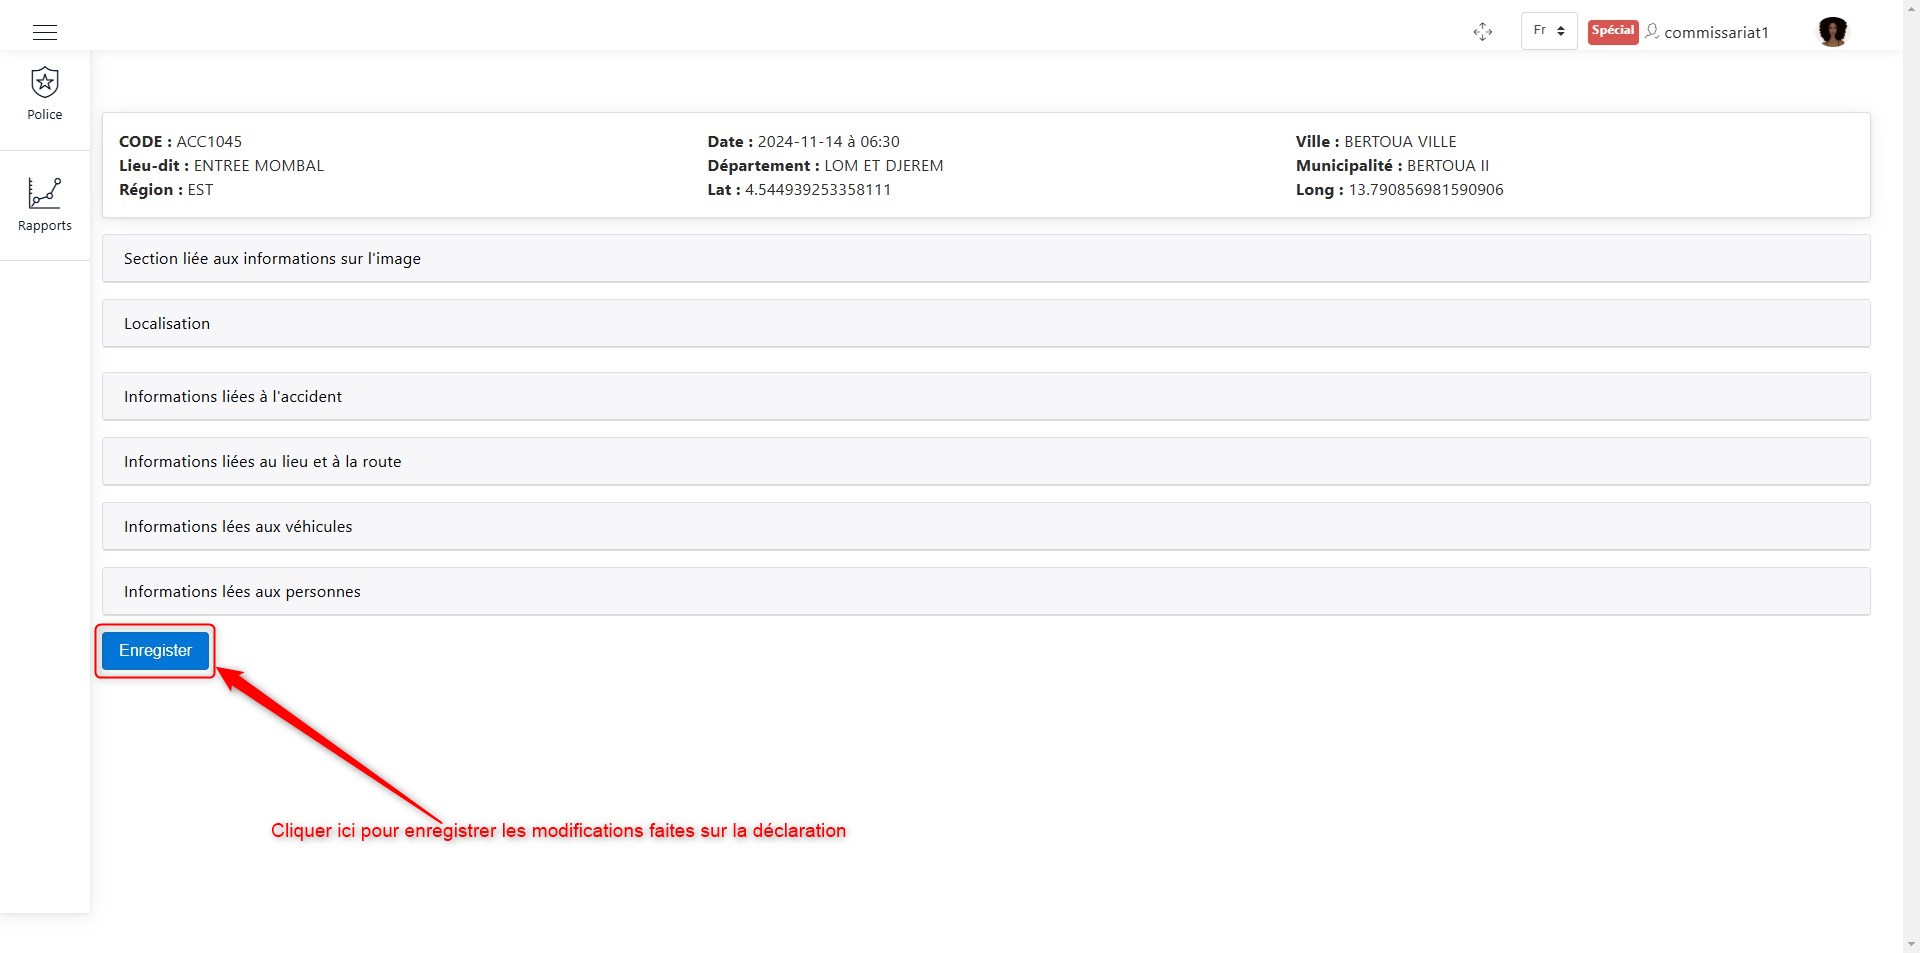
Save modifications to the declaration.
Adding a Sketch
To add a sketch to a declaration, click on Add Sketch in the list of available actions for an accident declaration. Once you click on Add Sketch, as shown here, the following window will appear:
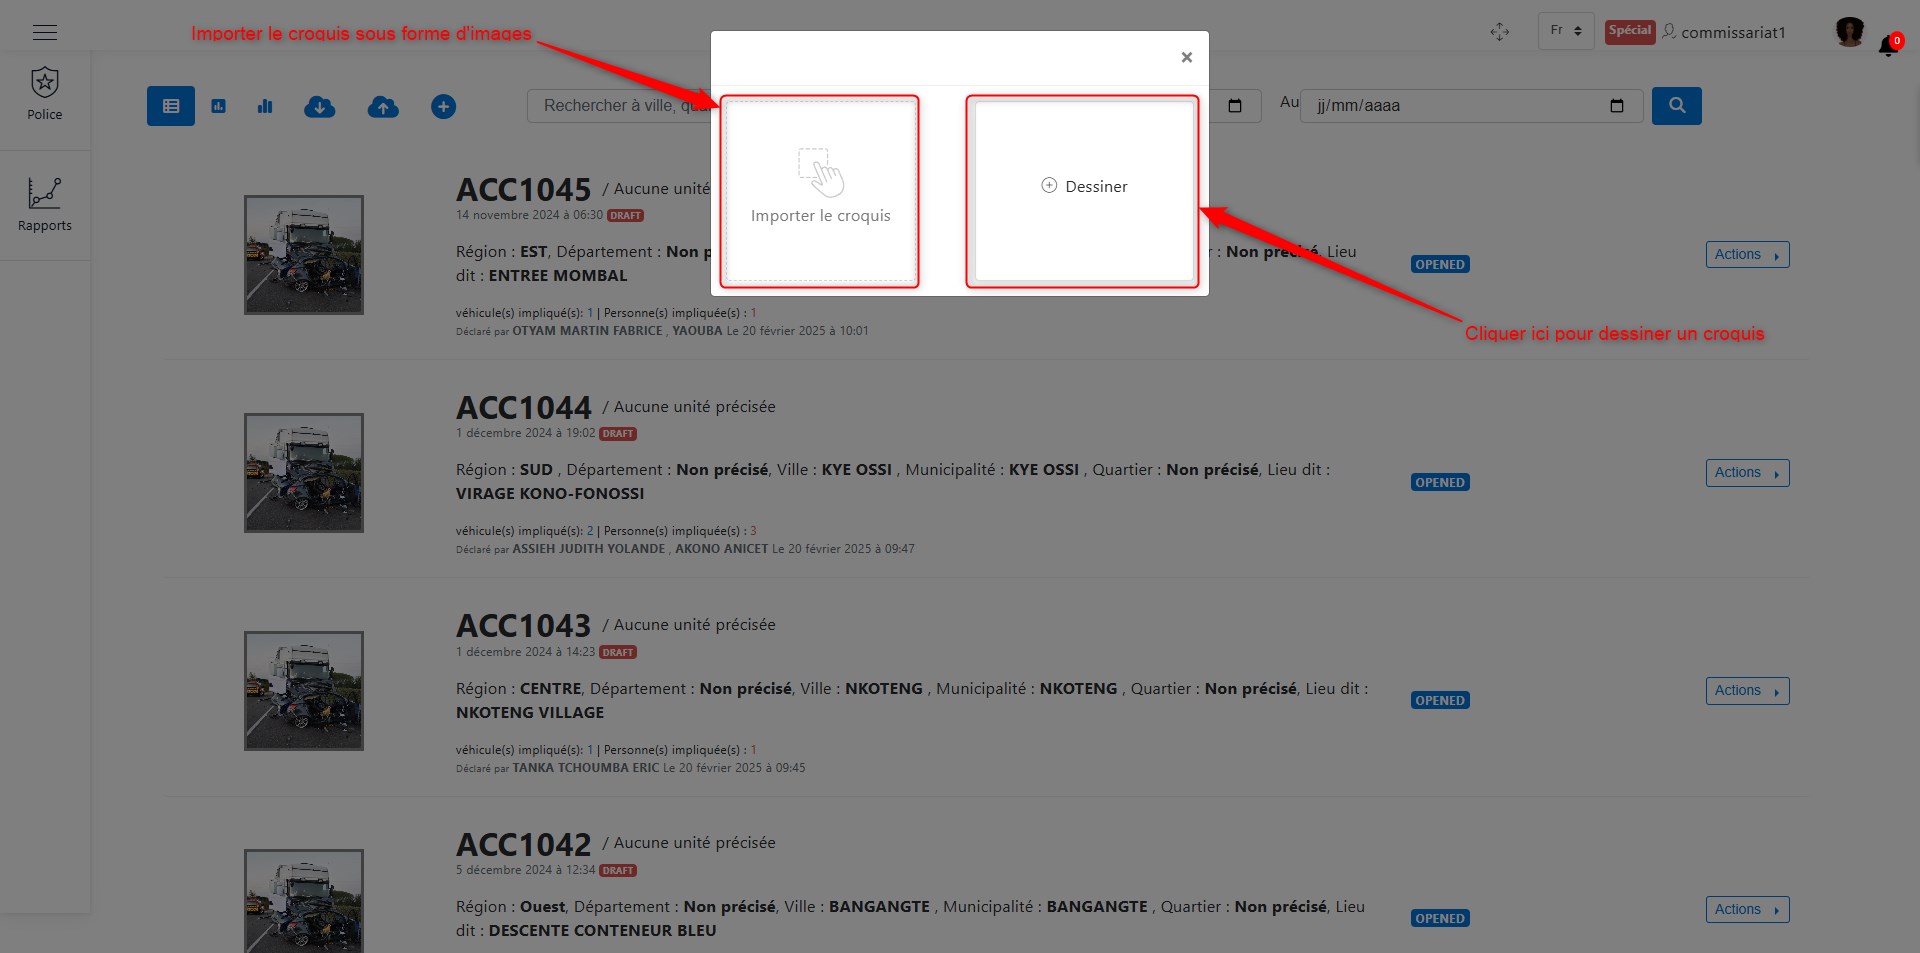
Add a sketch.
As shown in the image above, there are two options:
Draw the sketch directly within the application
Import a sketch image
Method 1: Drawing in the application
To draw within the application, click the Draw button, as illustrated in the following image. Once clicked, you will be redirected to the sketch drawing interface.
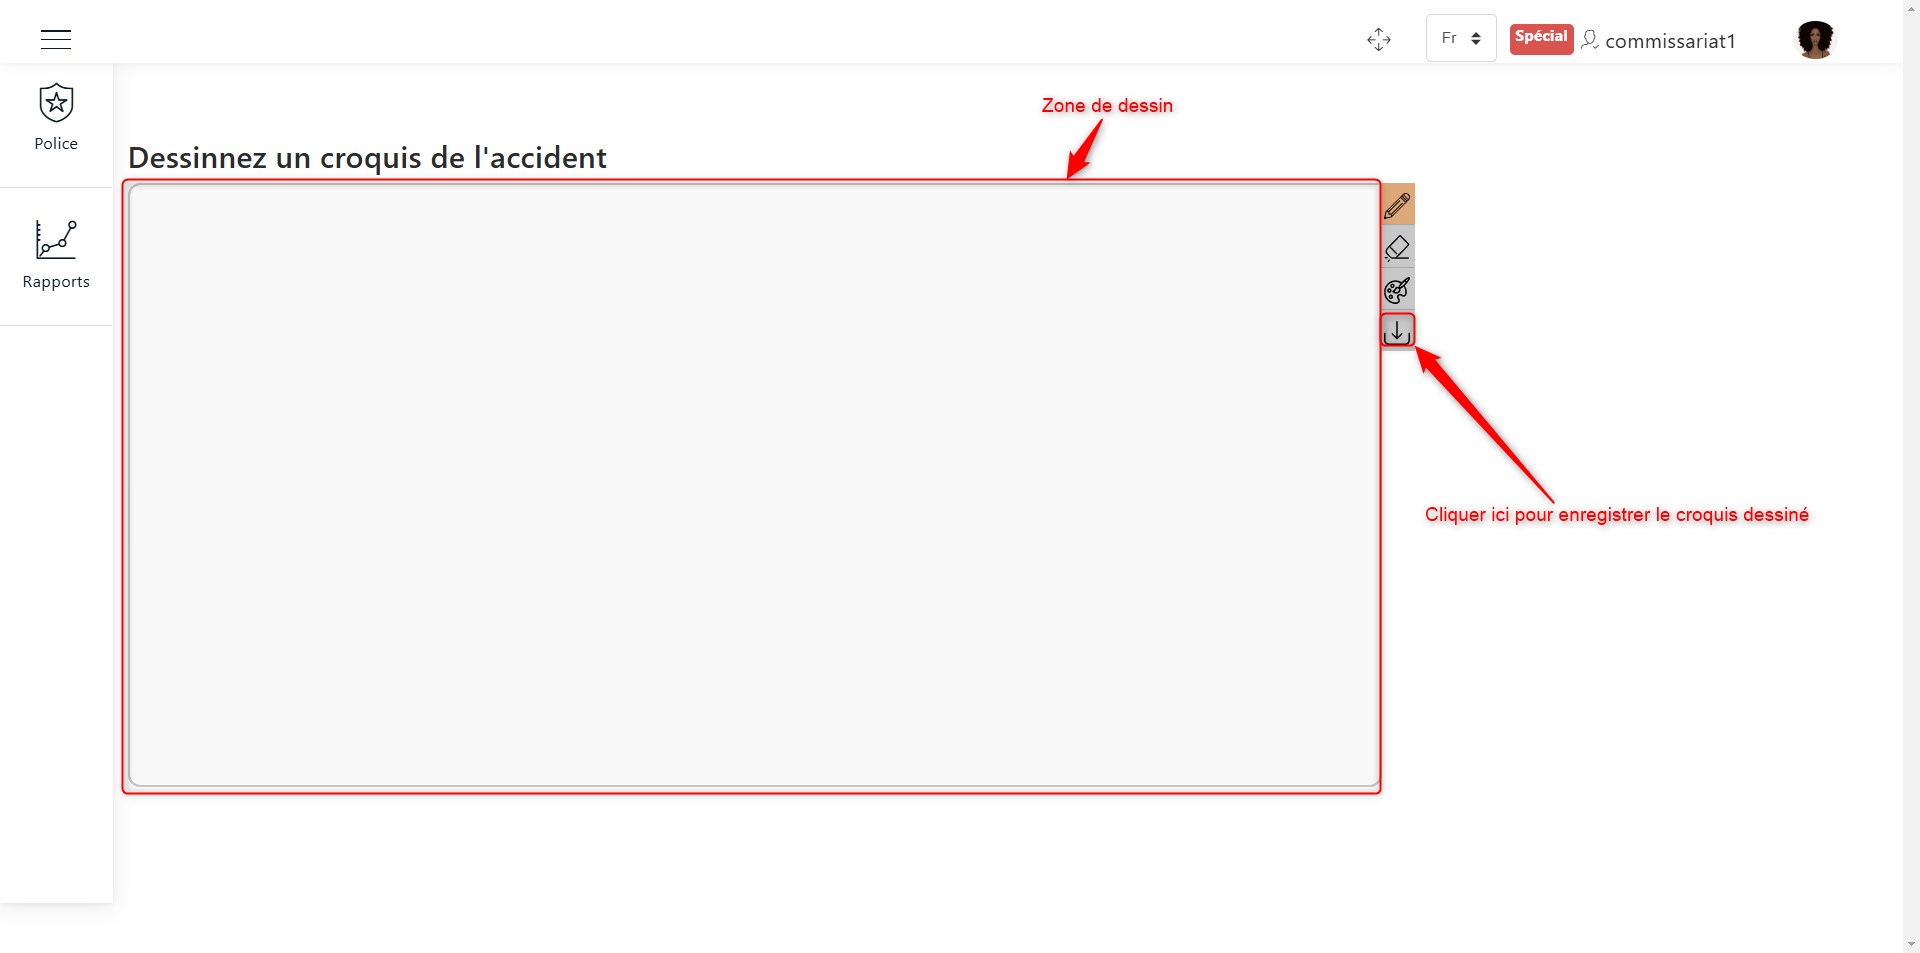
Drawing area.
Do not forget to save your sketch using the save button shown in the image above.
Method 2: Importing an image
To import a sketch image, click the image import button, as illustrated in the following image. Once clicked, a window will open, allowing you to browse for the sketch image to import.
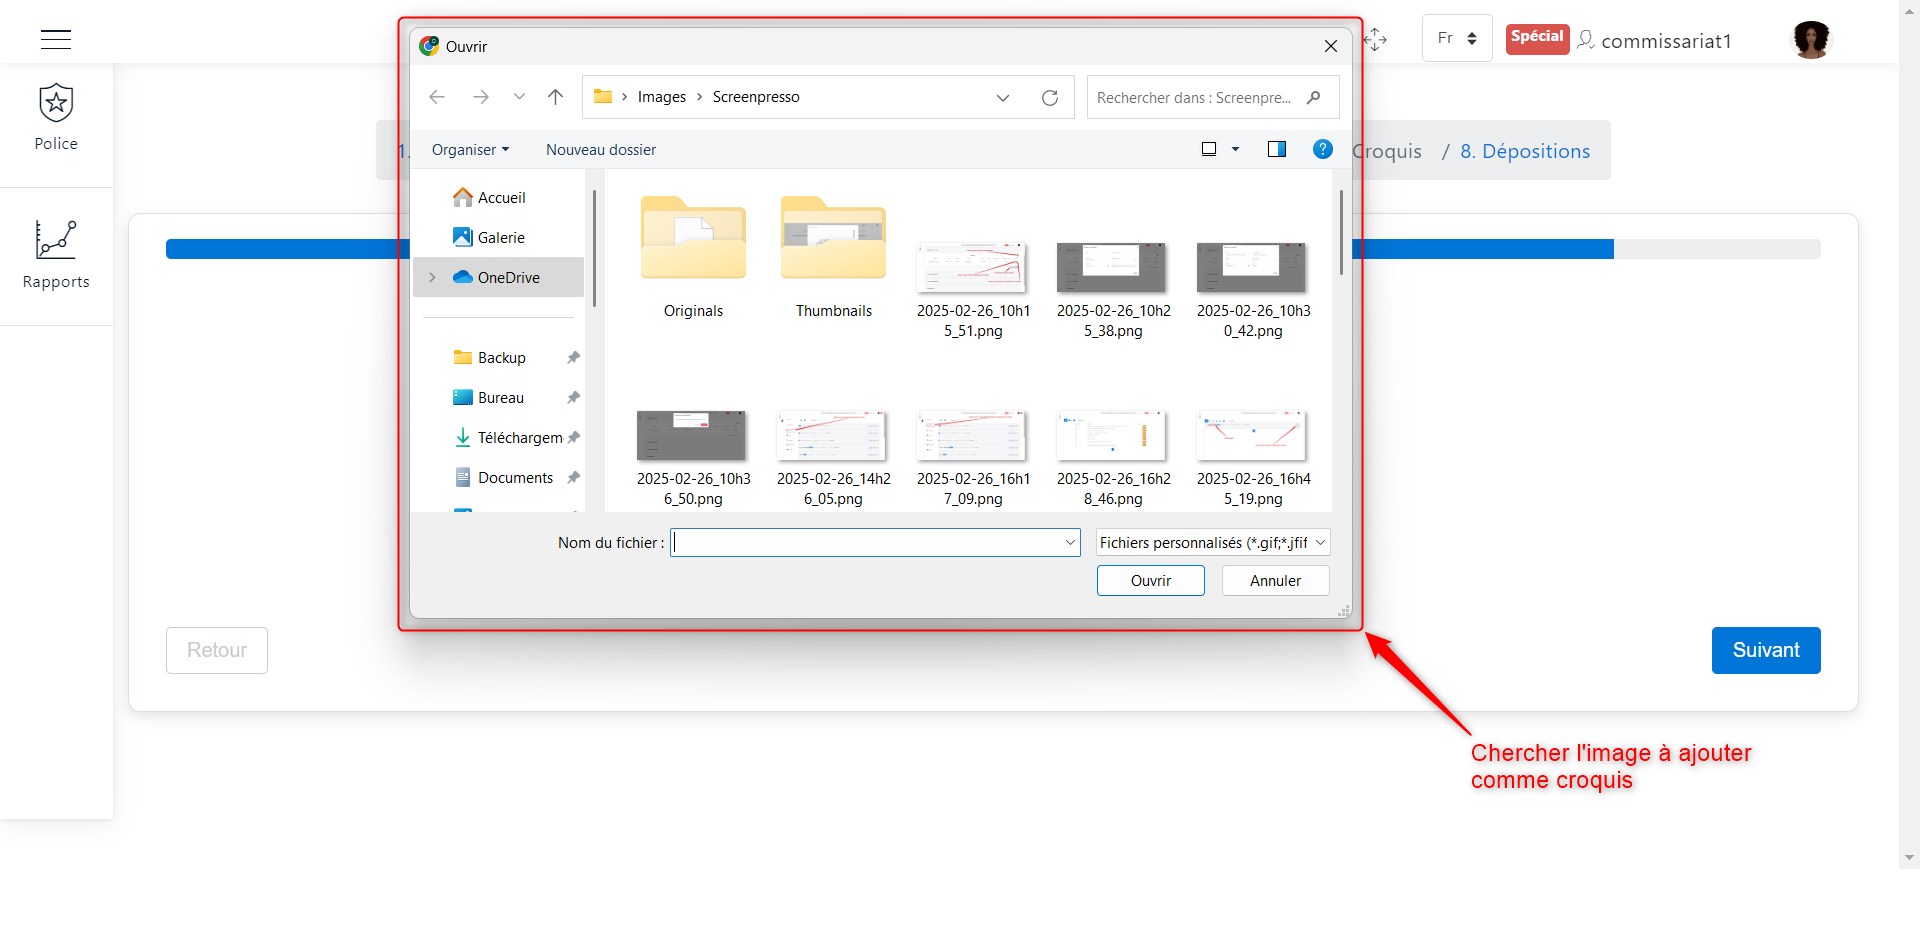
Import a sketch image.
Signing the Report
To sign the report, click on Sign Report in the list of available actions for an accident declaration. Once you click on Sign Report, as shown here, the following window will appear:
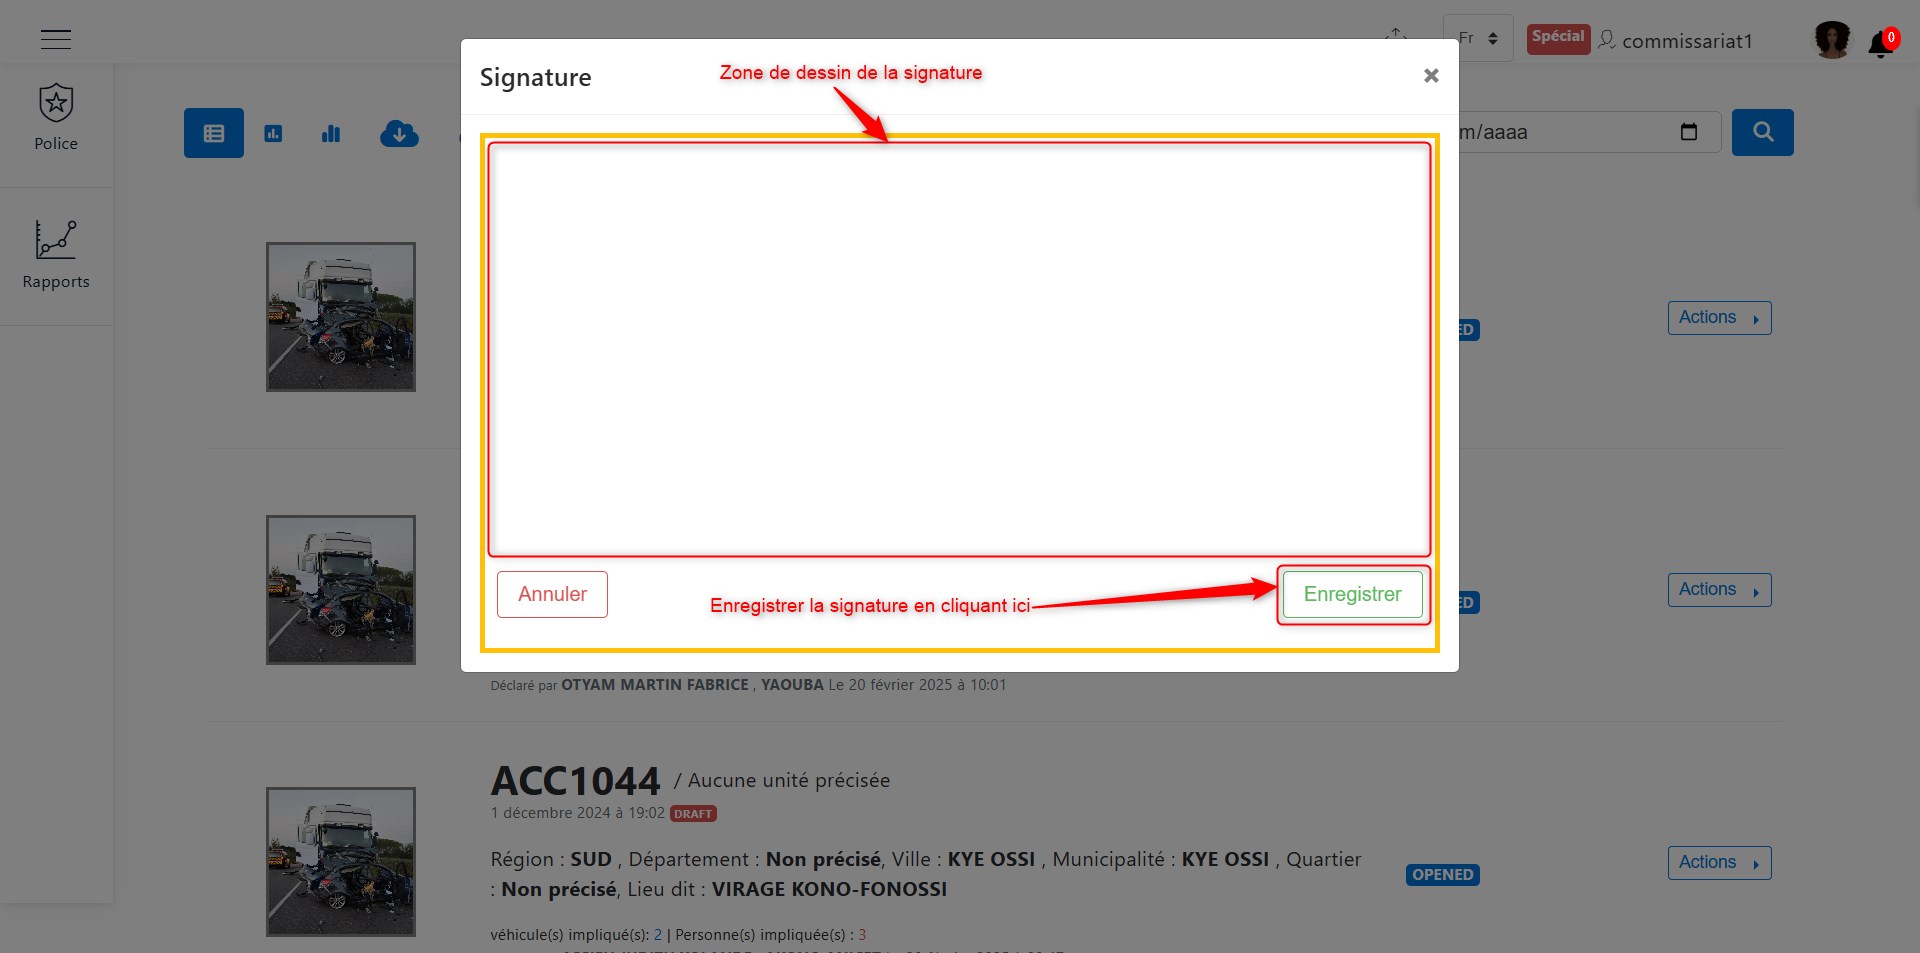
Sign the report.
Sign and save your signature by clicking on the Save button, as shown in the image above.