Adding an Accident Report - MOBILE
After entering the identification key, which is only requested on the first launch, you are redirected to the home page, where you can add a new accident.
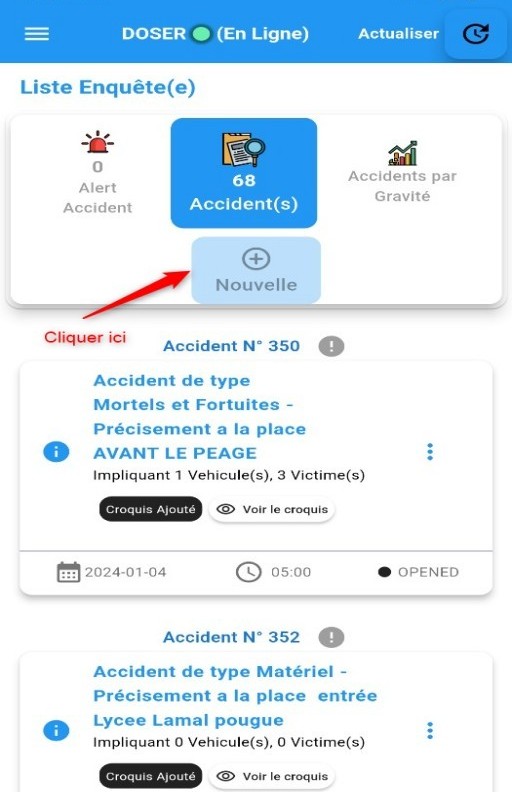
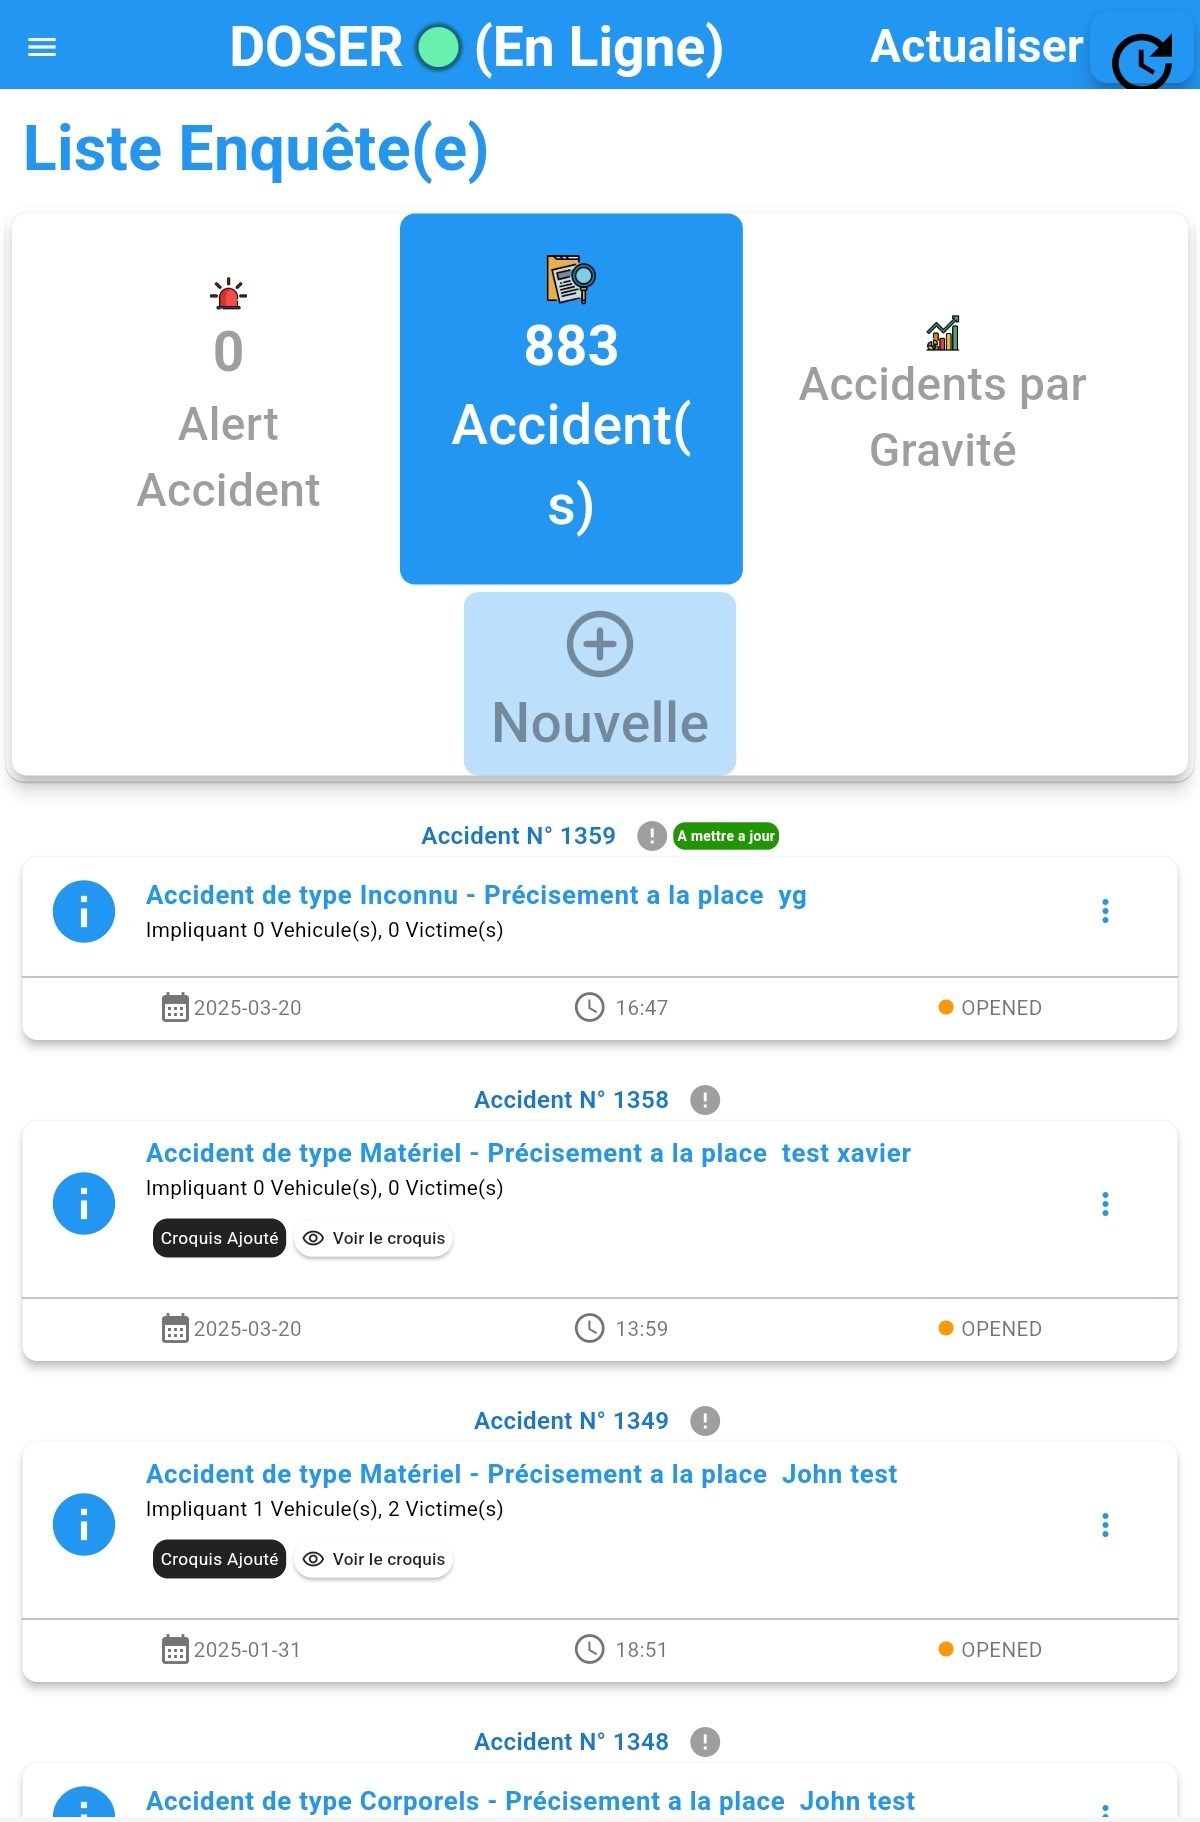
Home screen to add a new accident
After clicking on +, if you are offline, a warning message will be displayed asking if you want to continue, as shown in the following image:

After clicking Create, several steps will be presented to enter the accident information. The information to be provided in these steps includes:
The detailed explanation of the accident declaration process is as follows:
Inspector
Before adding an officer, you must first specify the organization they belong to, as shown in the following image:
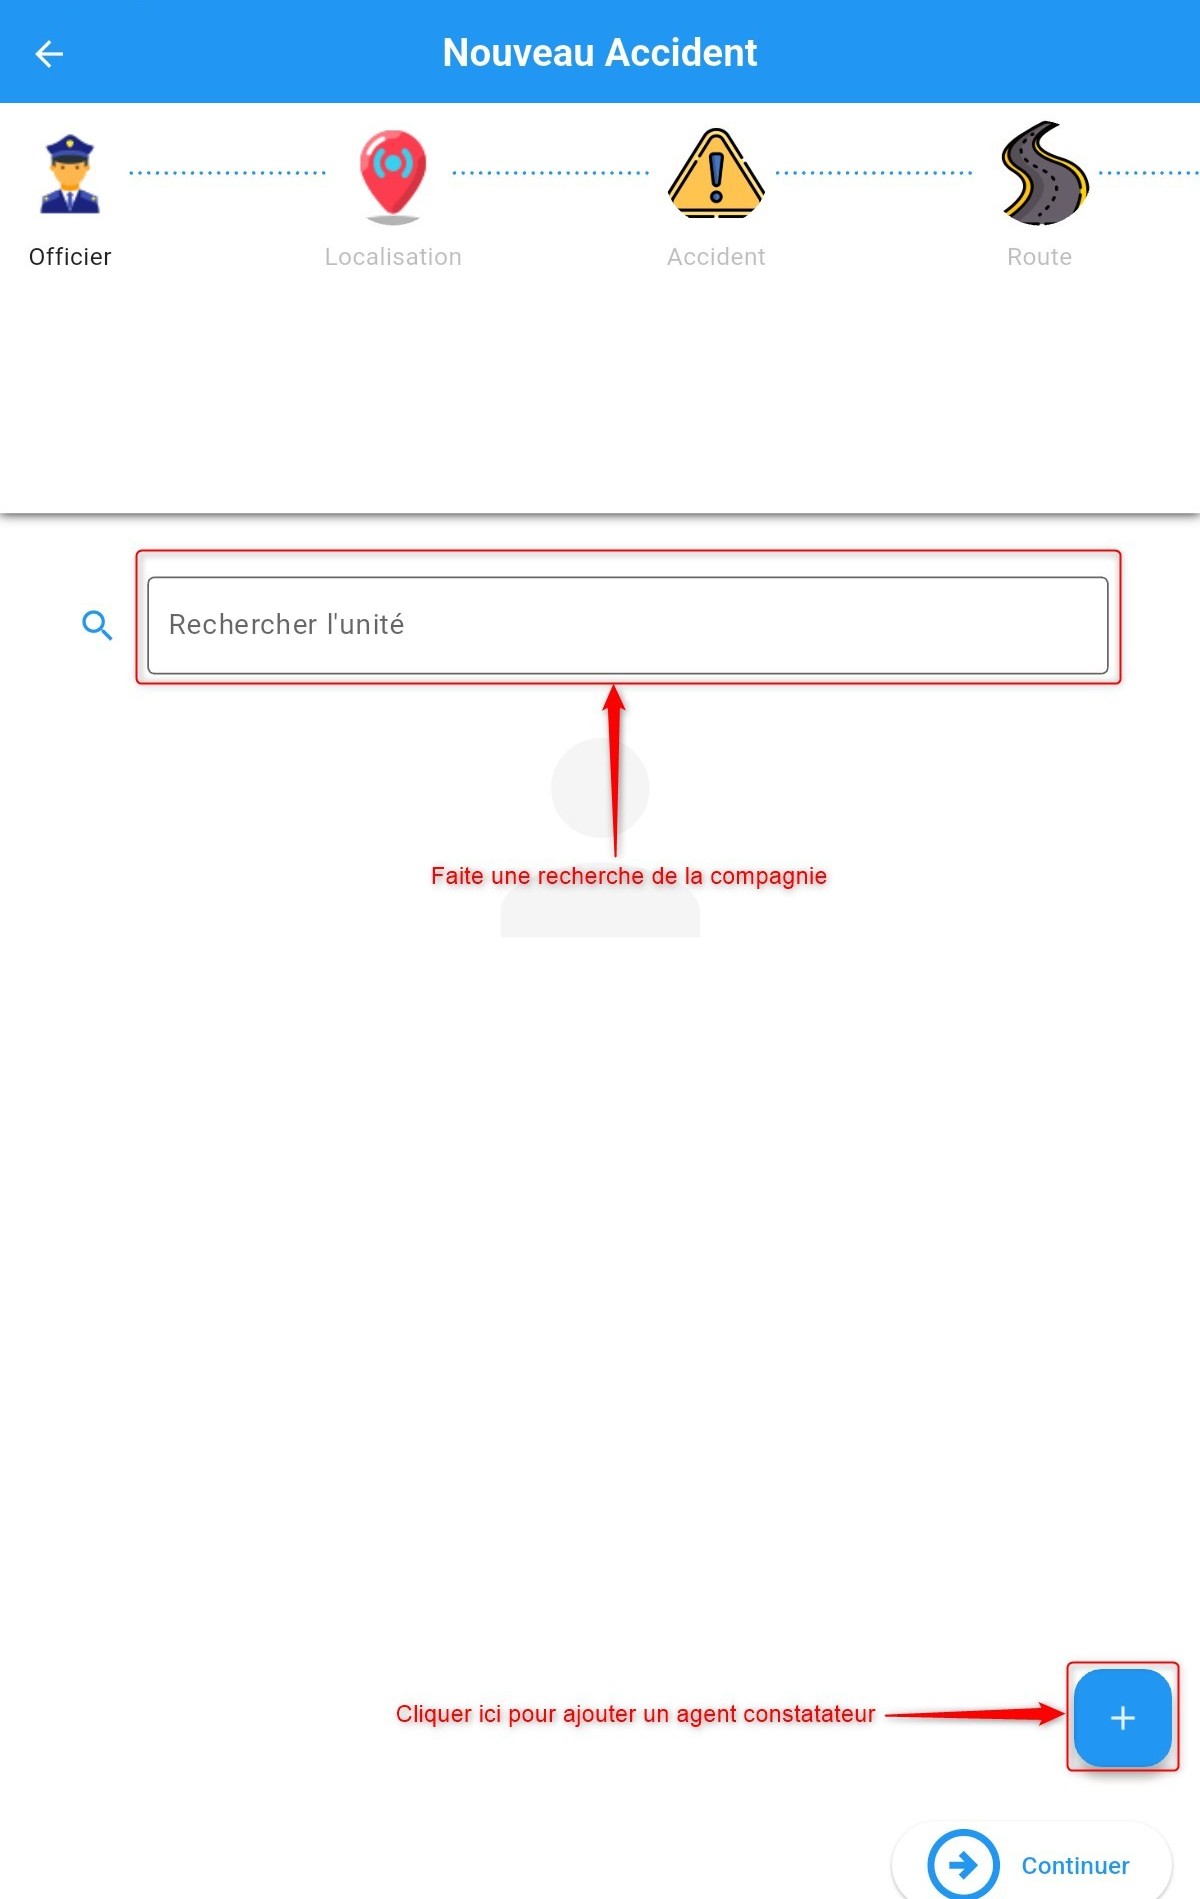
Search for the organization
Click on + as indicated in the previous image to add an inspector.
Fill in the fields in the displayed form.
If you are online, you can search for an existing police officer in the search field at the top of the form. Selecting an officer will automatically fill in the other fields, and you will only need to complete the missing information. Otherwise, fill in the form manually. If the name is not in the database, do the same.
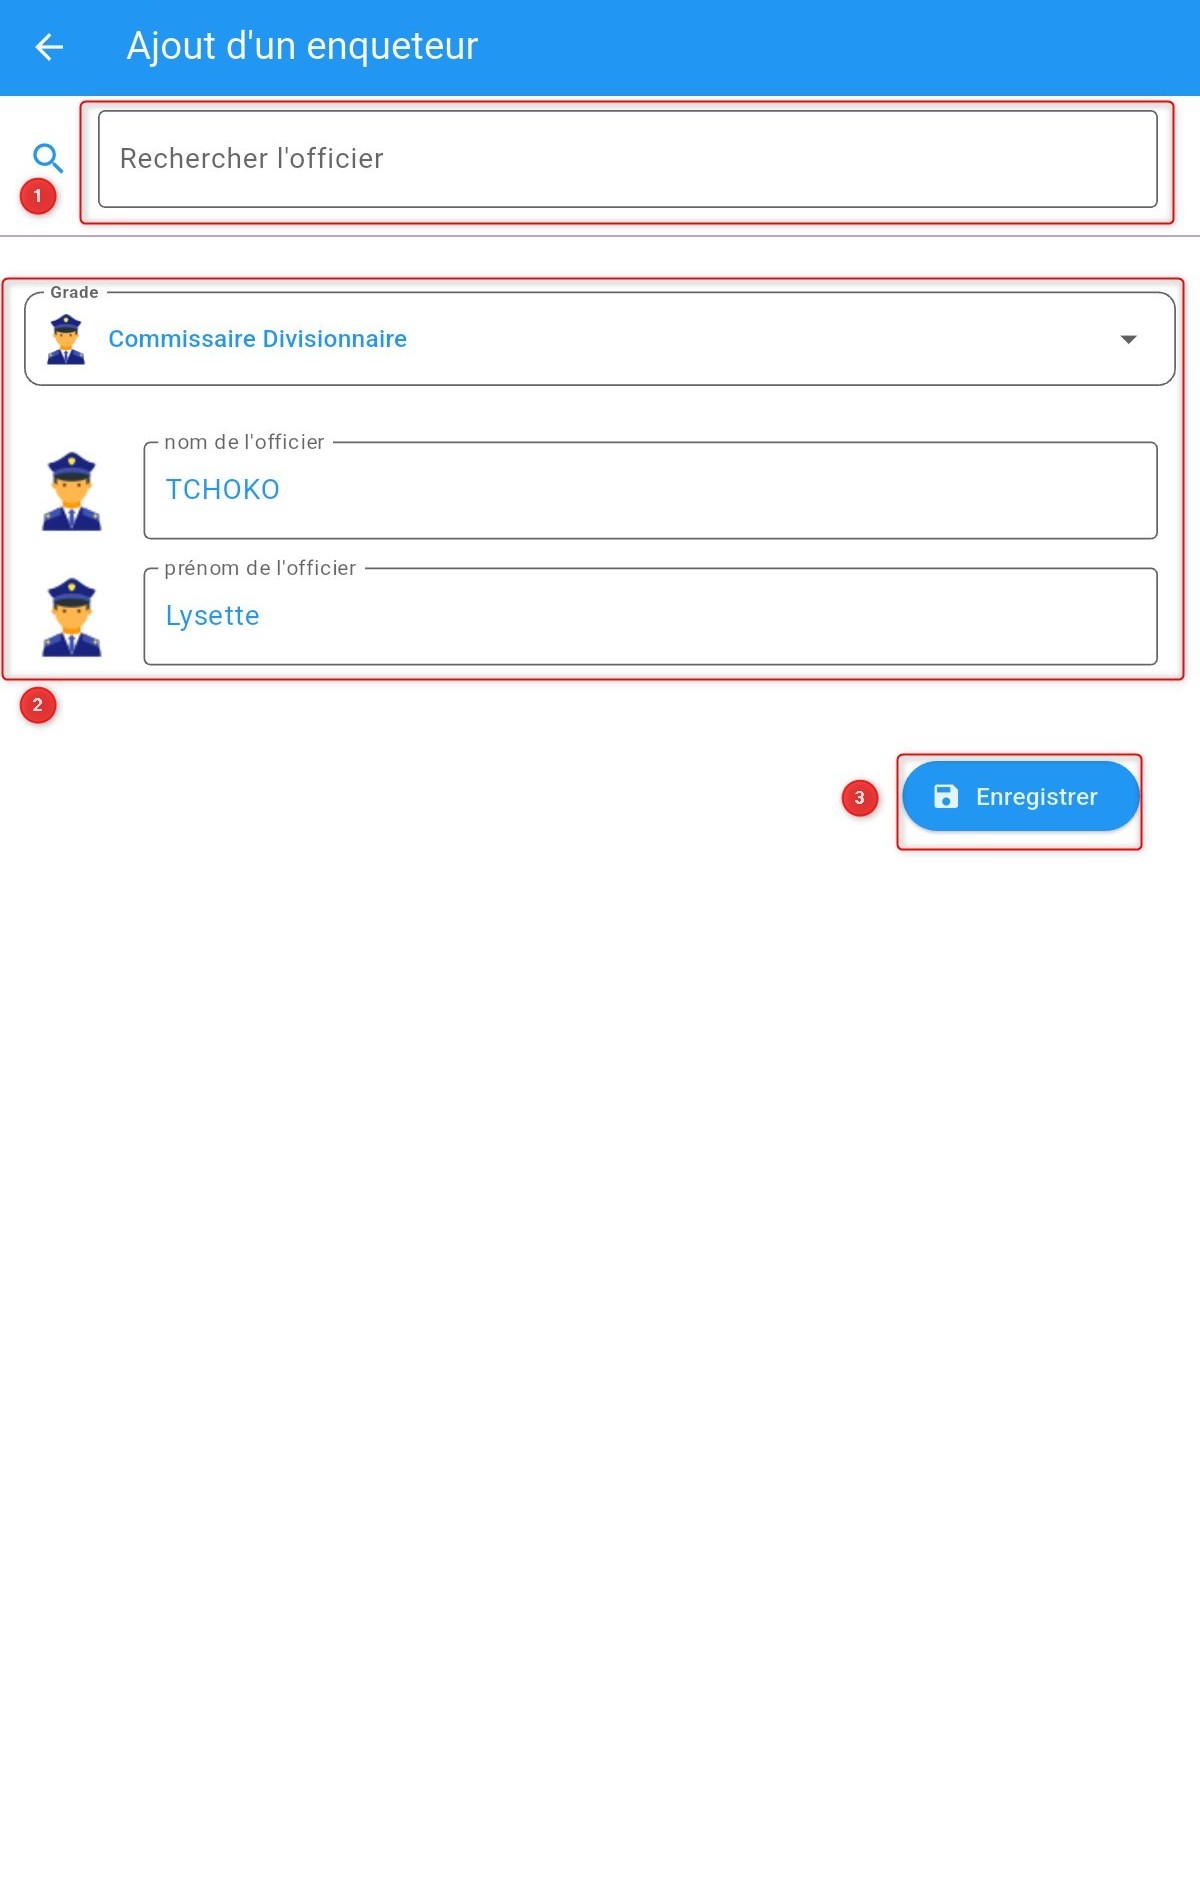
Adding investigator details
1. Search for a pre-registered officer by name
2. Manually fill in the fields
3. Click Save
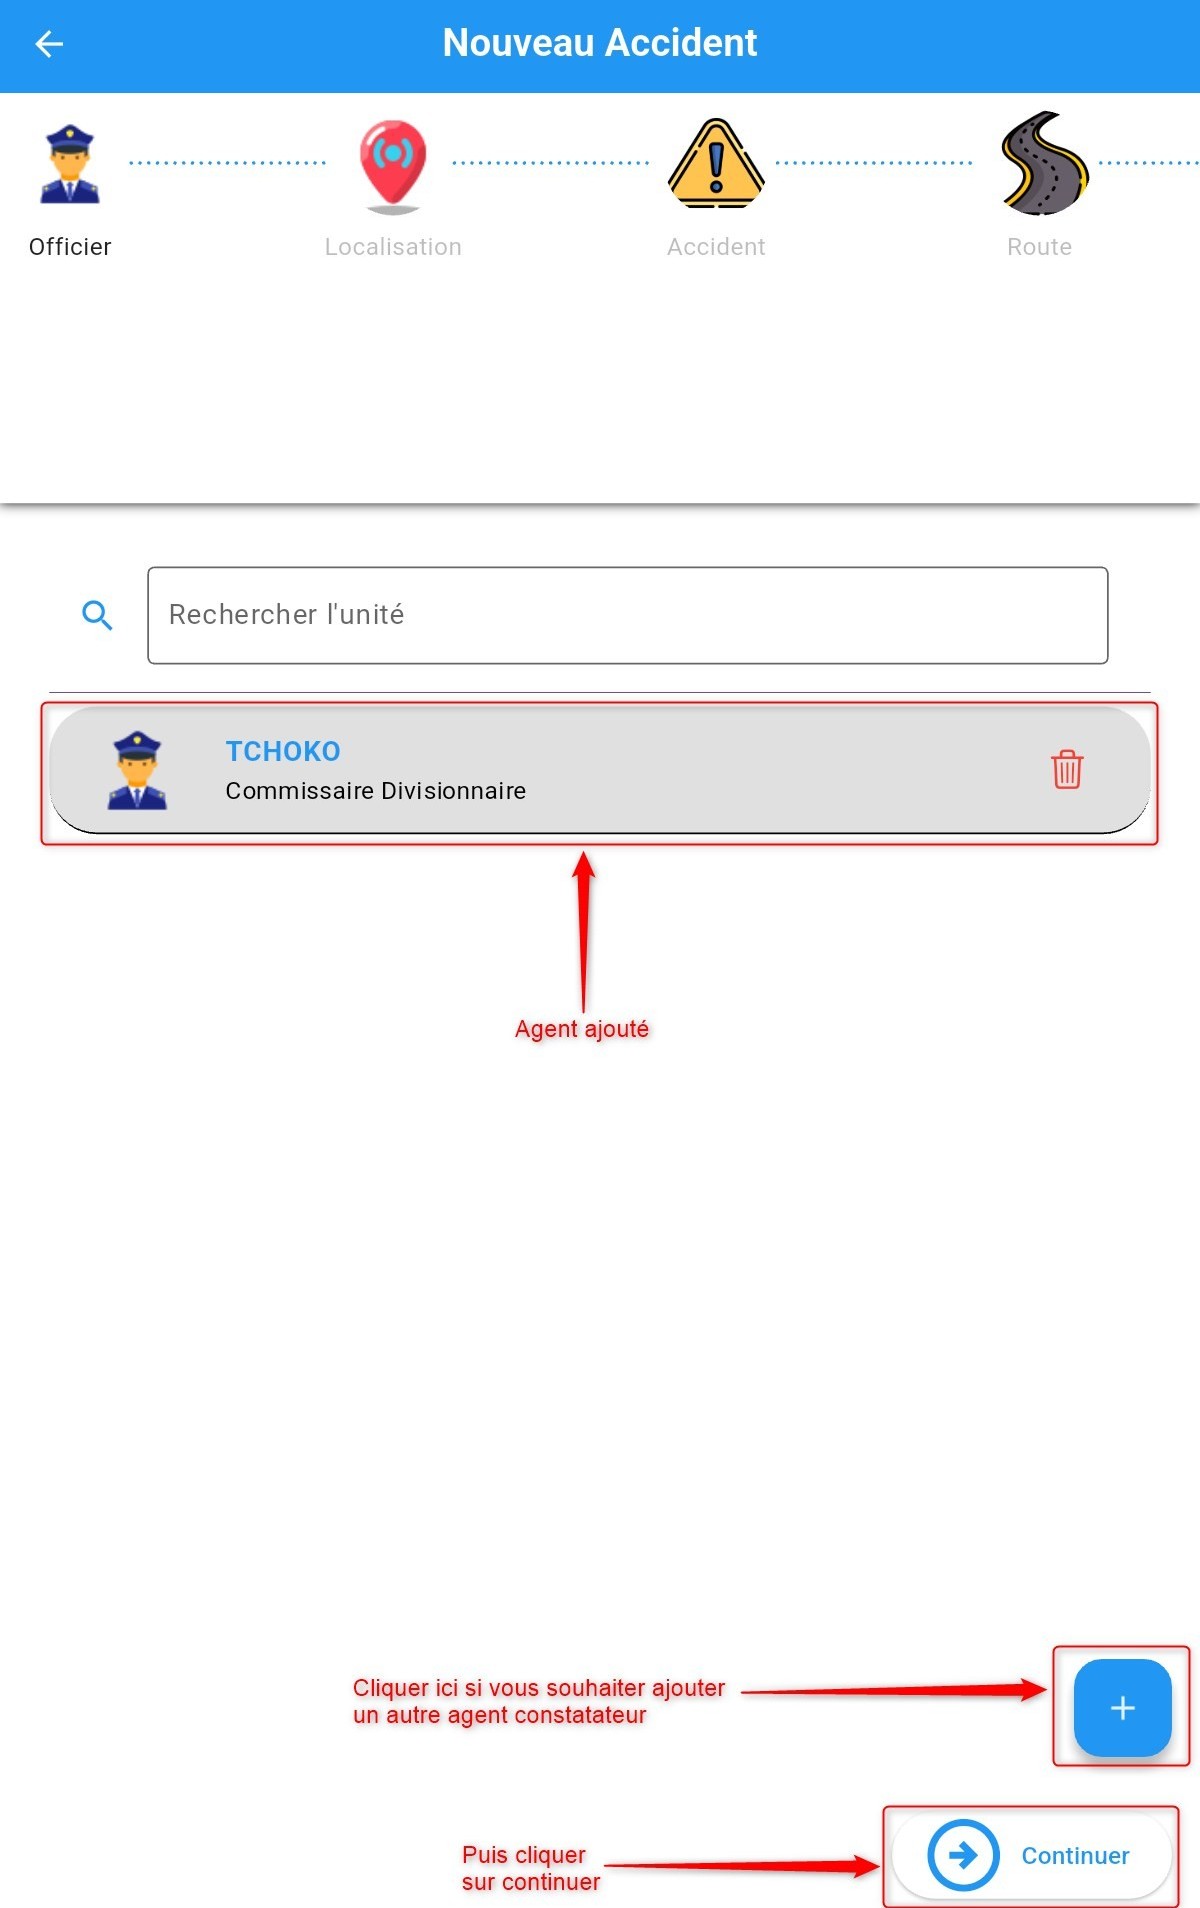
Investigator saved
Click Continue to complete this step and proceed to the next one.
Location
To enter the accident location, there are two methods:
Method 1: Manually entering location information
You must enter the following details:
Region
Department
City
Municipality
Neighborhood
Landmark
Latitude
Longitude
Then, click Continue to proceed to the next step.
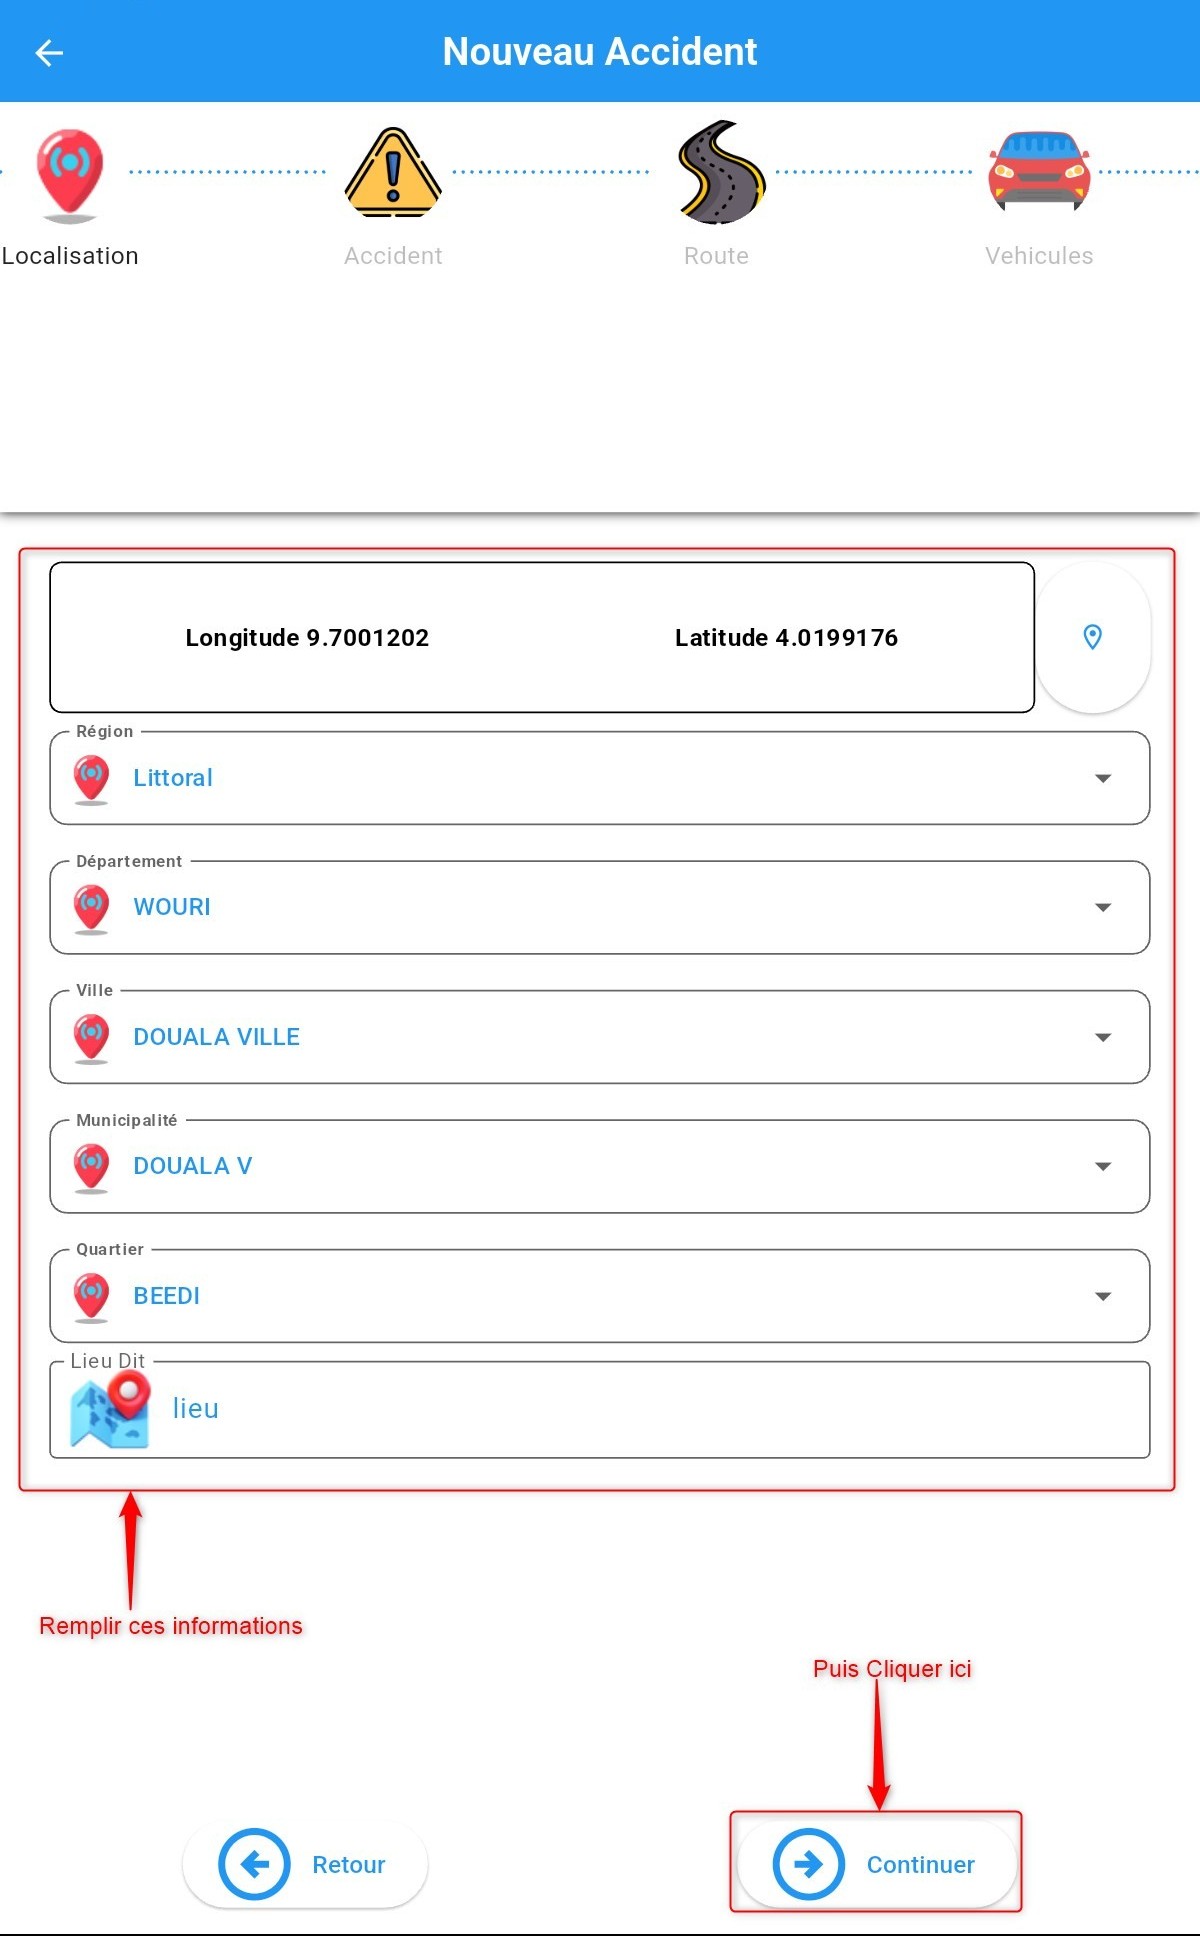
Location information
Method 2: Selecting the location on the map
For users who prefer using the map, locate the accident area on the map and select the position.

Location details
Click Continue to proceed to the next step.
Accident
Fill in the form fields that appear.
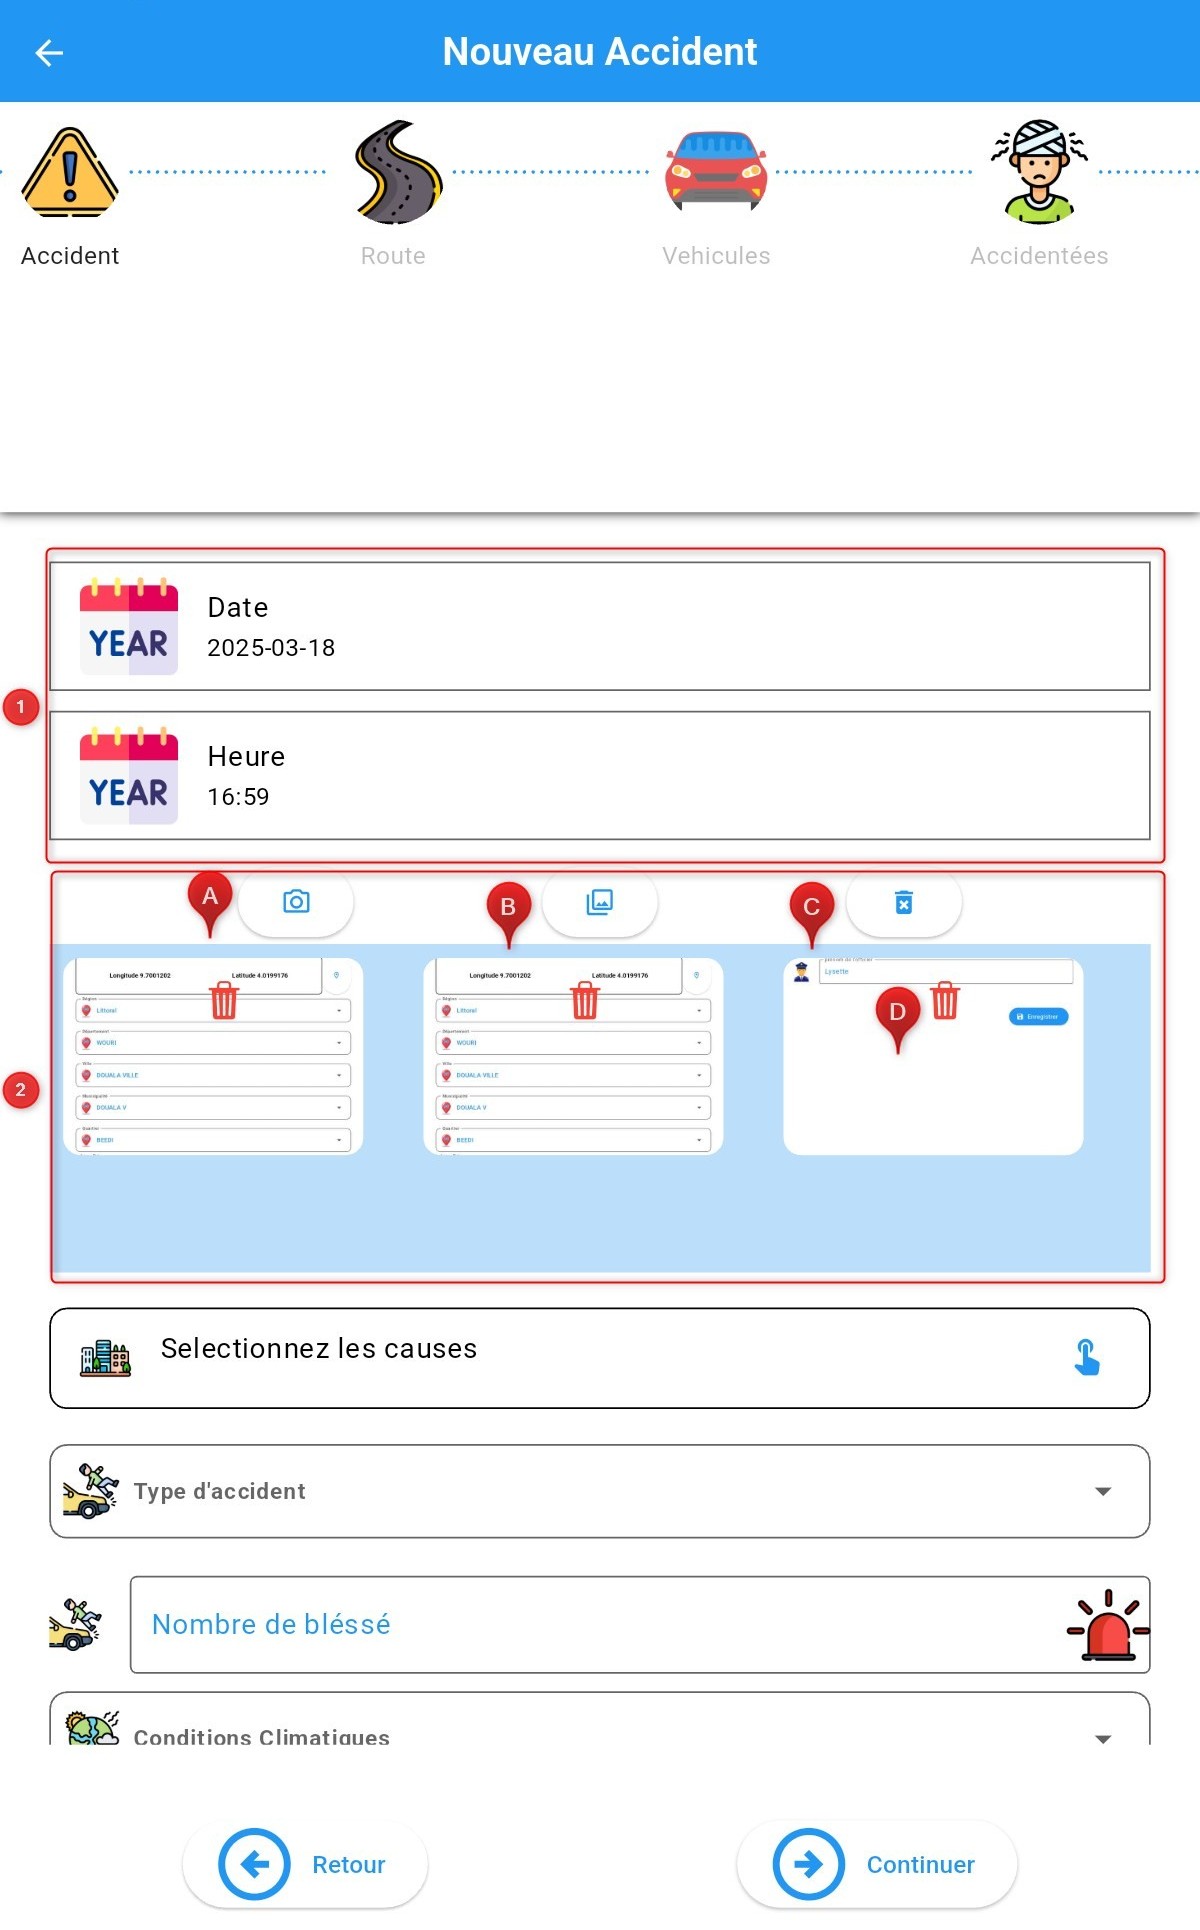
Accident section
1. Enter the date and time
2. Add photos
A. Take a photo
B. Select a photo from the gallery
C. Delete all captured or selected photos
D. Delete a specific photo
Then, complete the rest of the form fields: * By selecting options from the provided list * Or by manually entering text using the keyboard
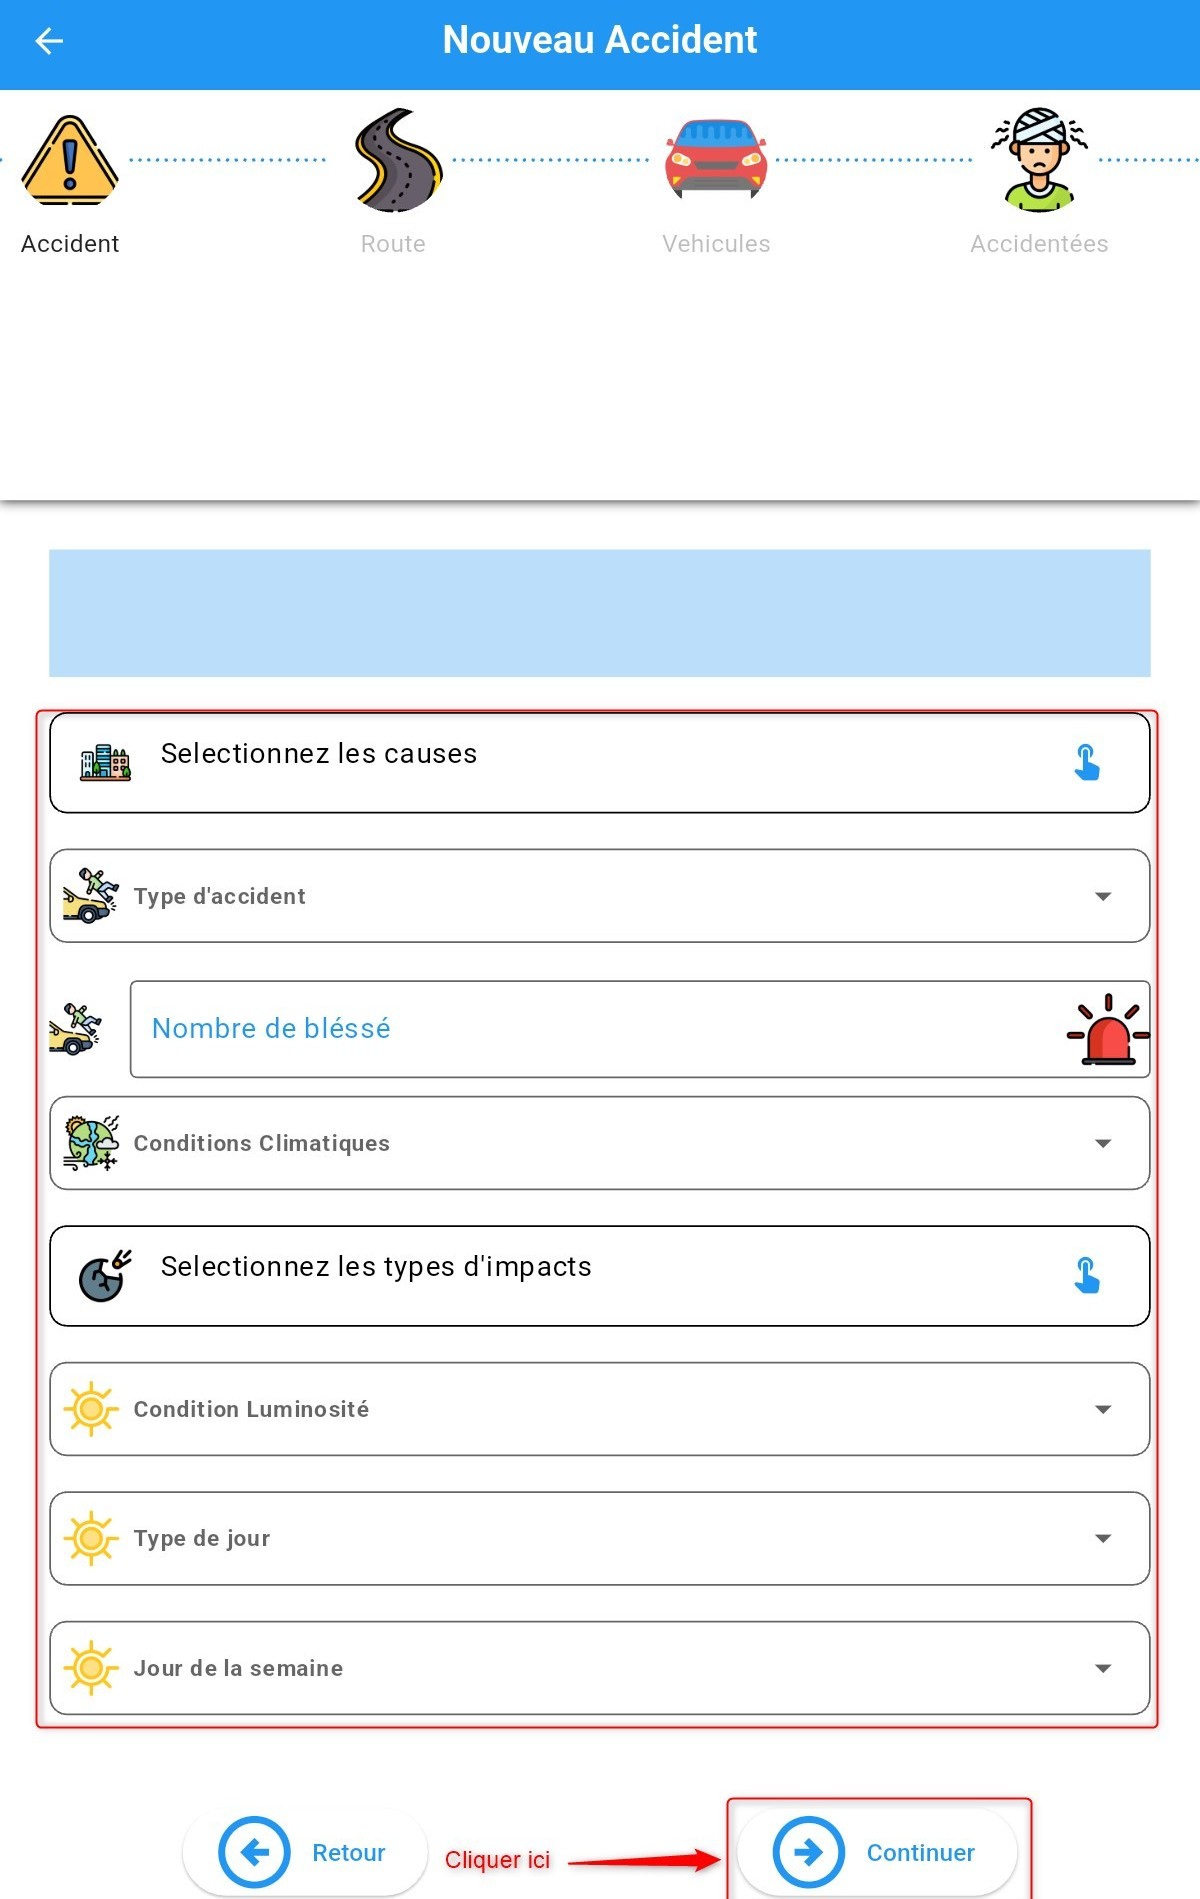
Accident section
Click Continue to proceed to the next step.
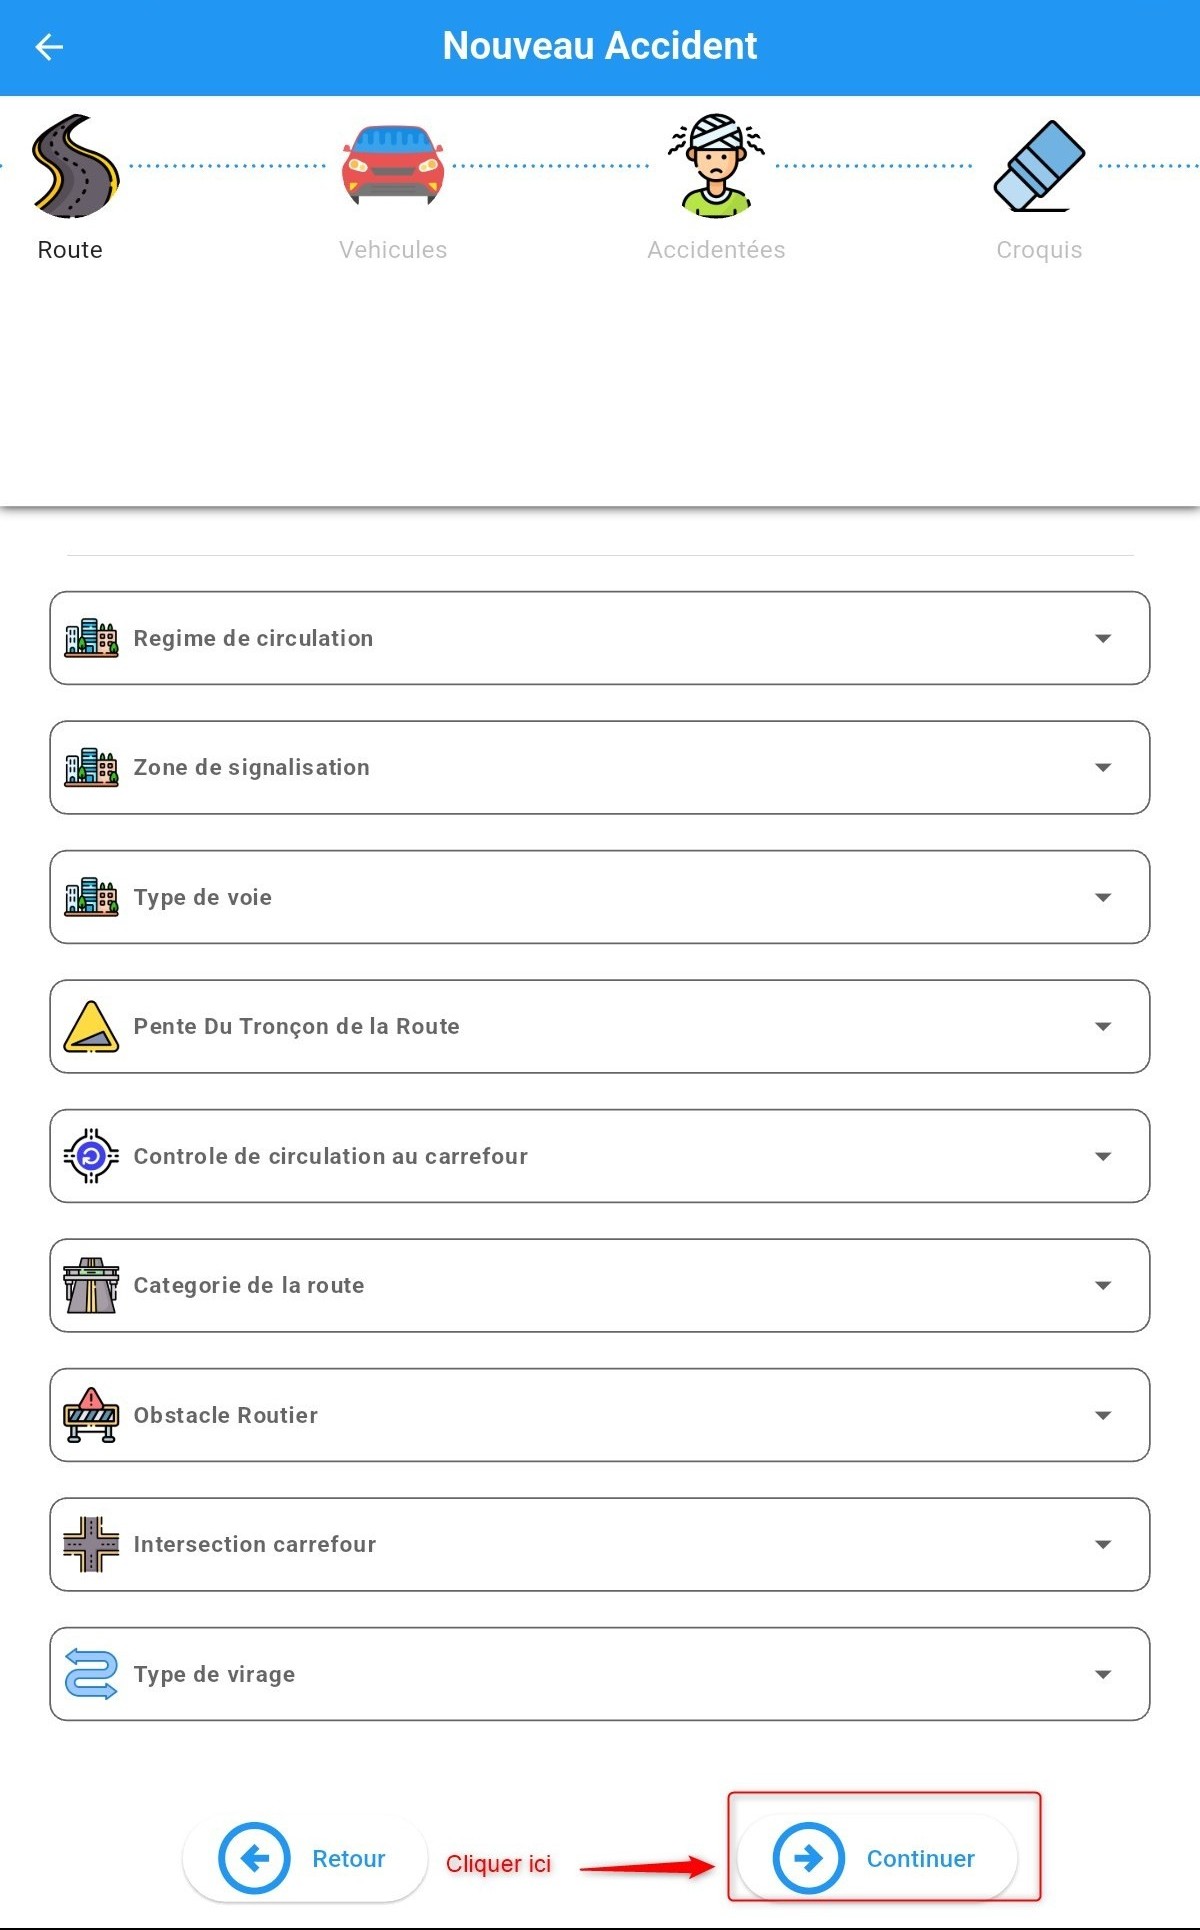
Road
At this step, you must provide information about the road.
Fill in the form fields:
By selecting options from the provided list
Or by manually entering text using the keyboard
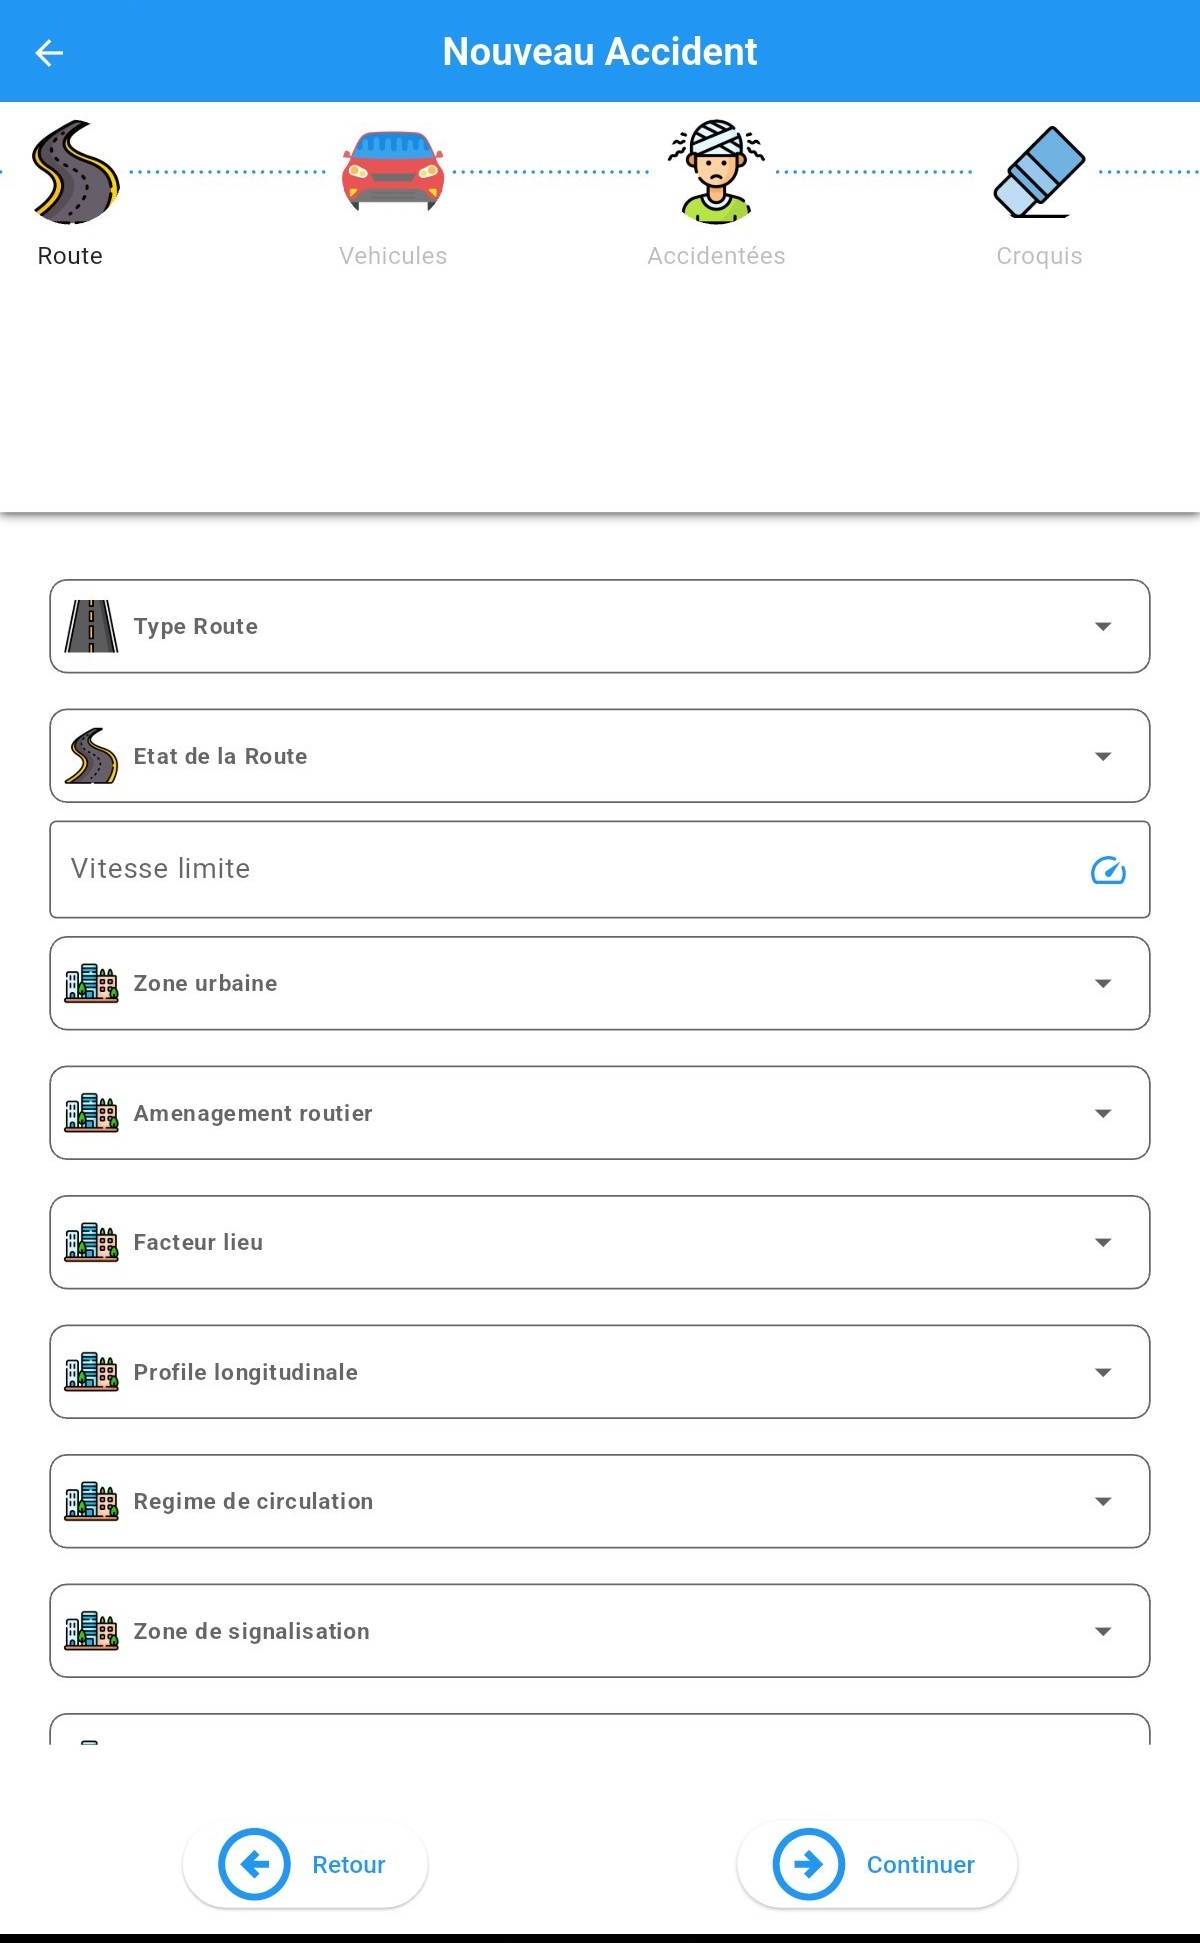
Road information
Road information
Click Continue to proceed to the next step.
Involved Vehicles
Enter details about the vehicles involved in the accident. Click the add button as shown in the image below to add a vehicle.
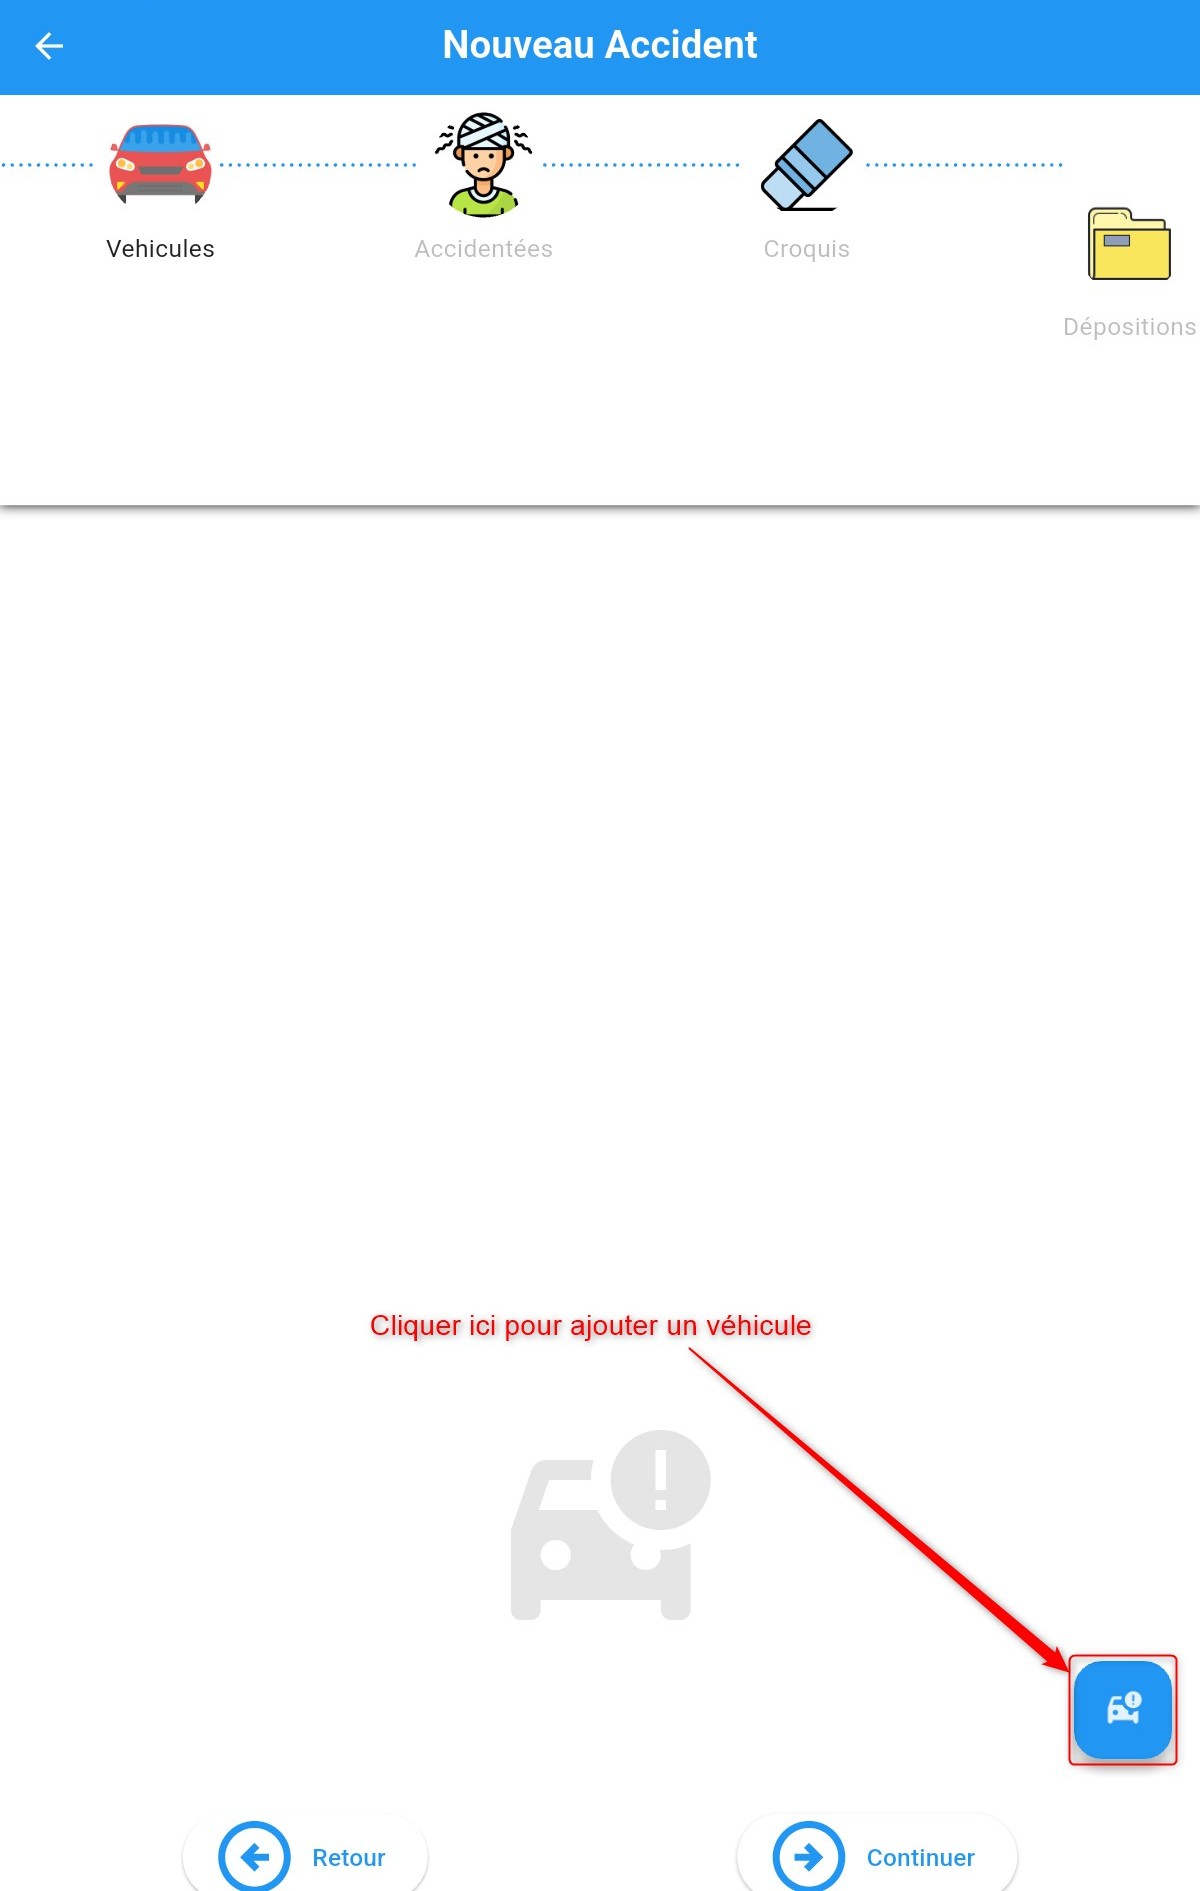
Adding a vehicle
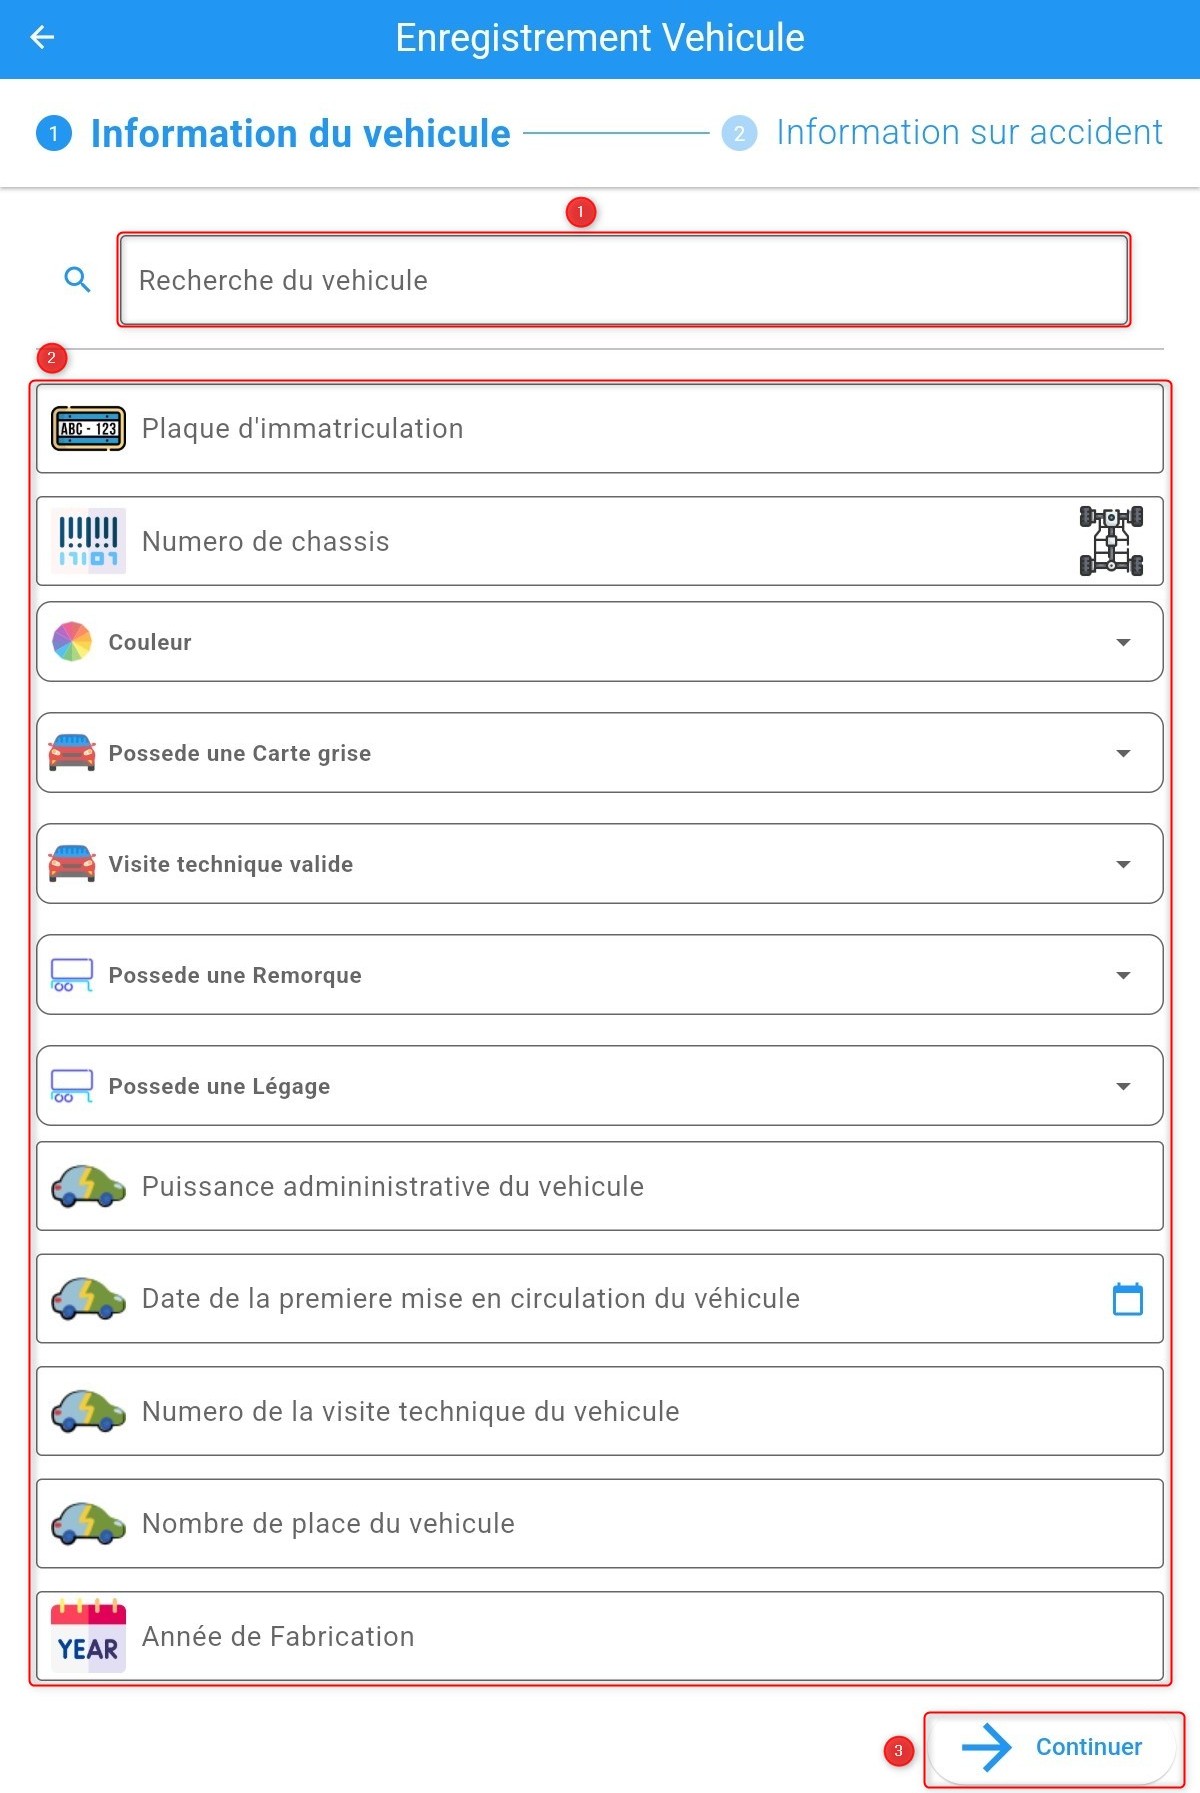
Adding a vehicle involves two steps: Vehicle information and Accident details.
1. Vehicle information
Fill in the vehicle details in the form in two ways:
By searching for a pre-registered vehicle in the search field. If found, selecting it will auto-fill the fields.
By manually entering all the information.
2. Accident details
Fill in accident-related information about the vehicle.
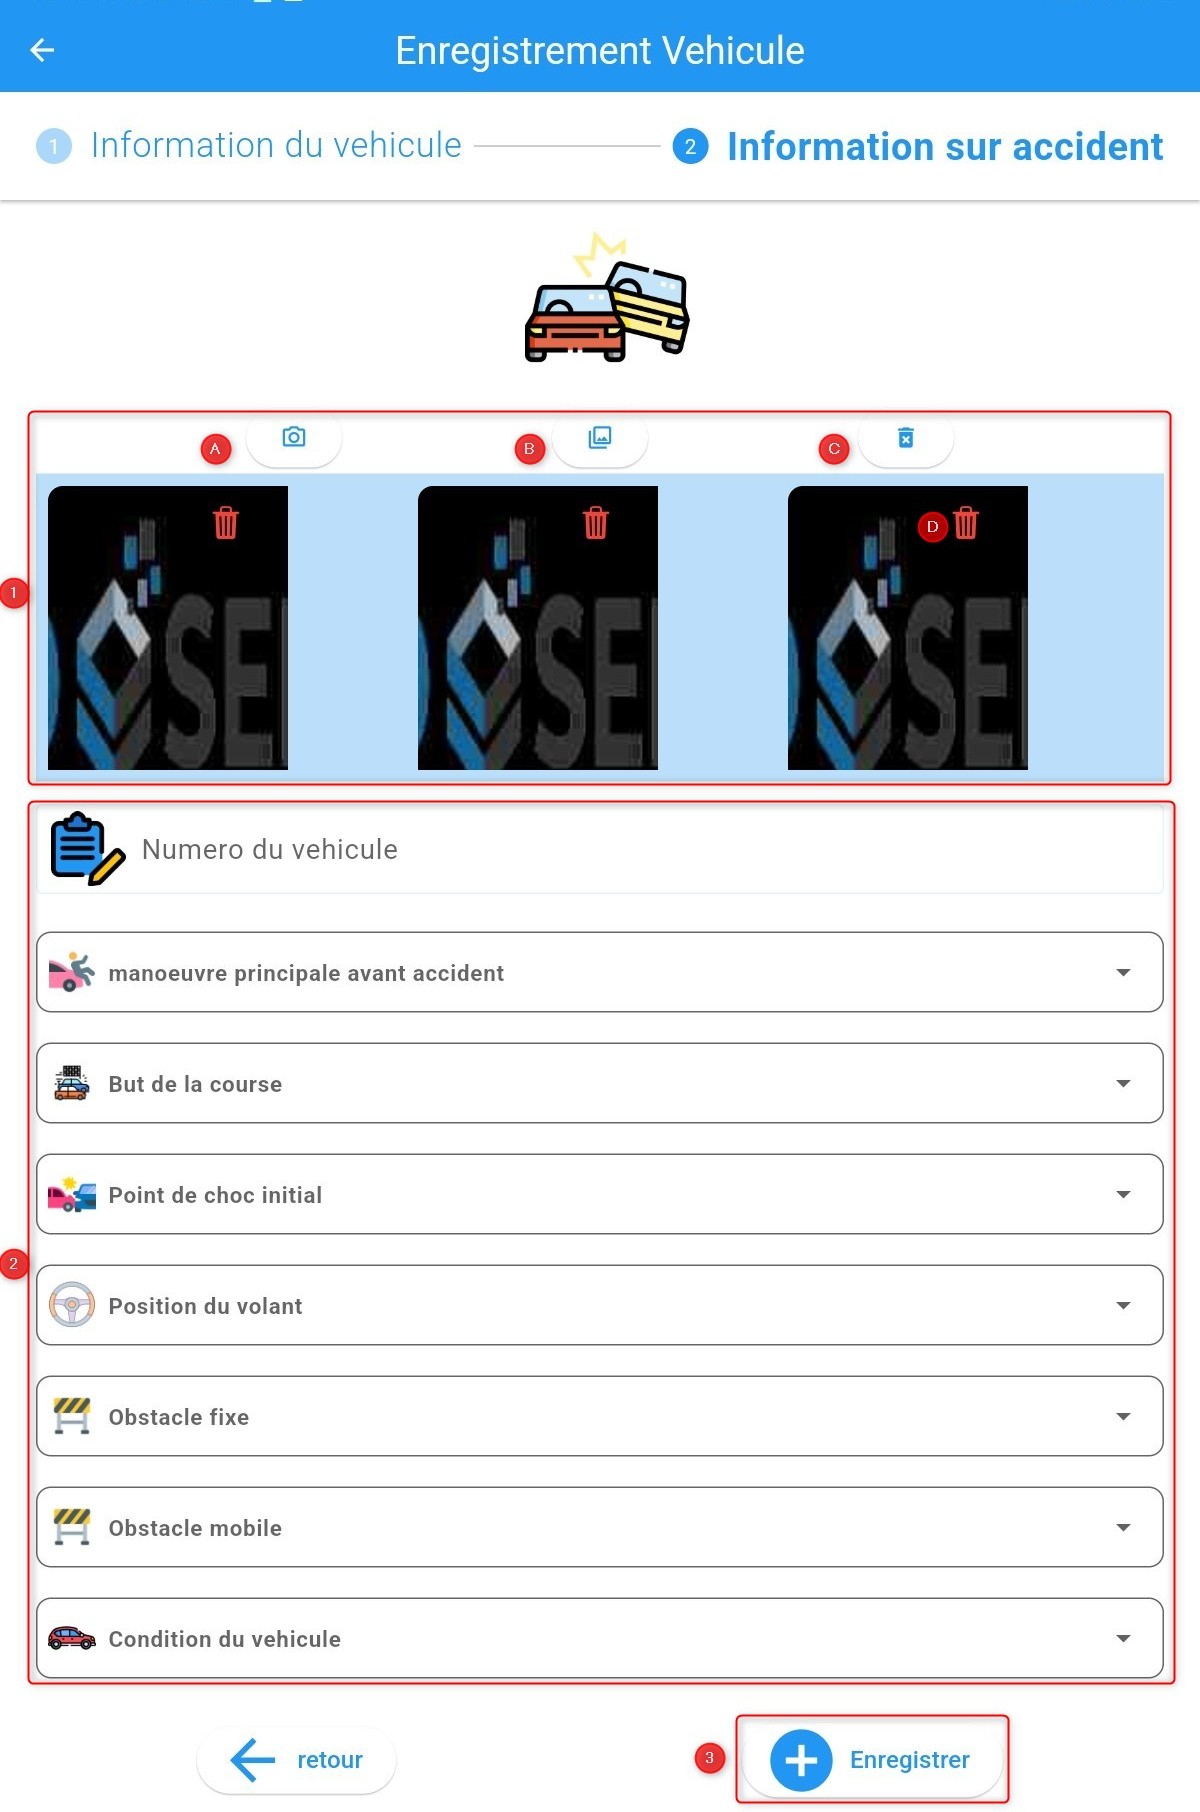
Vehicle accident information
Click Save to confirm. You can add more vehicles or click Continue.
Injured Users
Enter details about the individuals involved in the accident. Click the add button as shown below.
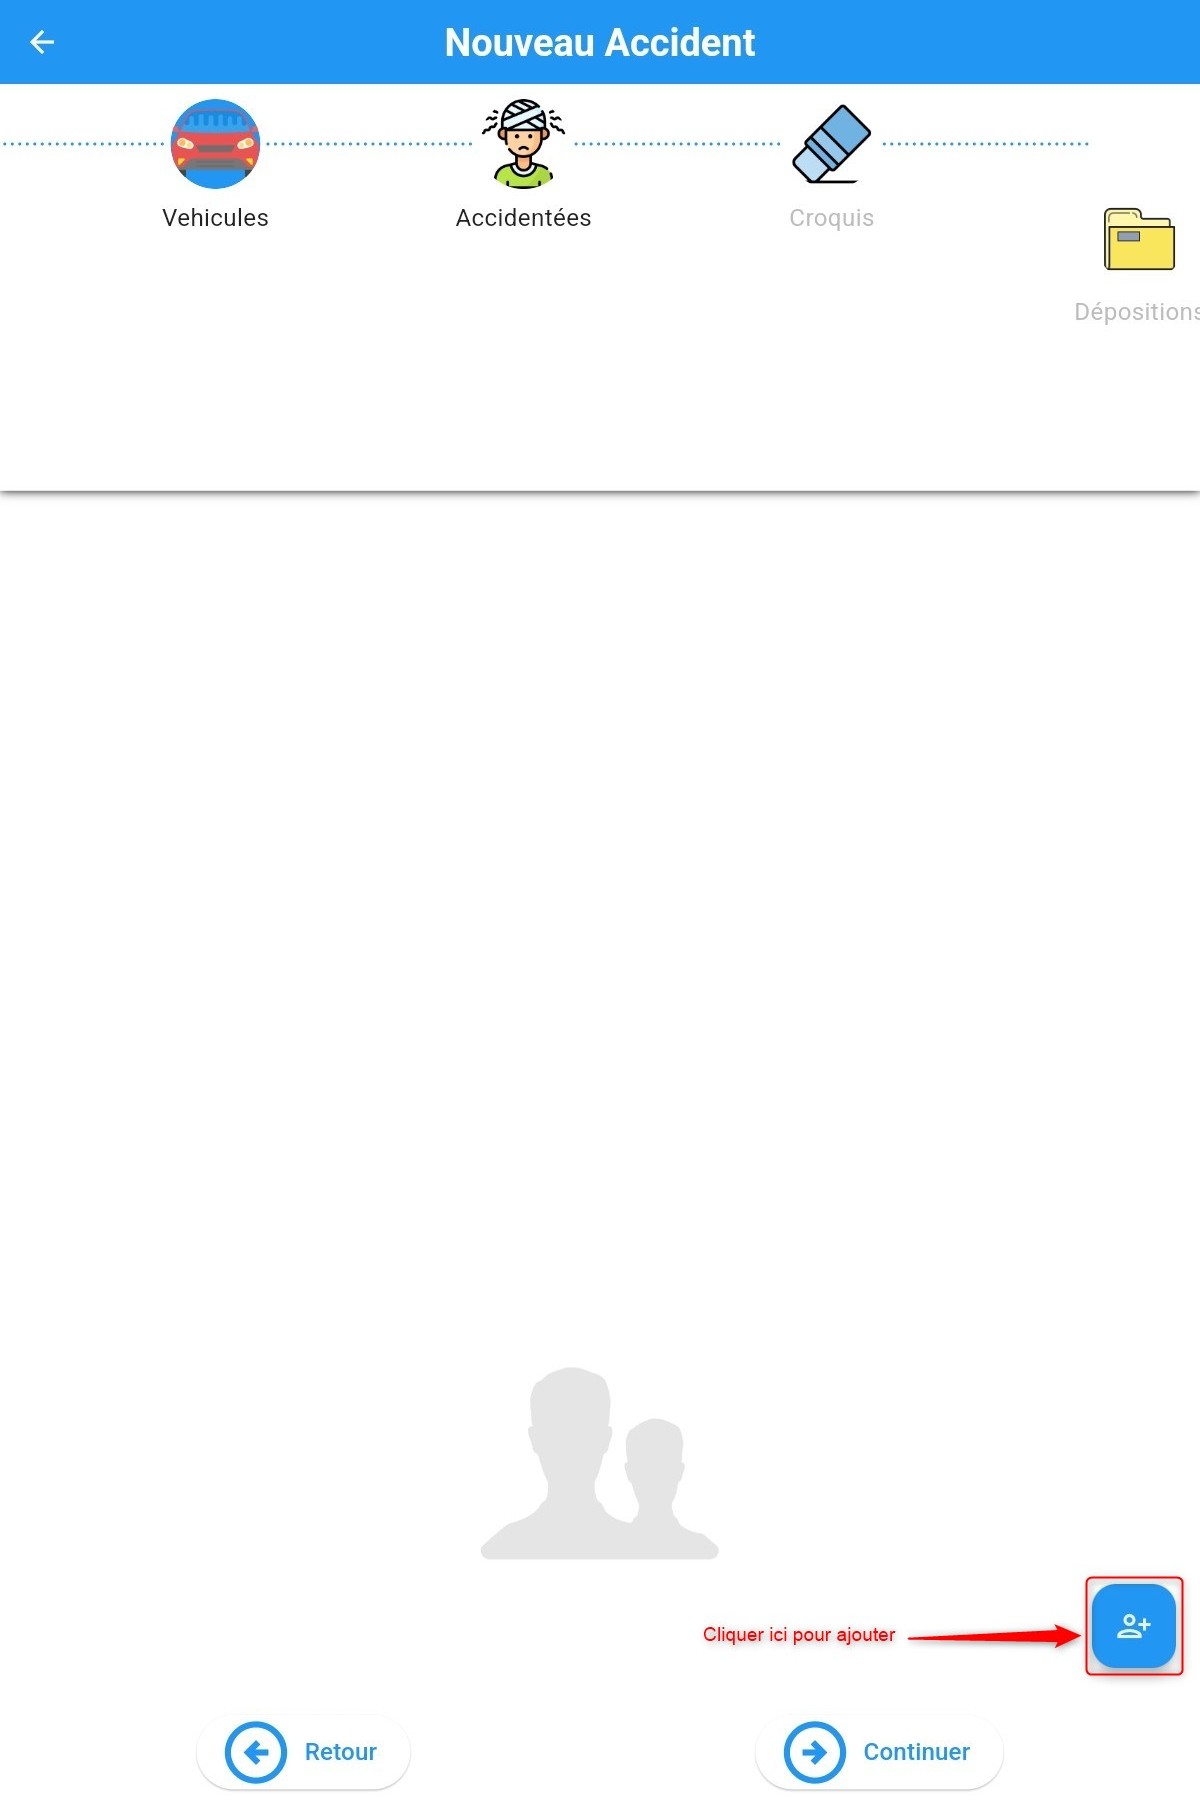
Adding an injured user
Fill in the details in the displayed form.
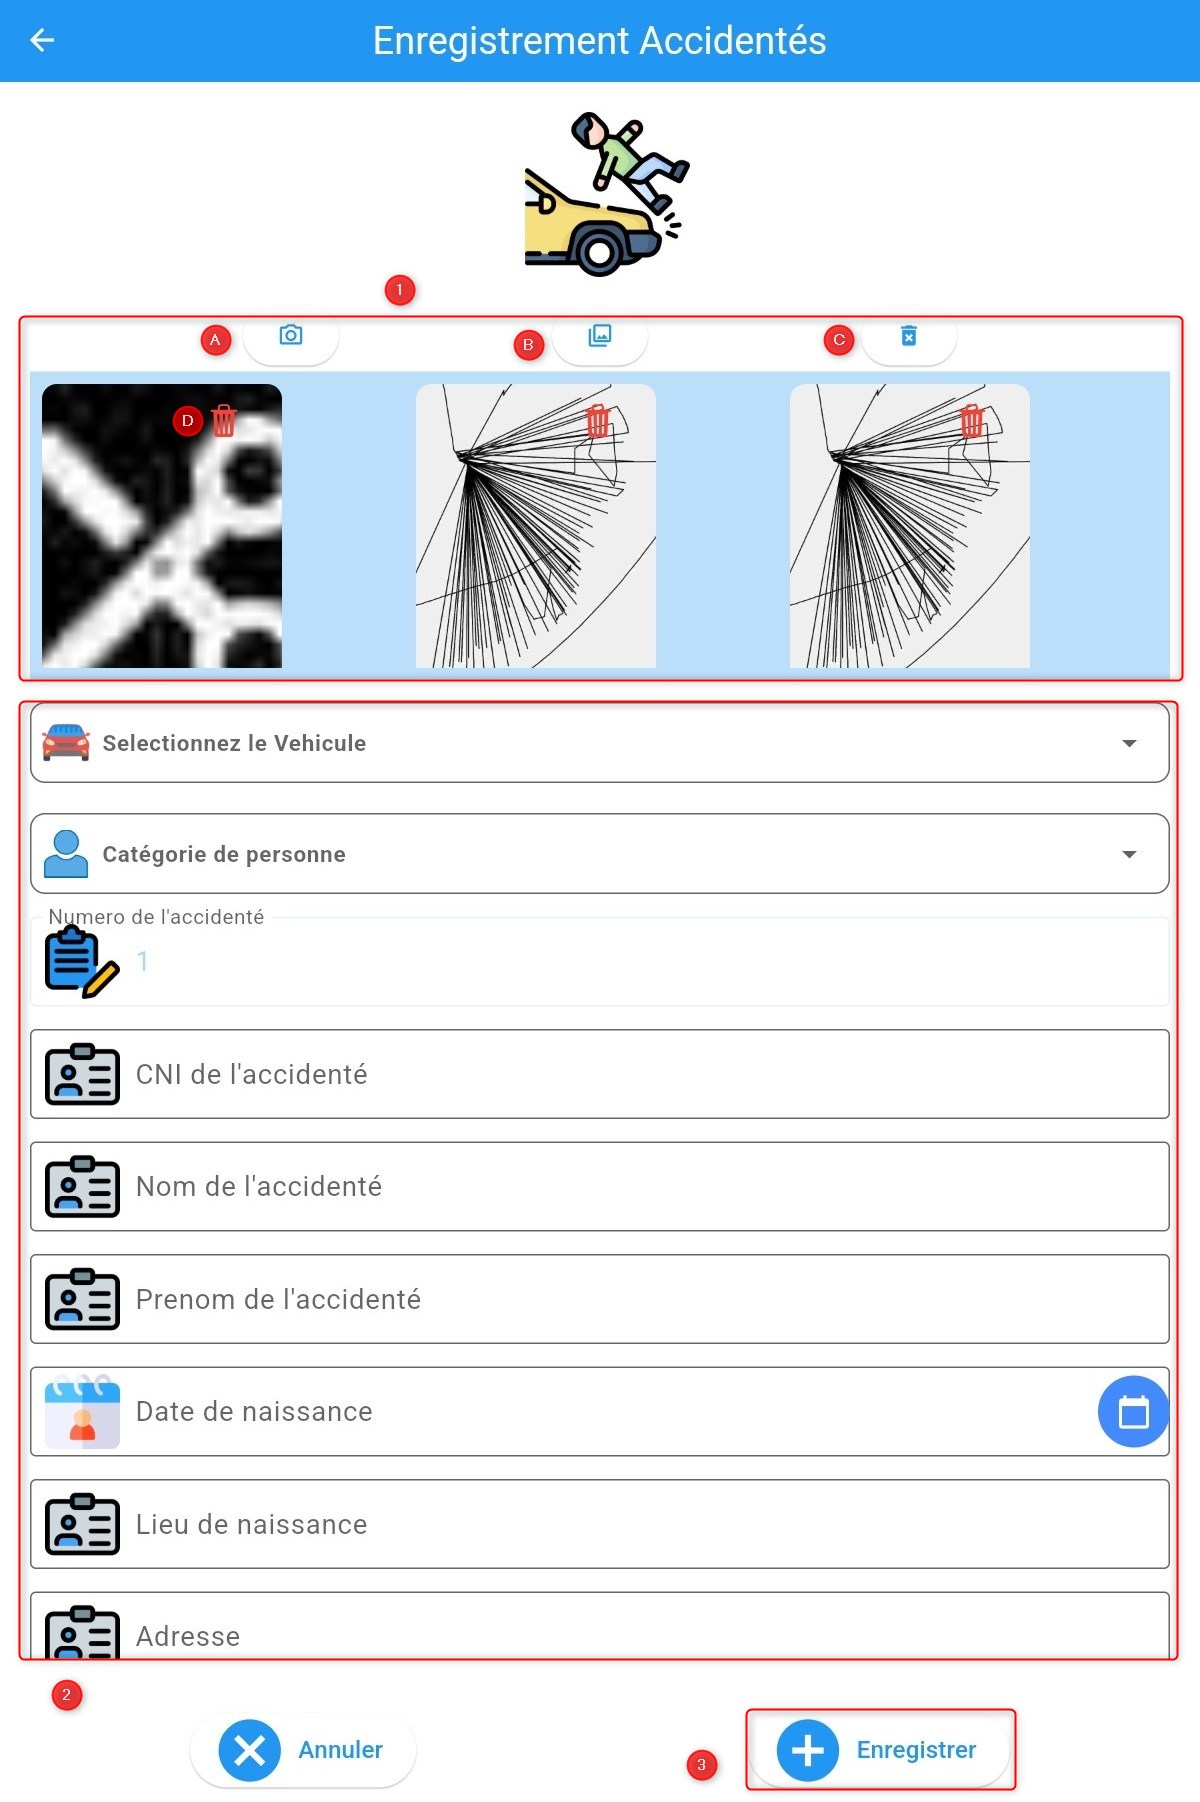
Injured user form
Click Save, then Continue to proceed.
Sketch
After clicking Continue, a drawing interface appears where you can create a sketch of the accident scene and save it.
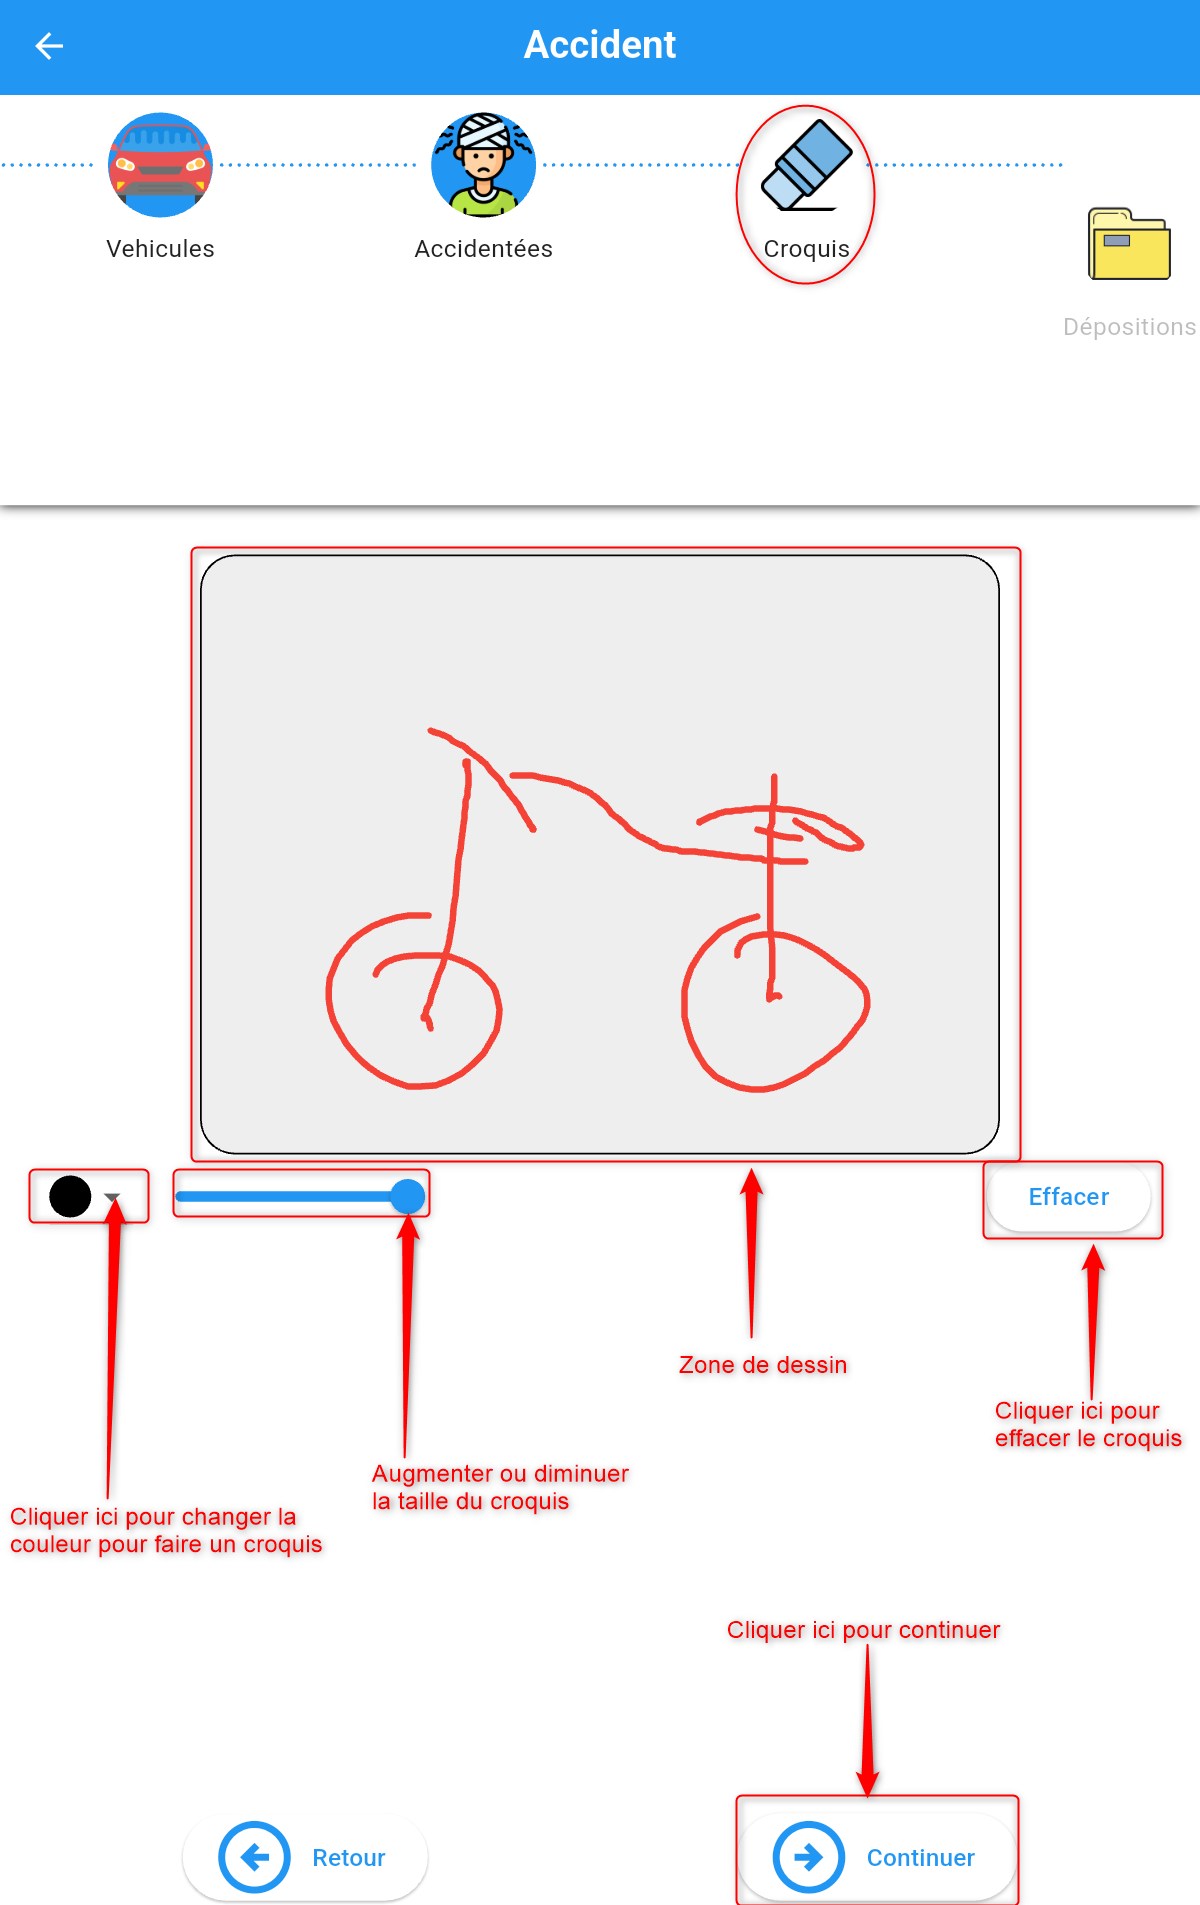
Adding a sketch
Click Continue to proceed.
Statements
In the statement section, you can add new statements by clicking the add button. You can also enter observations and remarks.
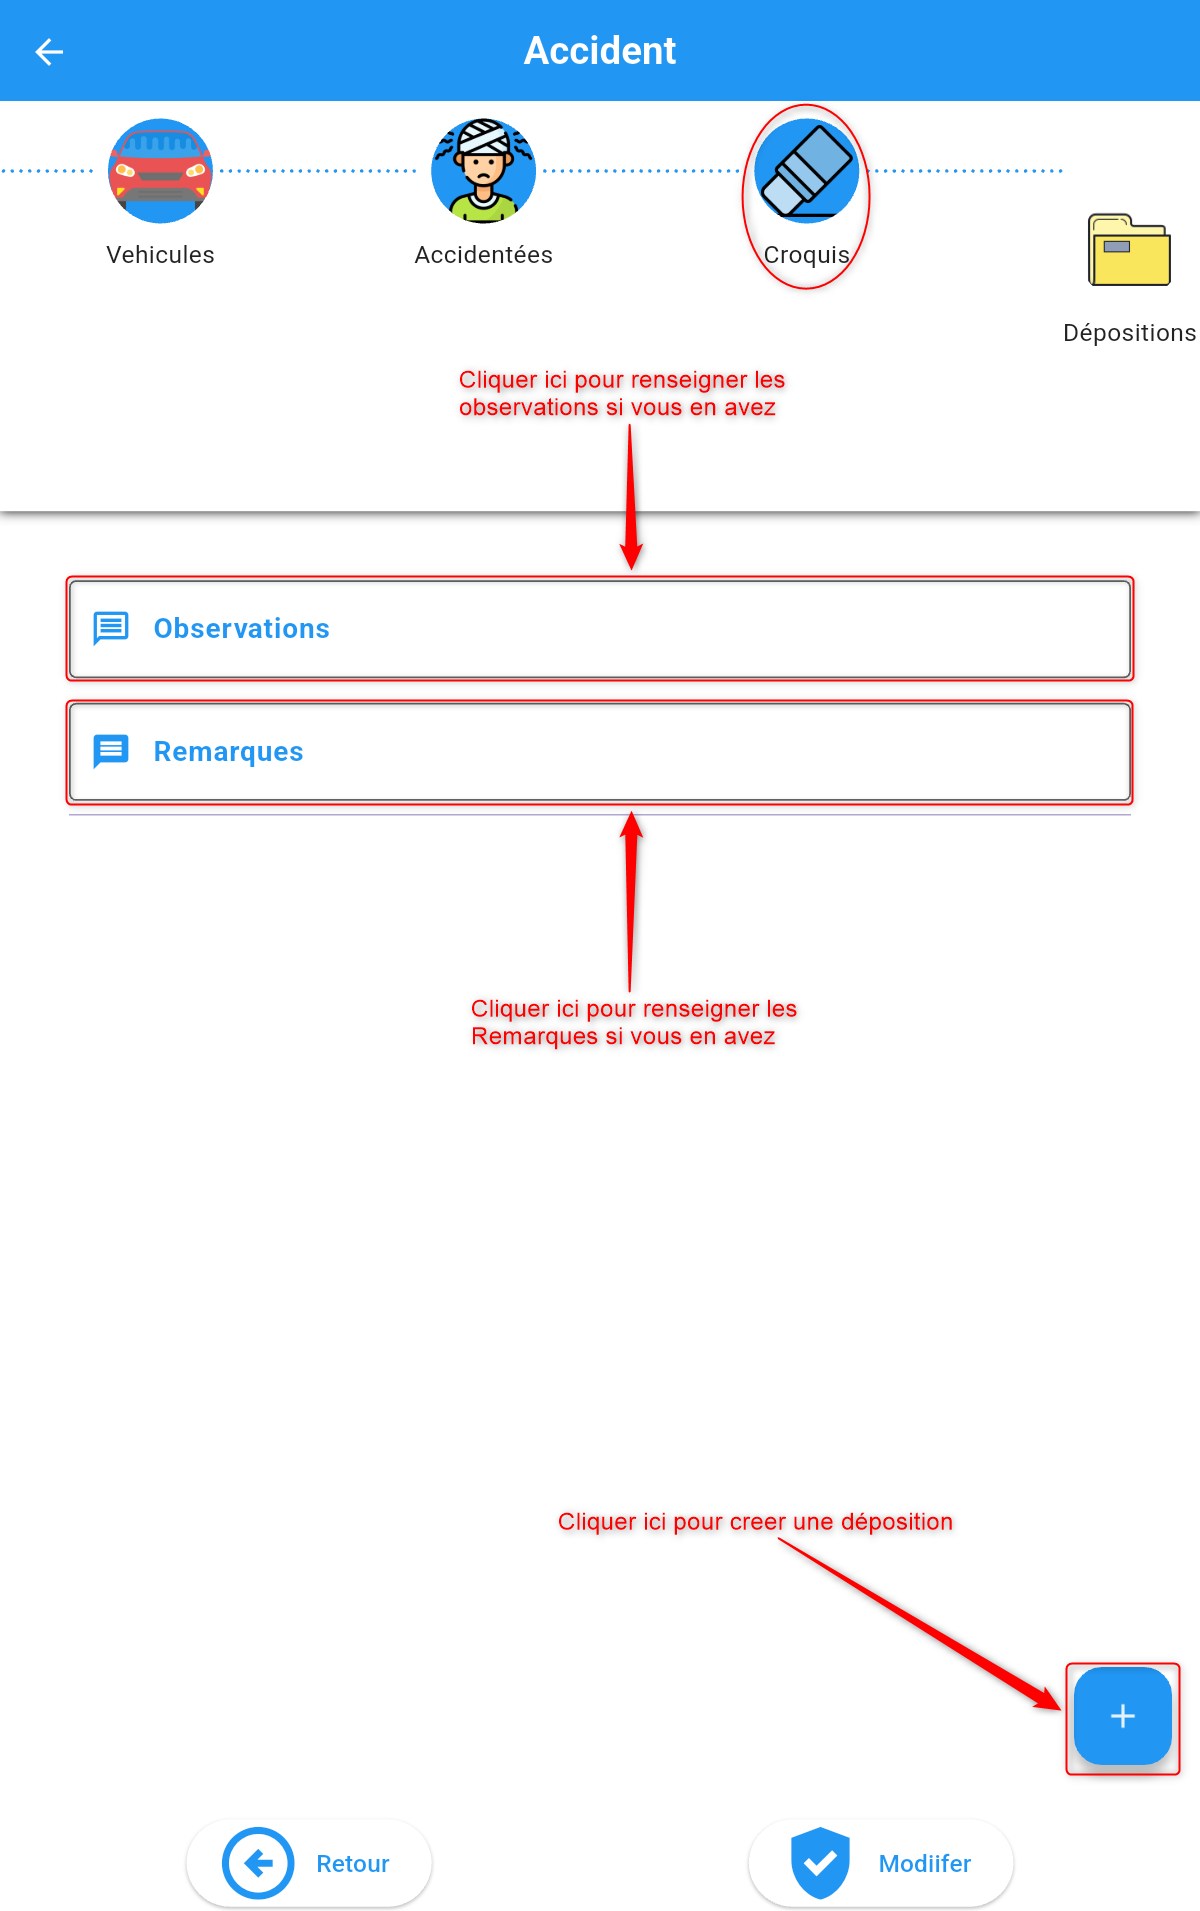
Statement addition home screen
After adding the statement, click Save.

Created statement
Click Finish to complete the accident declaration and return to the list of reported accidents.
List of declarations