PRODUCT AND SERVICE CONFIGURATION
The product and service configuration step is a crucial step for each hospital facility. Before using the features of this application, each hospital facility must enter the prices of the various examinations, treatments, medications, and its different categories of rooms, as prices depend on the organization.
NB: This configuration is done only once.
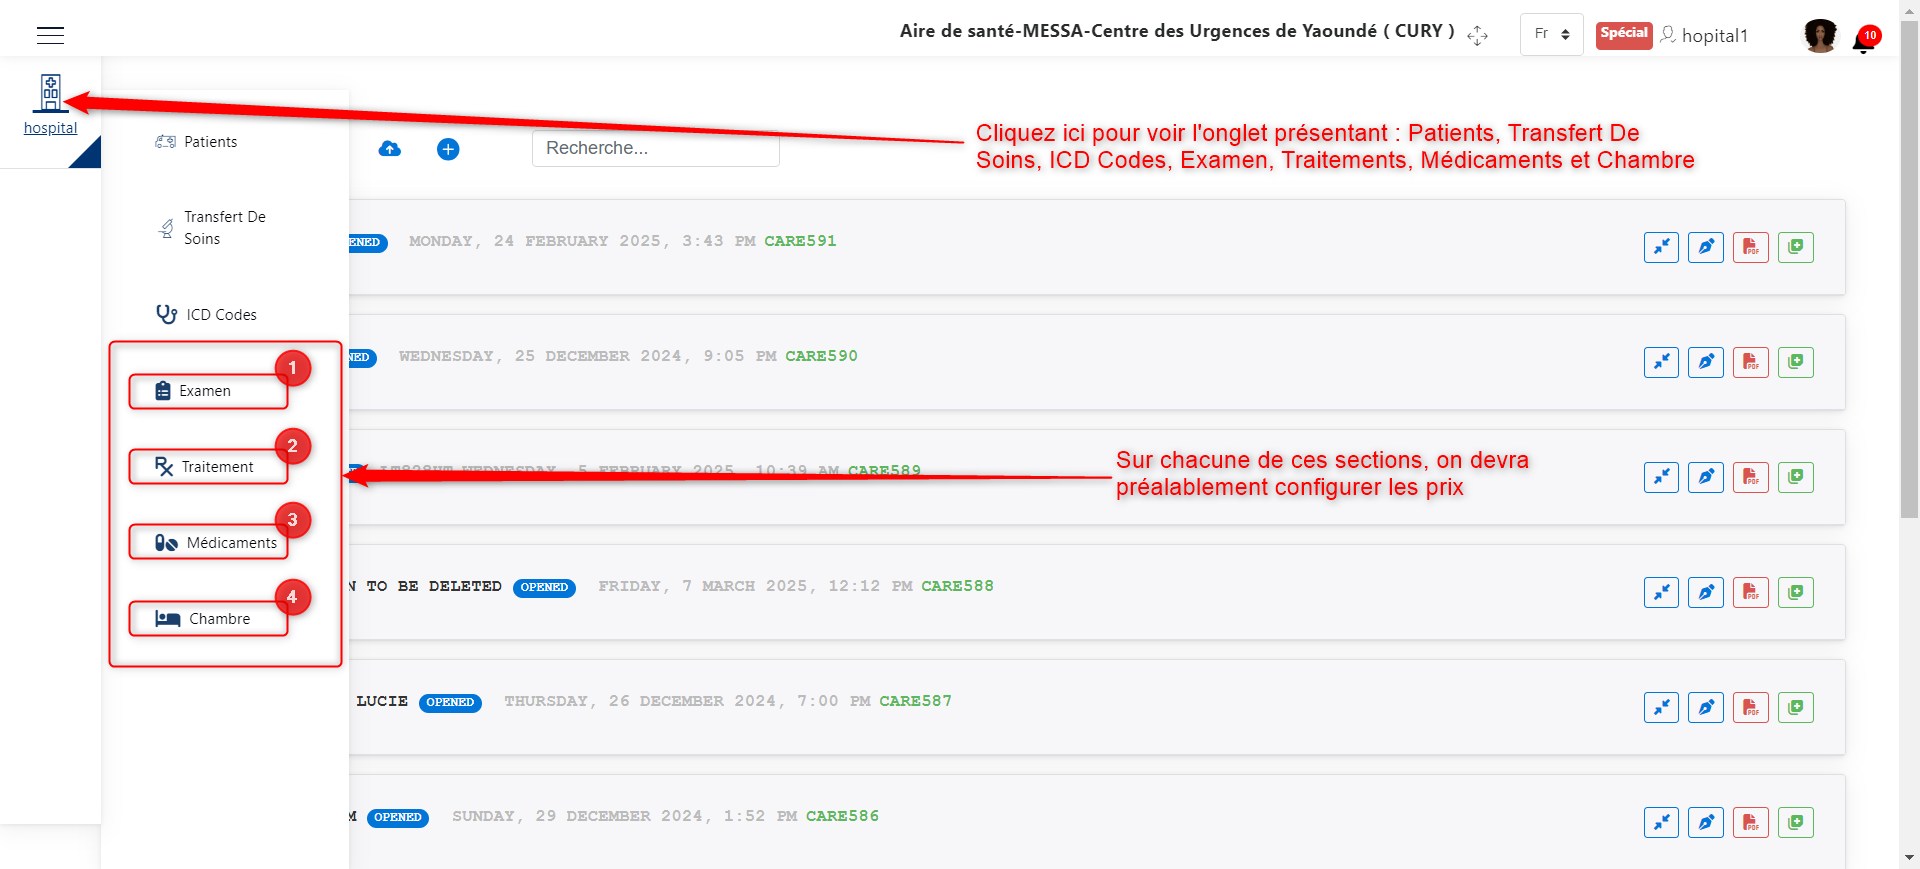
Product and Service Configuration.
As we can see in the image above, there are four main products and services for which we need to configure prices:
1. Examinations
2. Treatments
3. Medications
4. Rooms
We will now explain how to configure the prices of these products and services one by one.
Examinations
Click on 1 as shown in the following image to access the examination configuration interface.
The image below shows the examination configuration interface. The actions that can be performed here are:
Adding a new examination
Updating examination information
Deleting an examination
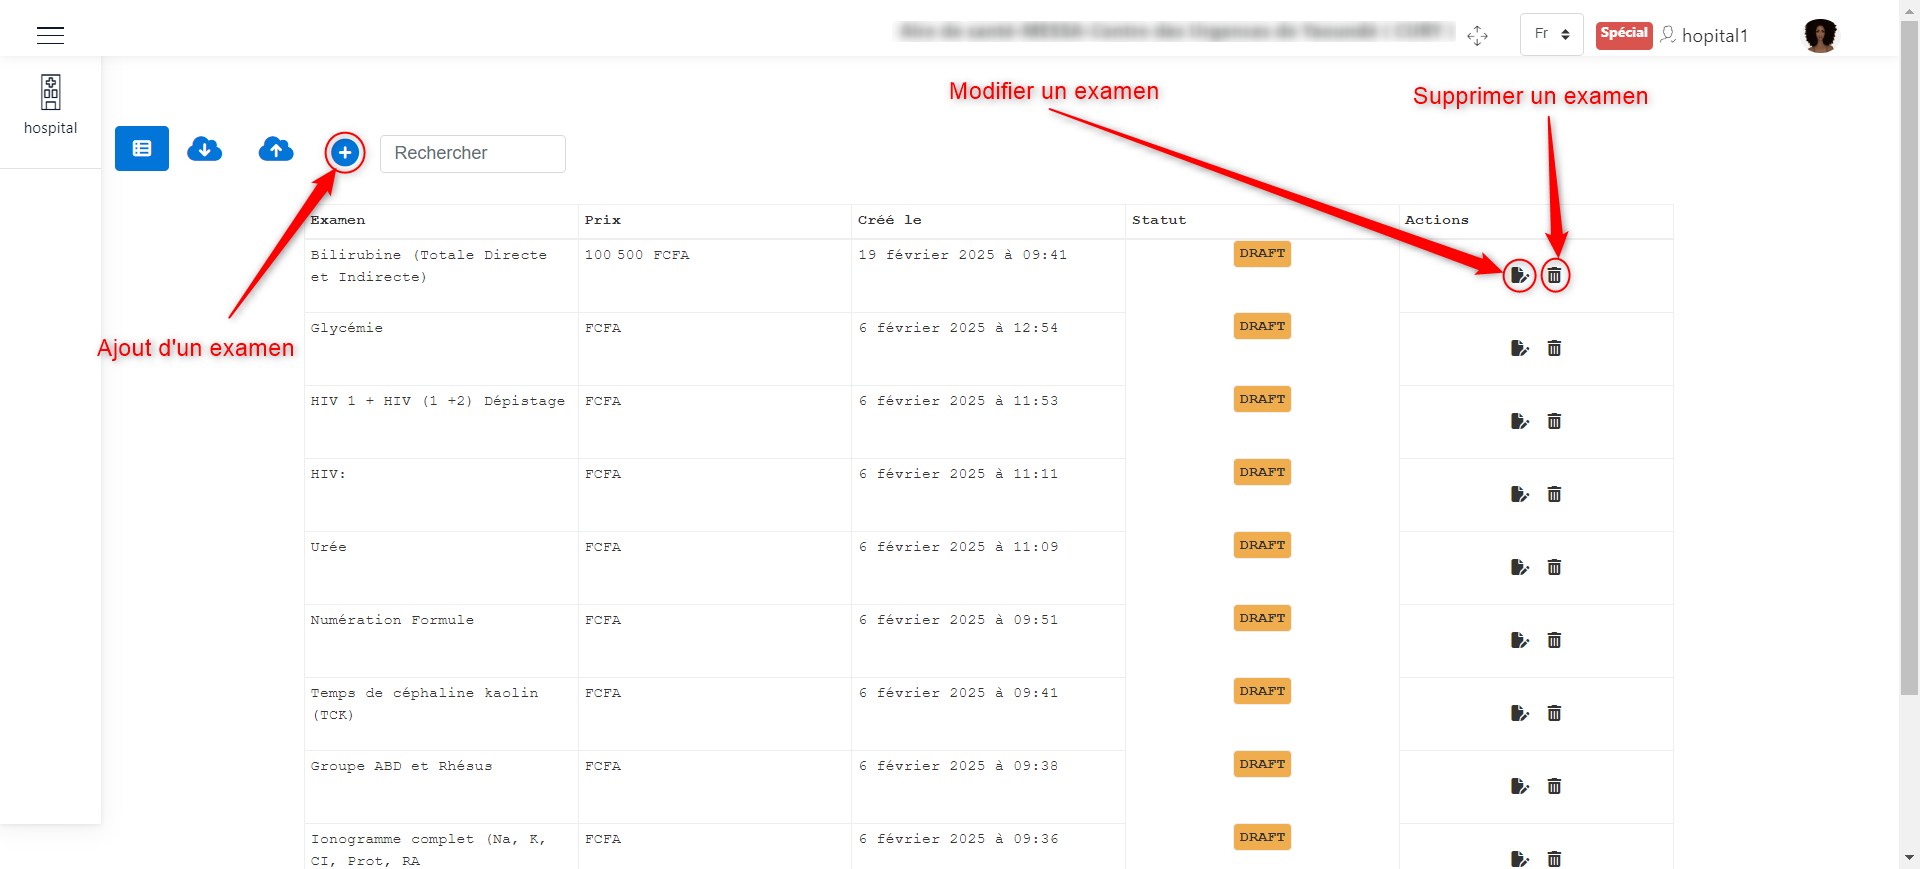
Examination Configuration.
When clicking on + to add an examination, as indicated here, a window appears where you can enter the examination details, such as its name and price.
Click the Save button to confirm the addition of the examination. The image below illustrates this scenario.
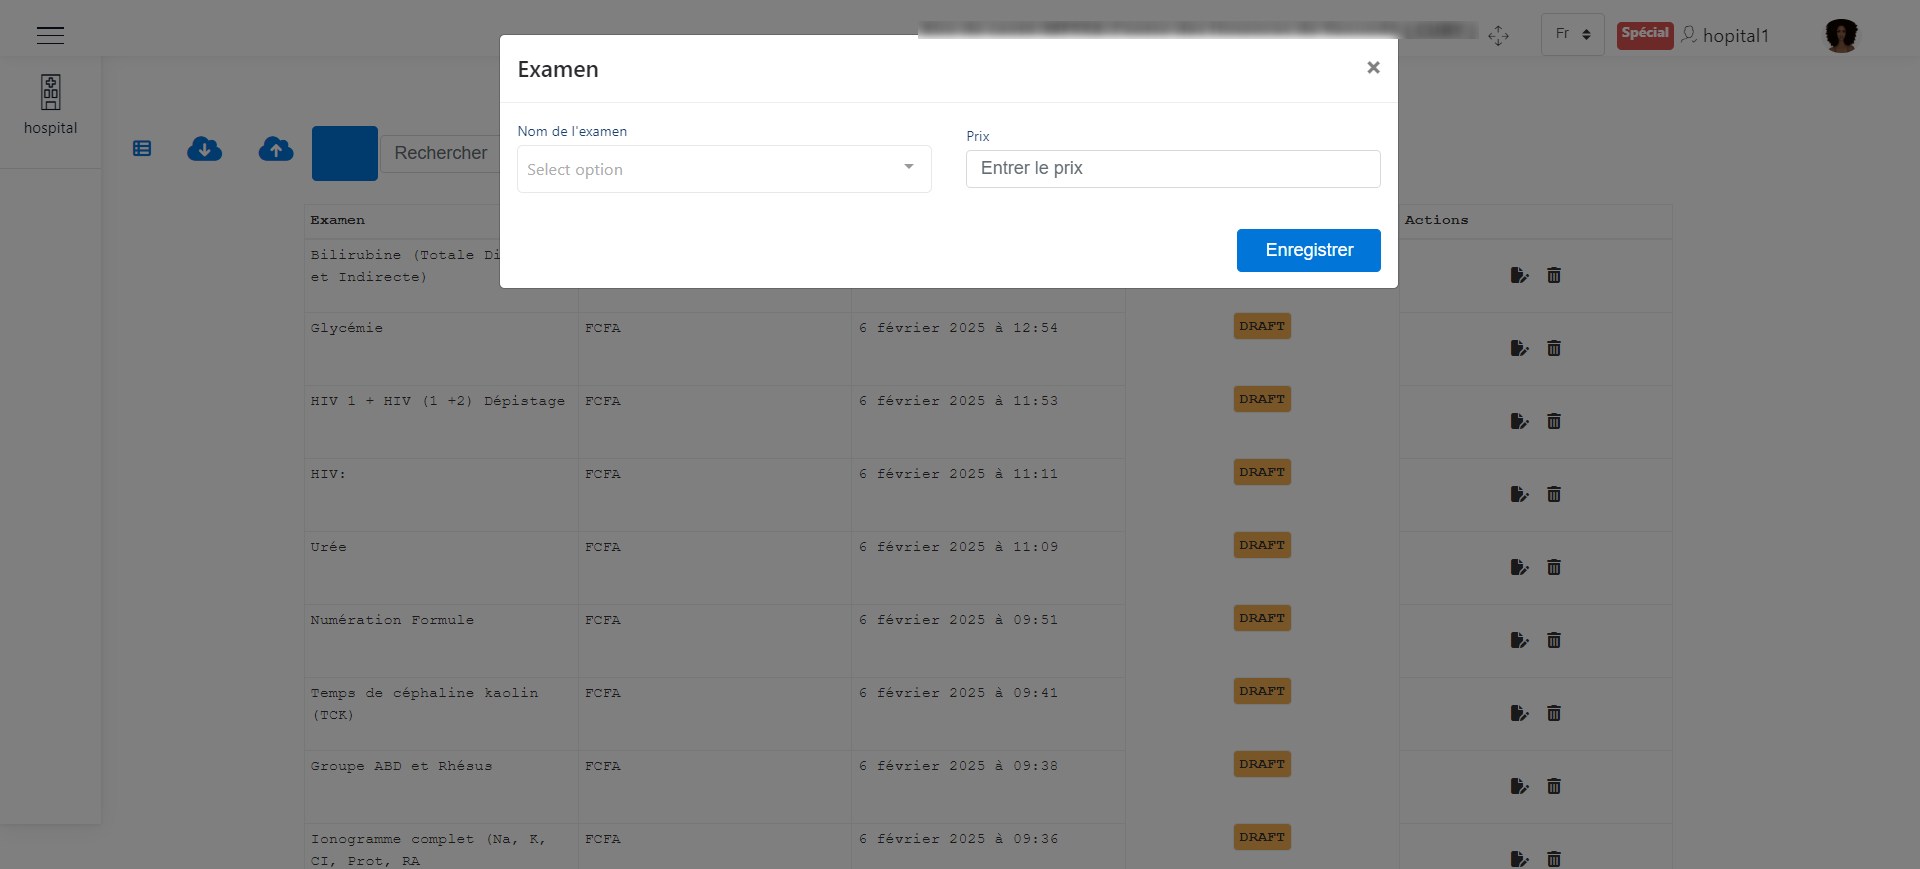
Add an Examination.
To modify an examination, click the edit button as shown in the following image. A window will appear allowing you to modify the previously saved information.
Click the Save button to confirm the changes. The image below illustrates this scenario.
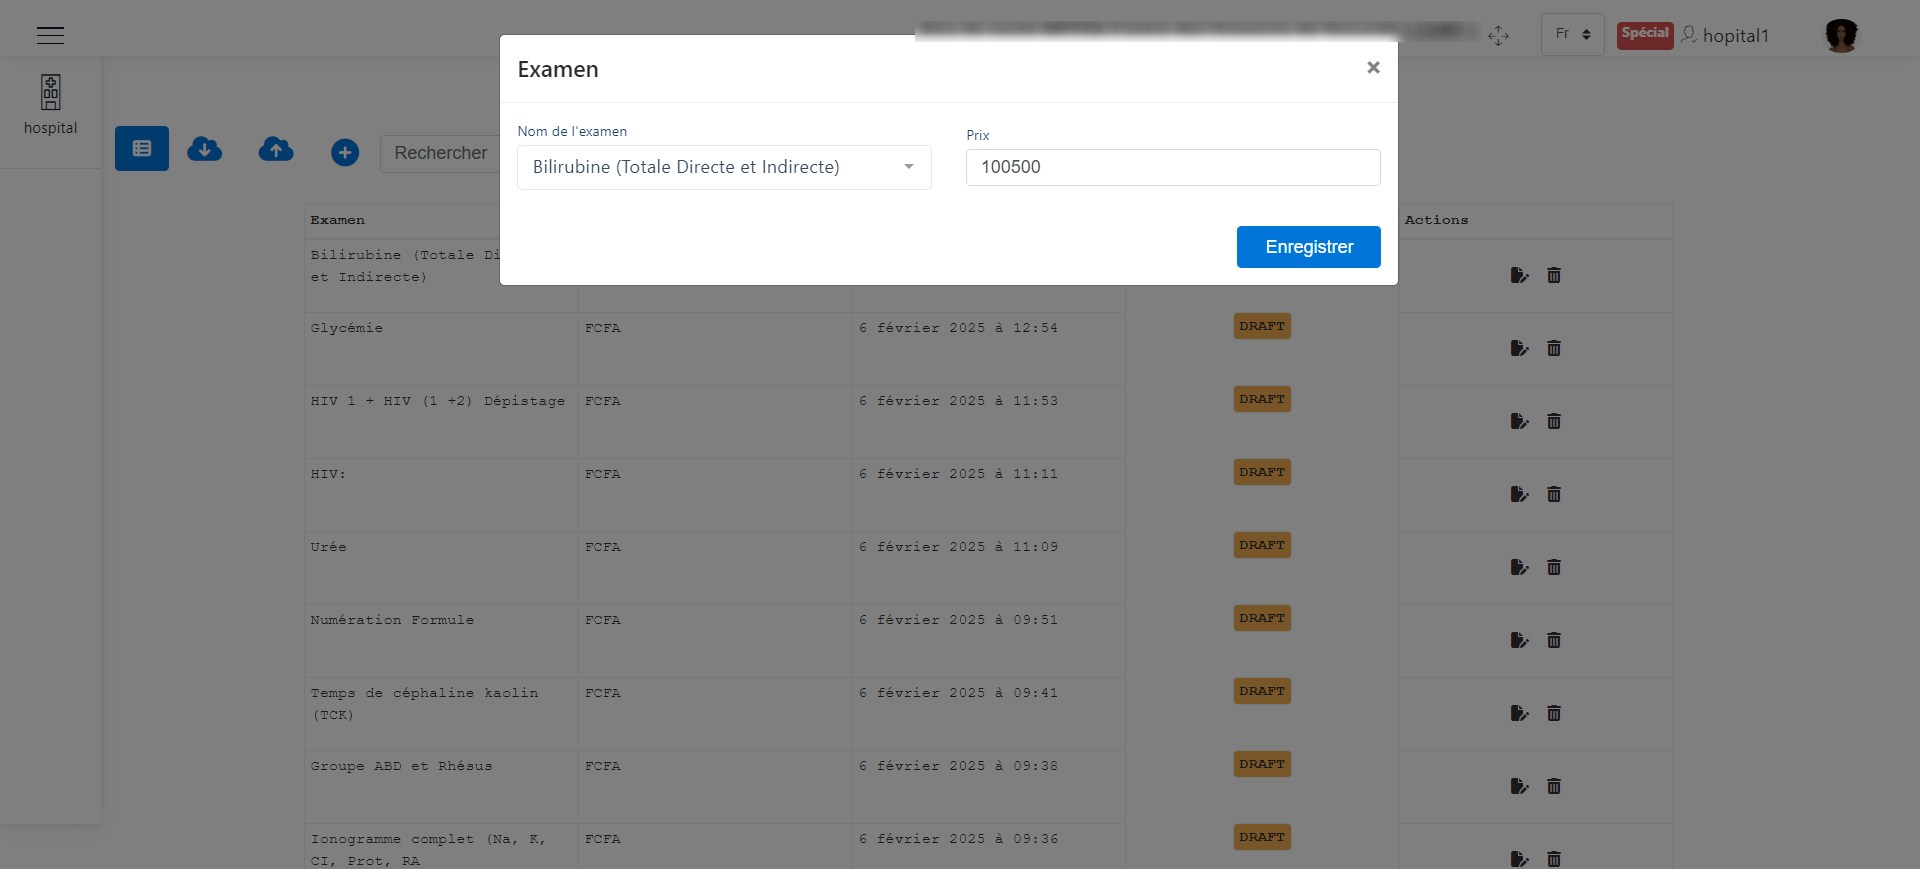
Edit an Examination.
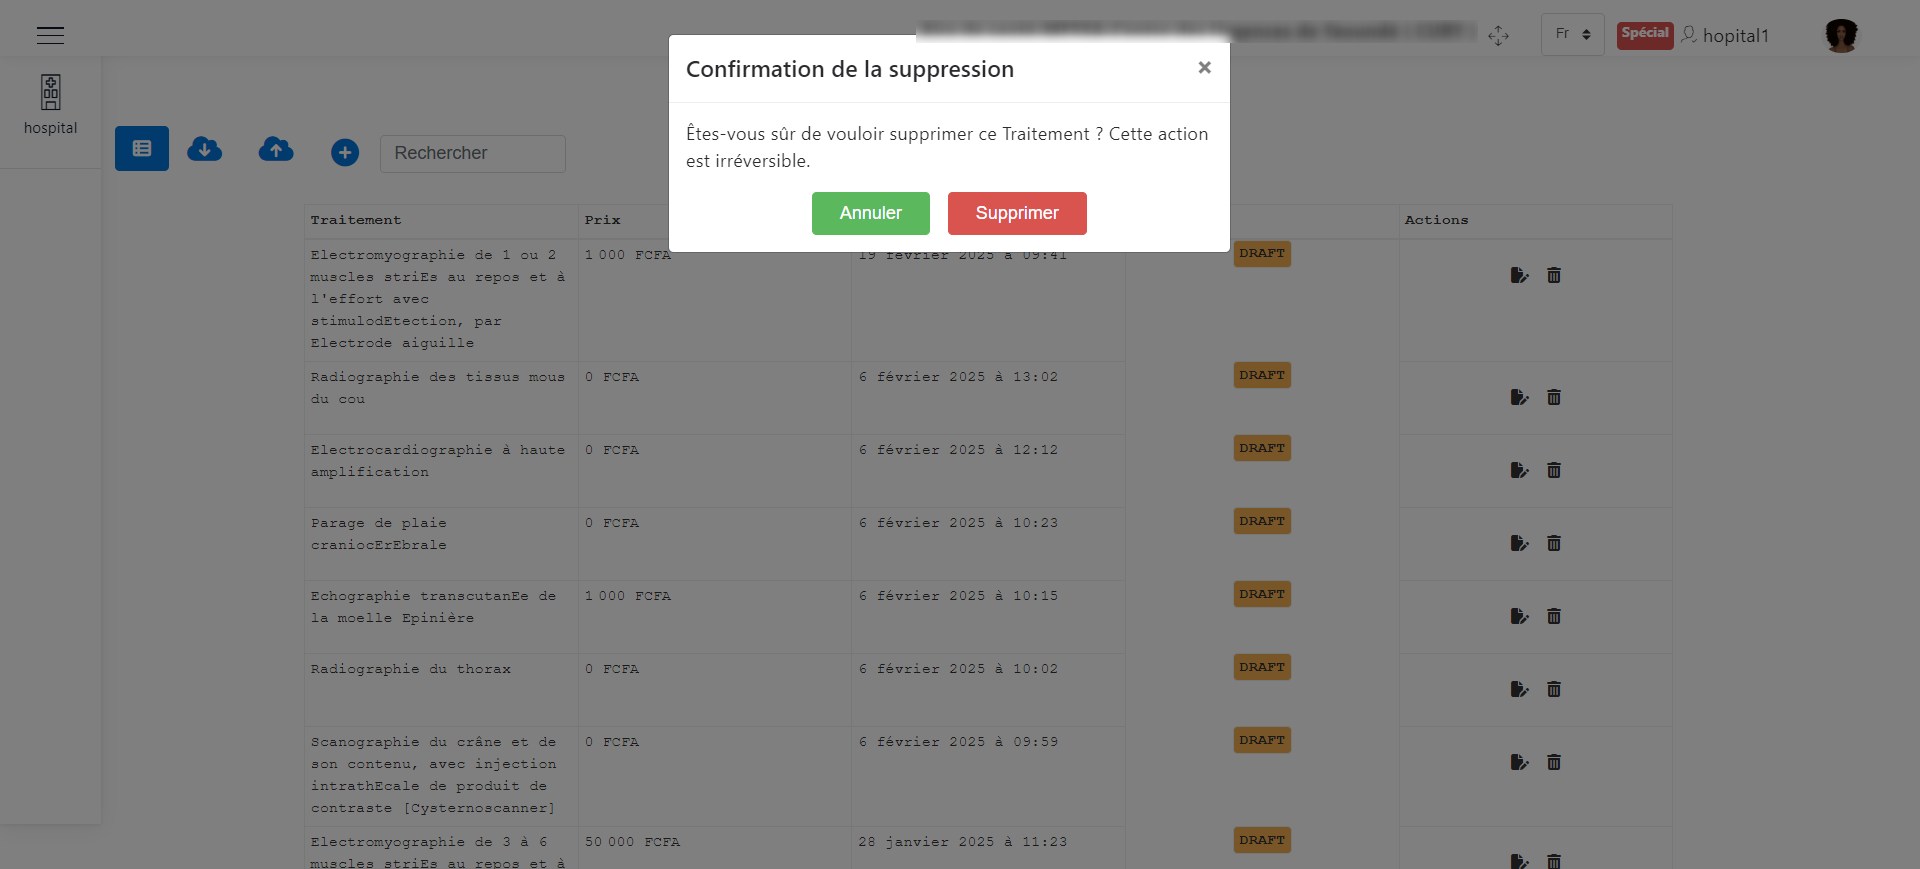
To delete an examination, click the delete button as shown in the following image. A window will appear allowing you to confirm the deletion of the examination.
Click the Delete button to confirm the deletion or the Cancel button to cancel the operation. The image below illustrates this scenario.
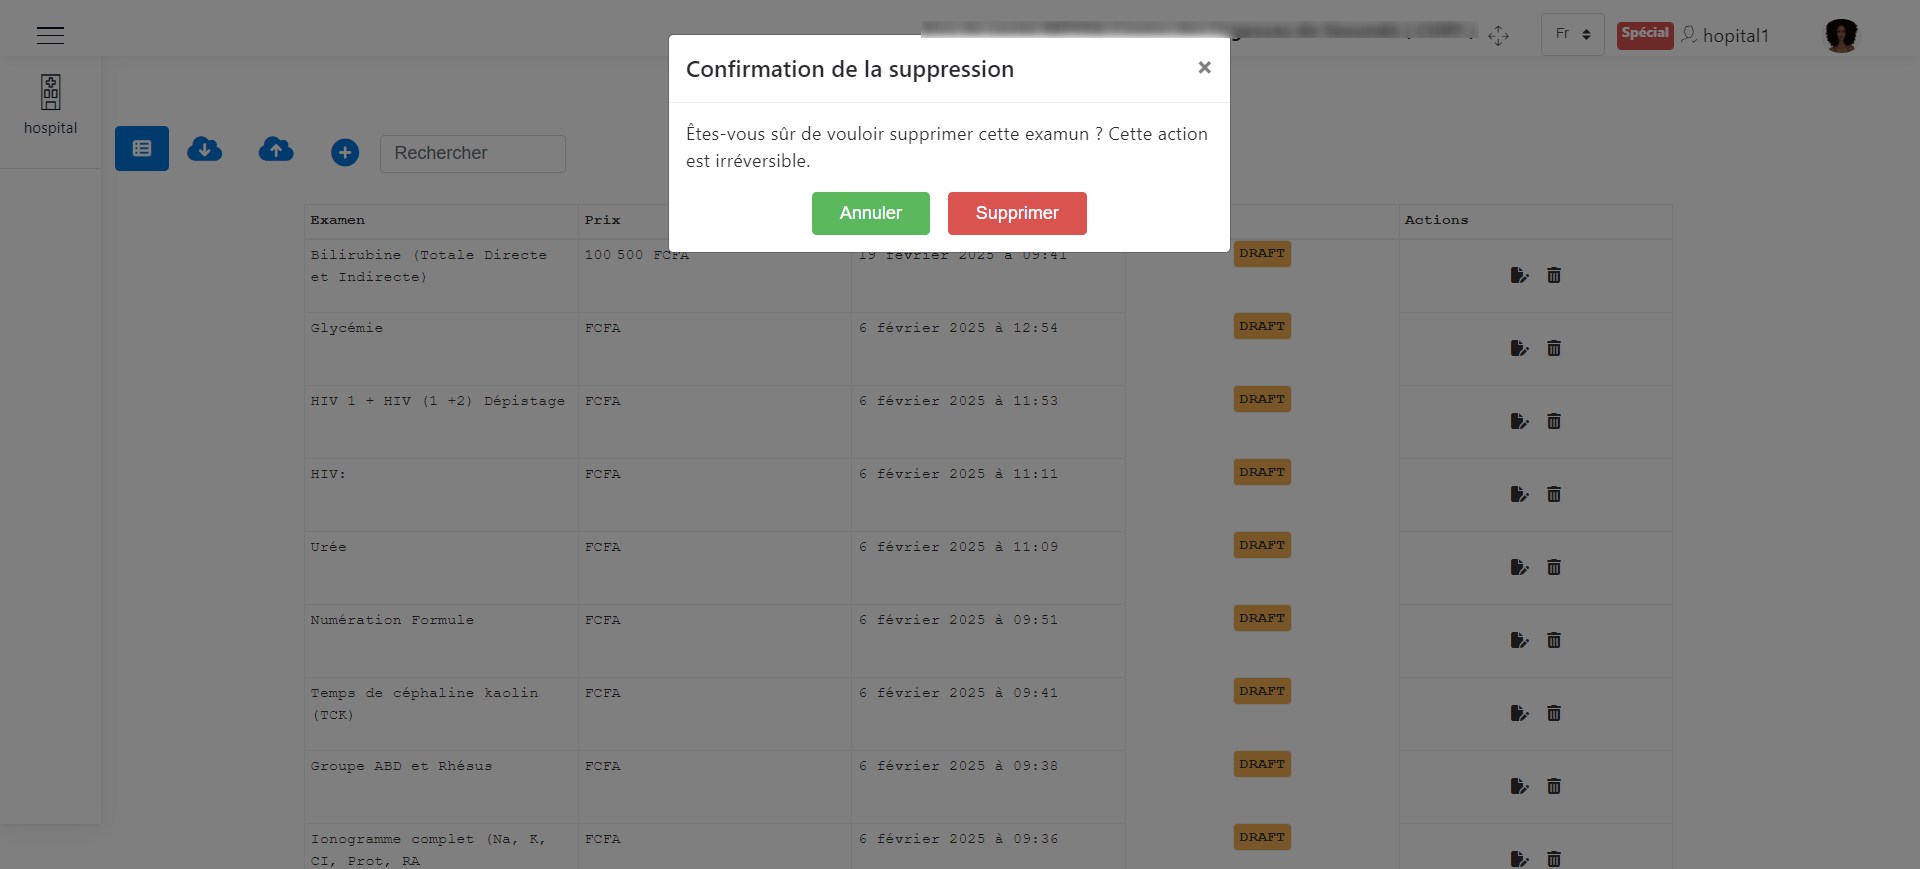
Delete an Examination.
Treatments
Click on 2 as shown in the following image to access the treatment configuration interface.
The image below shows the treatment configuration interface. The actions that can be performed here are:
Adding a new treatment
Updating treatment information
Deleting a treatment
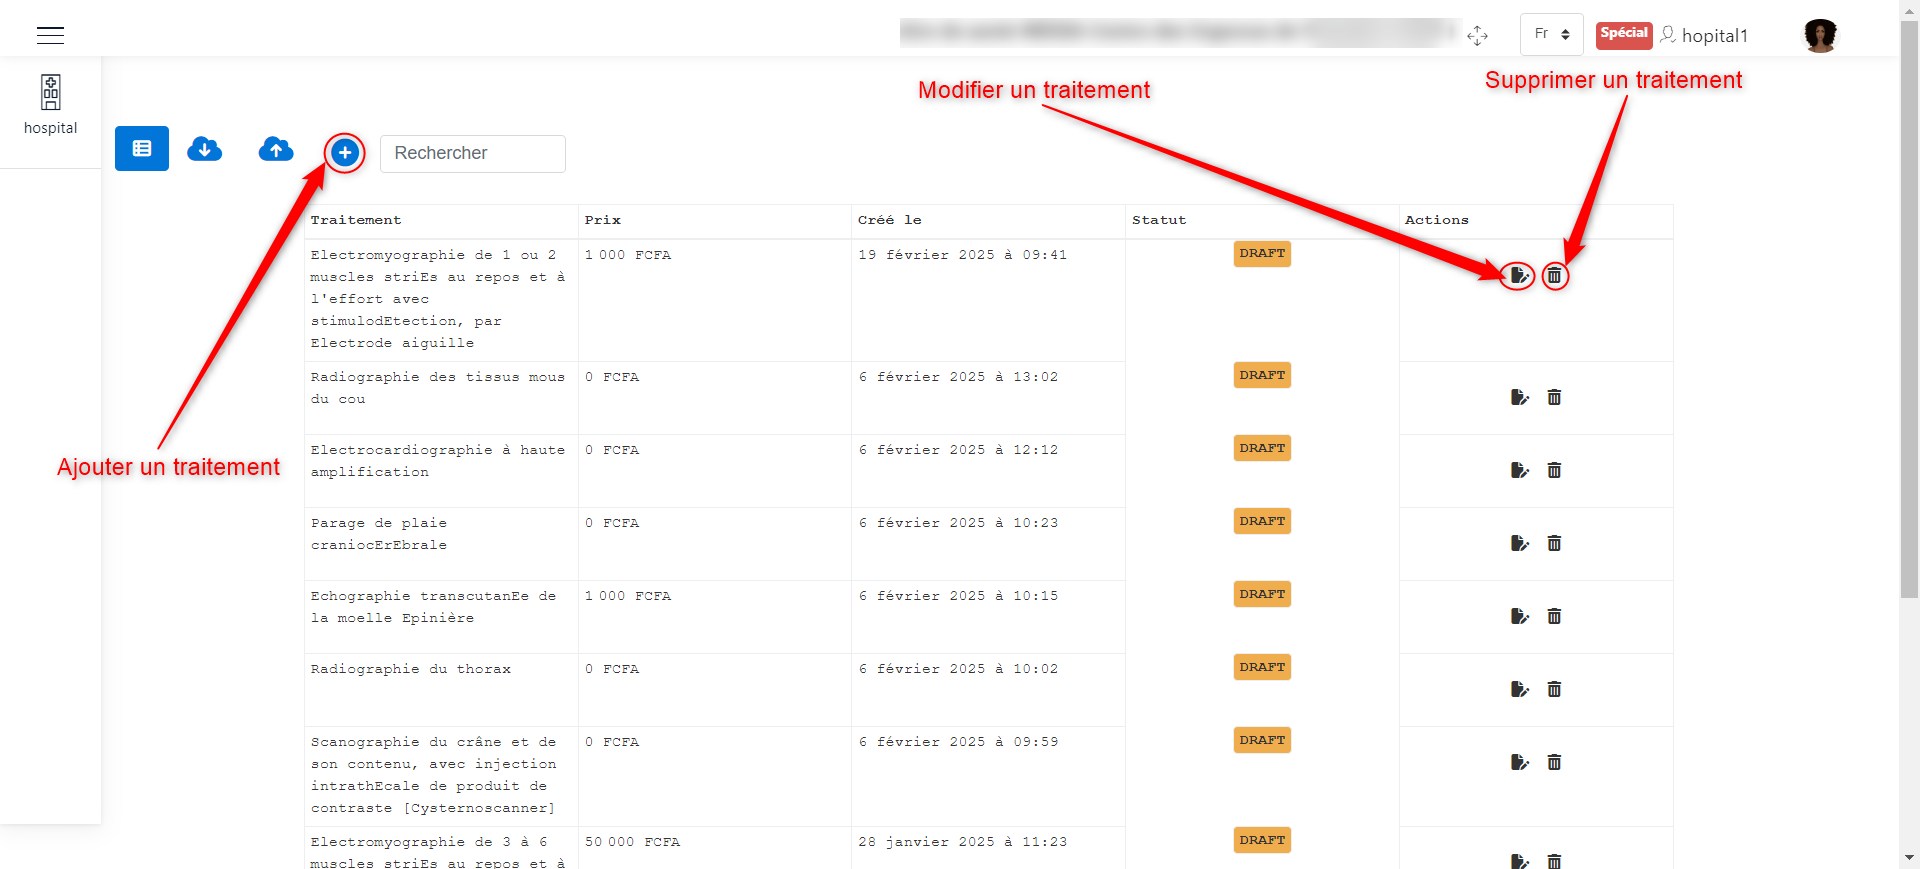
Treatment Configuration.
When clicking on + to add a treatment, as indicated here, a window appears where you can enter the treatment details, such as its name and price.
Click the Save button to confirm the addition of the treatment. The image below illustrates this scenario.
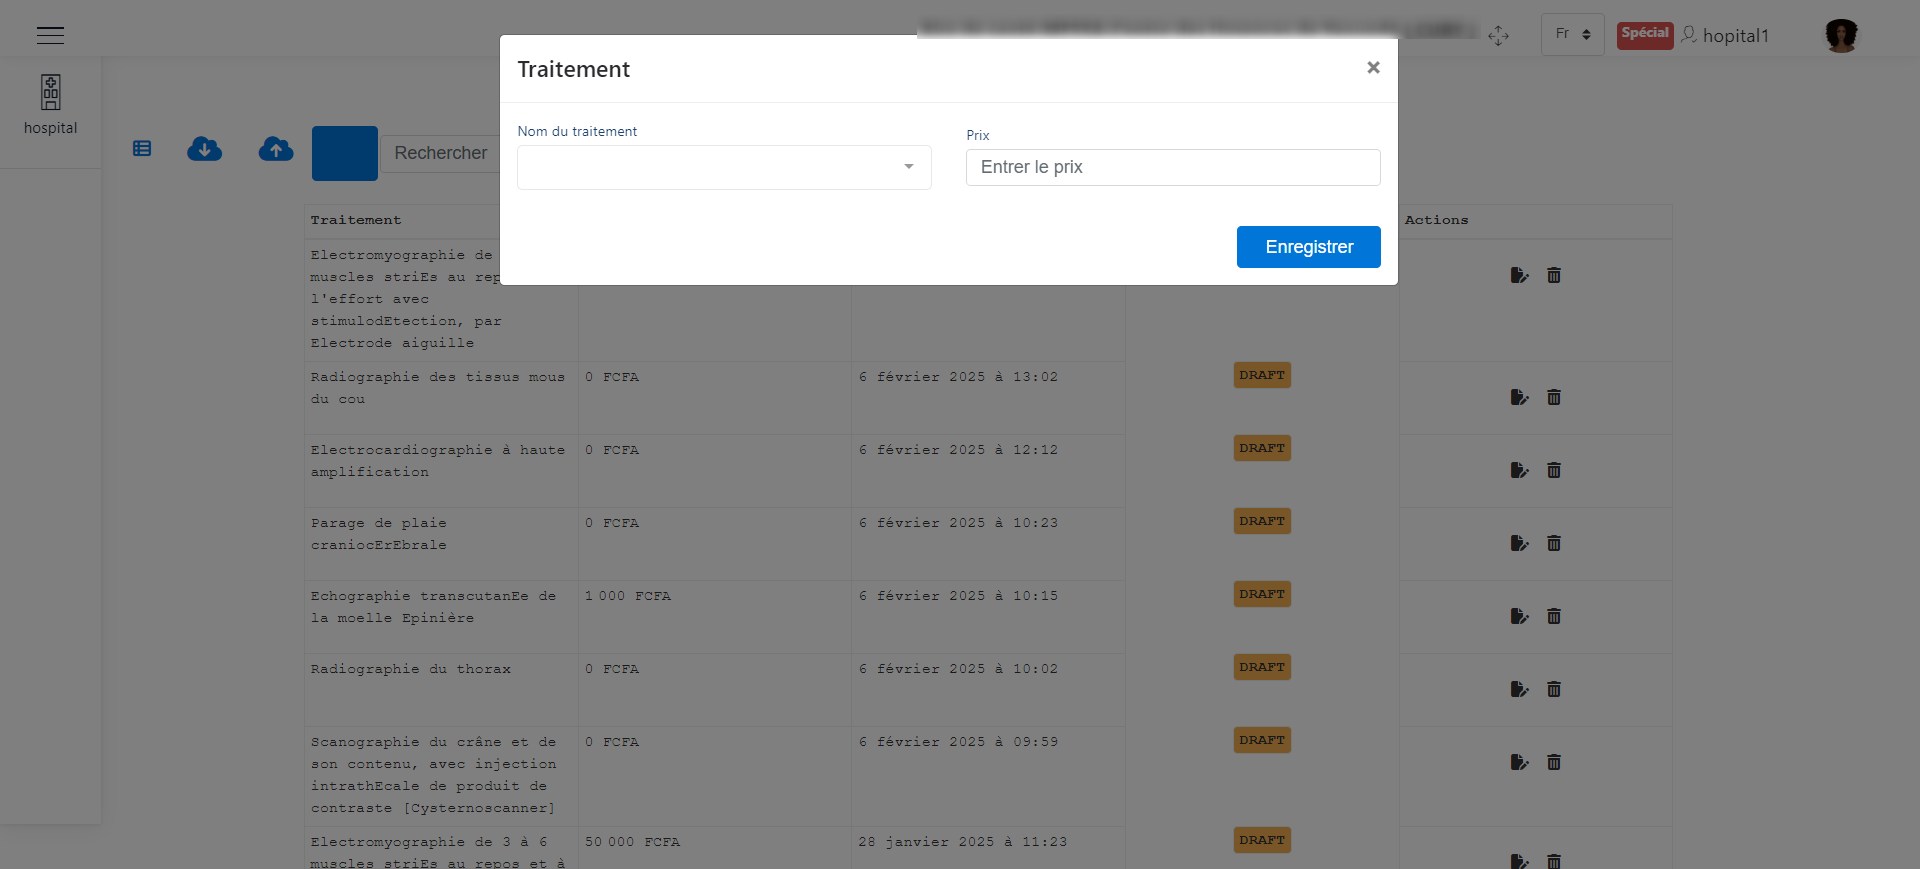
Add a Treatment.
To modify a treatment, click the edit button as shown in the following image. A window will appear allowing you to modify the previously saved information.
Click the Save button to confirm the changes. The image below illustrates this scenario.
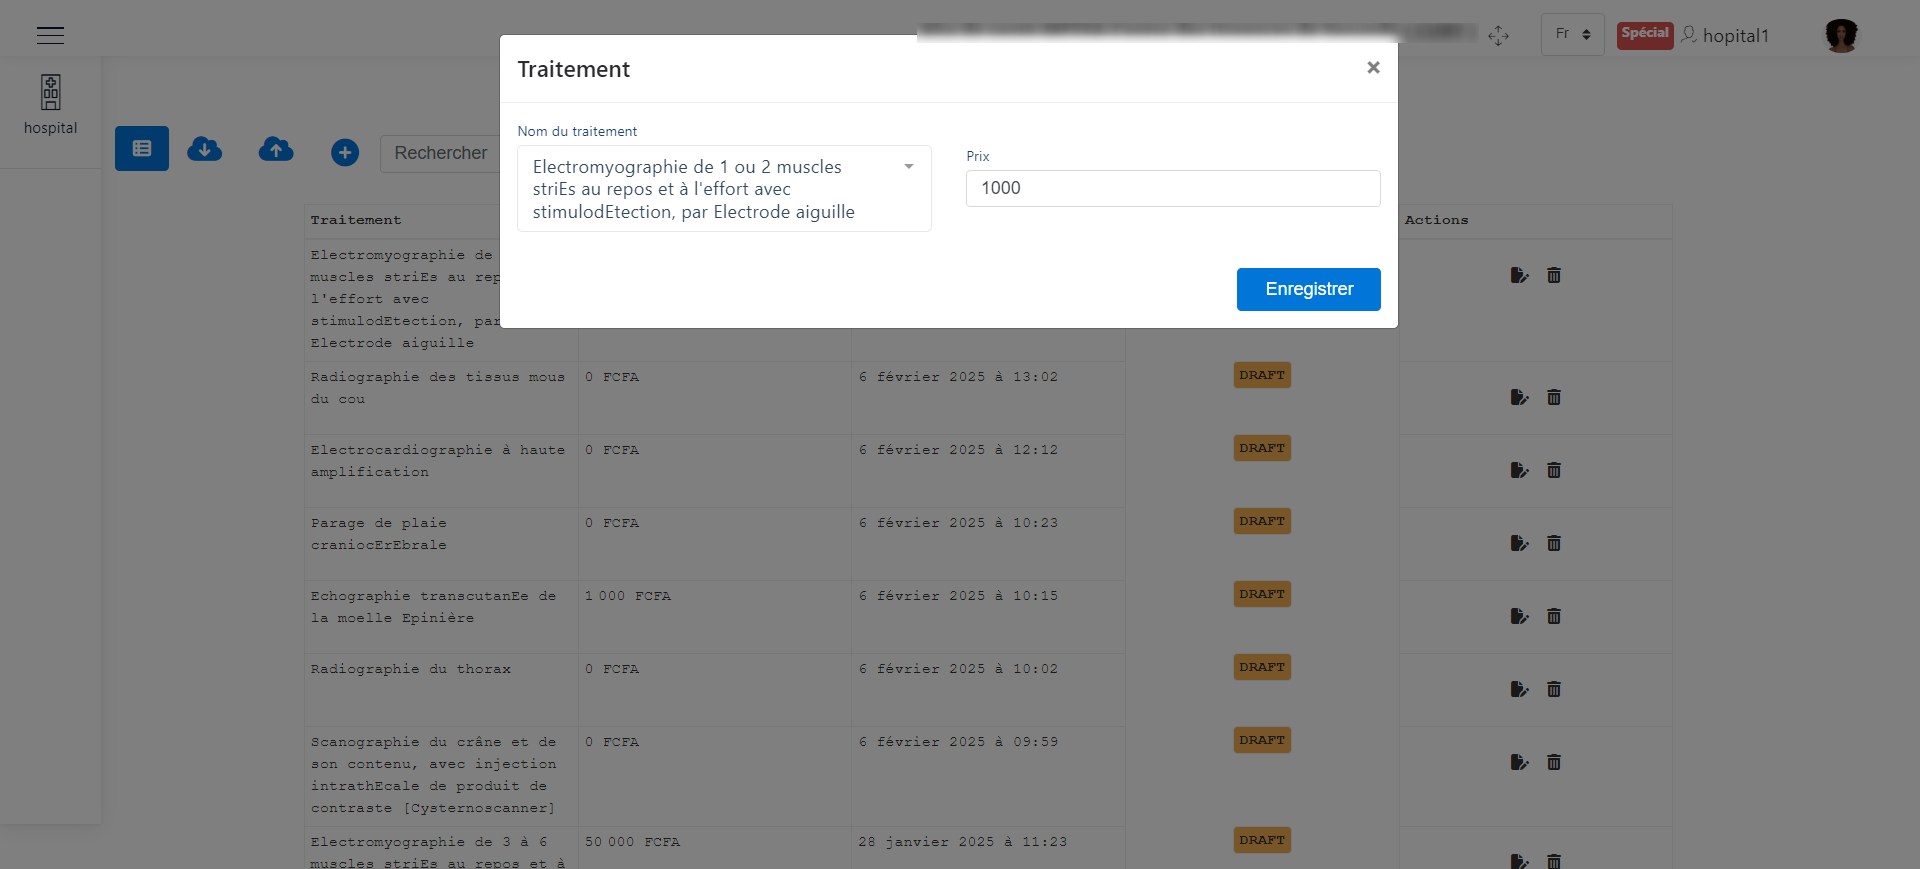
Edit a Treatment.
To delete a treatment, click the delete button as shown in the following image. A window will appear allowing you to confirm the deletion of the treatment.
Click the Delete button to confirm the deletion or the Cancel button to cancel the operation. The image below illustrates this scenario.
Delete a Treatment.
Medications
Click on 3 as shown in the following image to access the medication configuration interface.
The image below shows the medication configuration interface. The actions that can be performed here are:
Adding a new medication
Updating medication information
Deleting a medication

Medication Configuration.
When clicking on + to add a medication, as indicated here, a window appears where you can enter the medication details, such as its name and price.
Click the Save button to confirm the addition of the medication. The image below illustrates this scenario.

Add a Medication.
To modify a medication, click the edit button as shown in the following image. A window will appear allowing you to modify the previously saved information.
Click the Save button to confirm the changes. The image below illustrates this scenario.

Edit a Medication.
To delete a medication, click the delete button as shown in the following image. A window will appear allowing you to confirm the deletion of the medication.
Click the Delete button to confirm the deletion or the Cancel button to cancel the operation. The image below illustrates this scenario.
Delete a Medication.
Rooms
Click on 4 as shown in the following image to access the room configuration interface.
The image below shows the room configuration interface. The actions that can be performed here are:
Adding a new room
Updating room information
Deleting a room
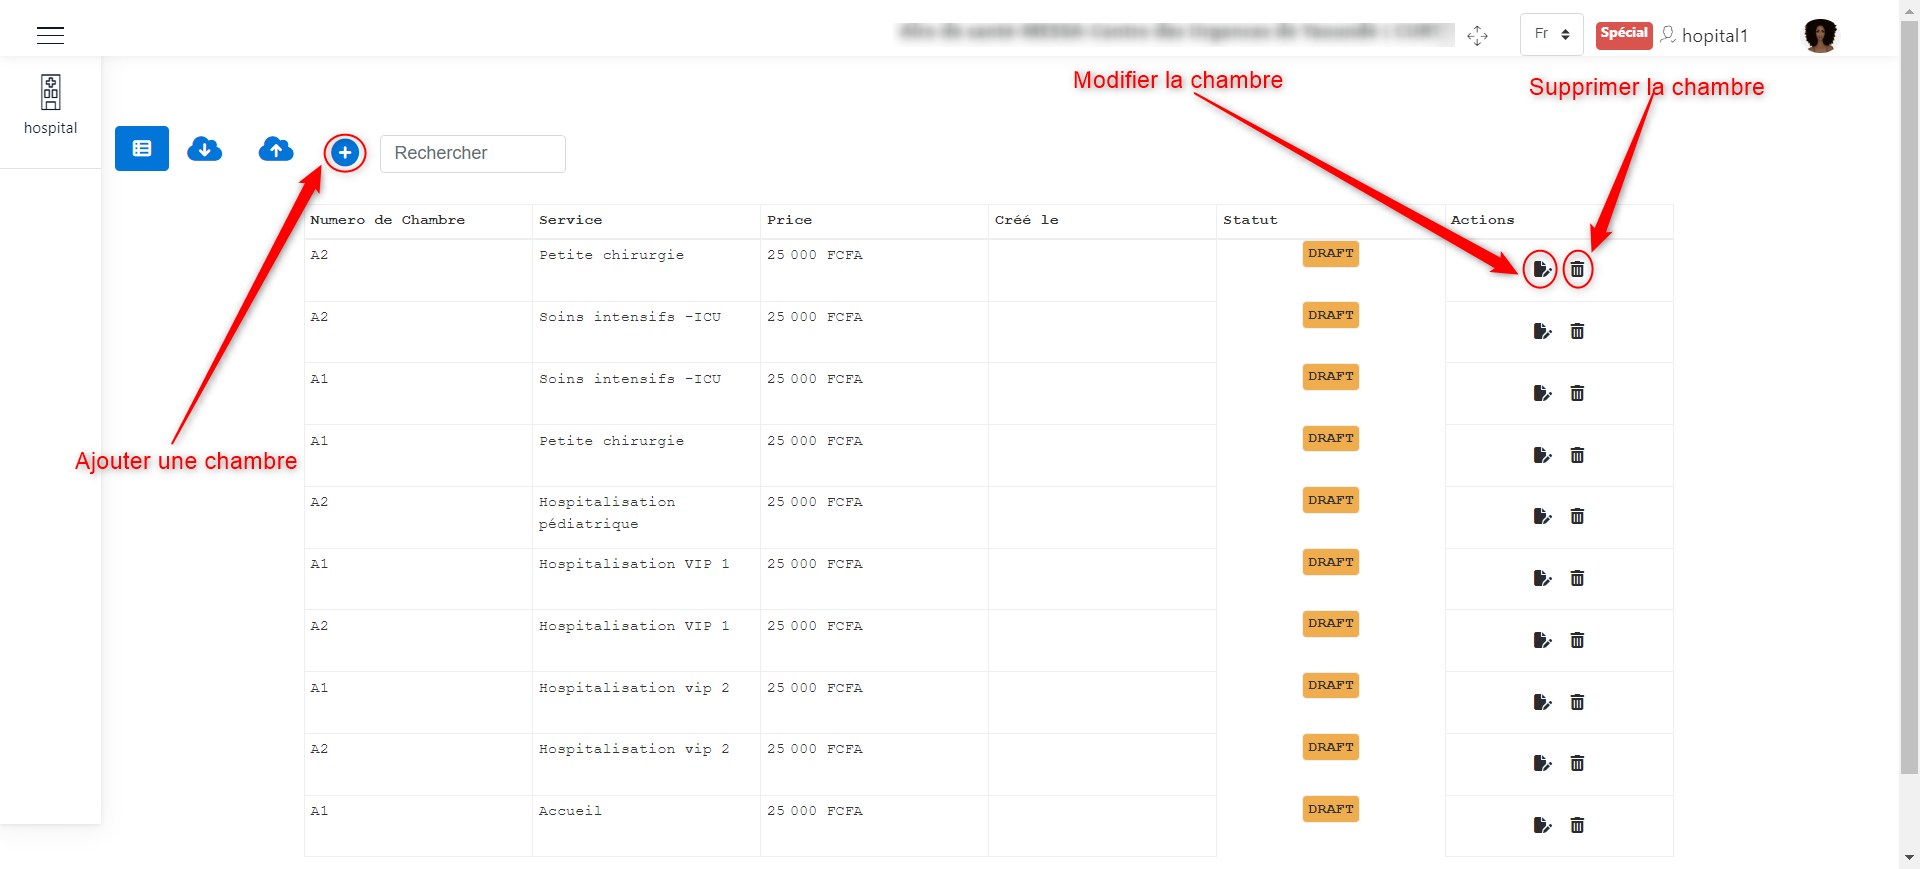
Room Configuration.
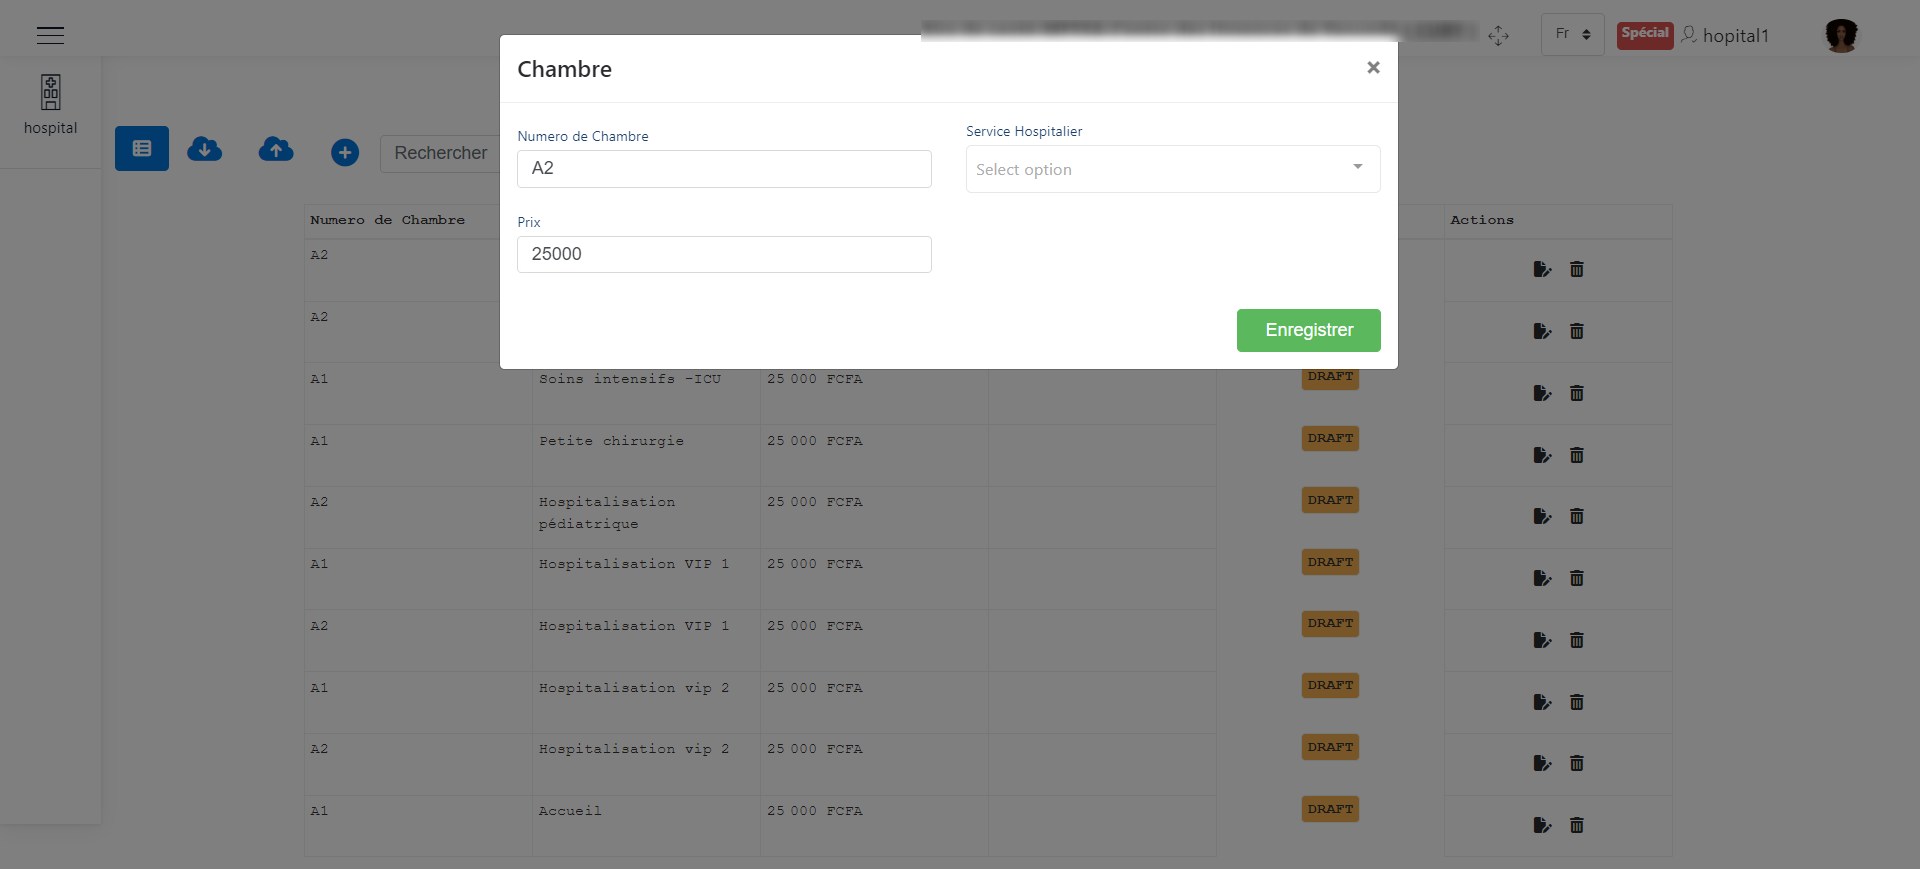
When clicking on + to add a room, as indicated here, a window appears where you can enter the room details, such as its number, the hospital department, and its price.
Click the Save button to confirm the addition of the room. The image below illustrates this scenario.

Add a Room.
To modify a room, click the edit button as shown in the following image. A window will appear allowing you to modify the previously saved information.
Click the Save button to confirm the changes. The image below illustrates this scenario.
Edit a Room.
To delete a room, click the delete button as shown in the following image. A window will appear allowing you to confirm the deletion of the room.
Click the Delete button to confirm the deletion or the Cancel button to cancel the operation. The image below illustrates this scenario.

Delete a Room.
ICD CODE VIEWING
To view the list of ICD codes, please click on the ICD Codes button as shown in the image below.
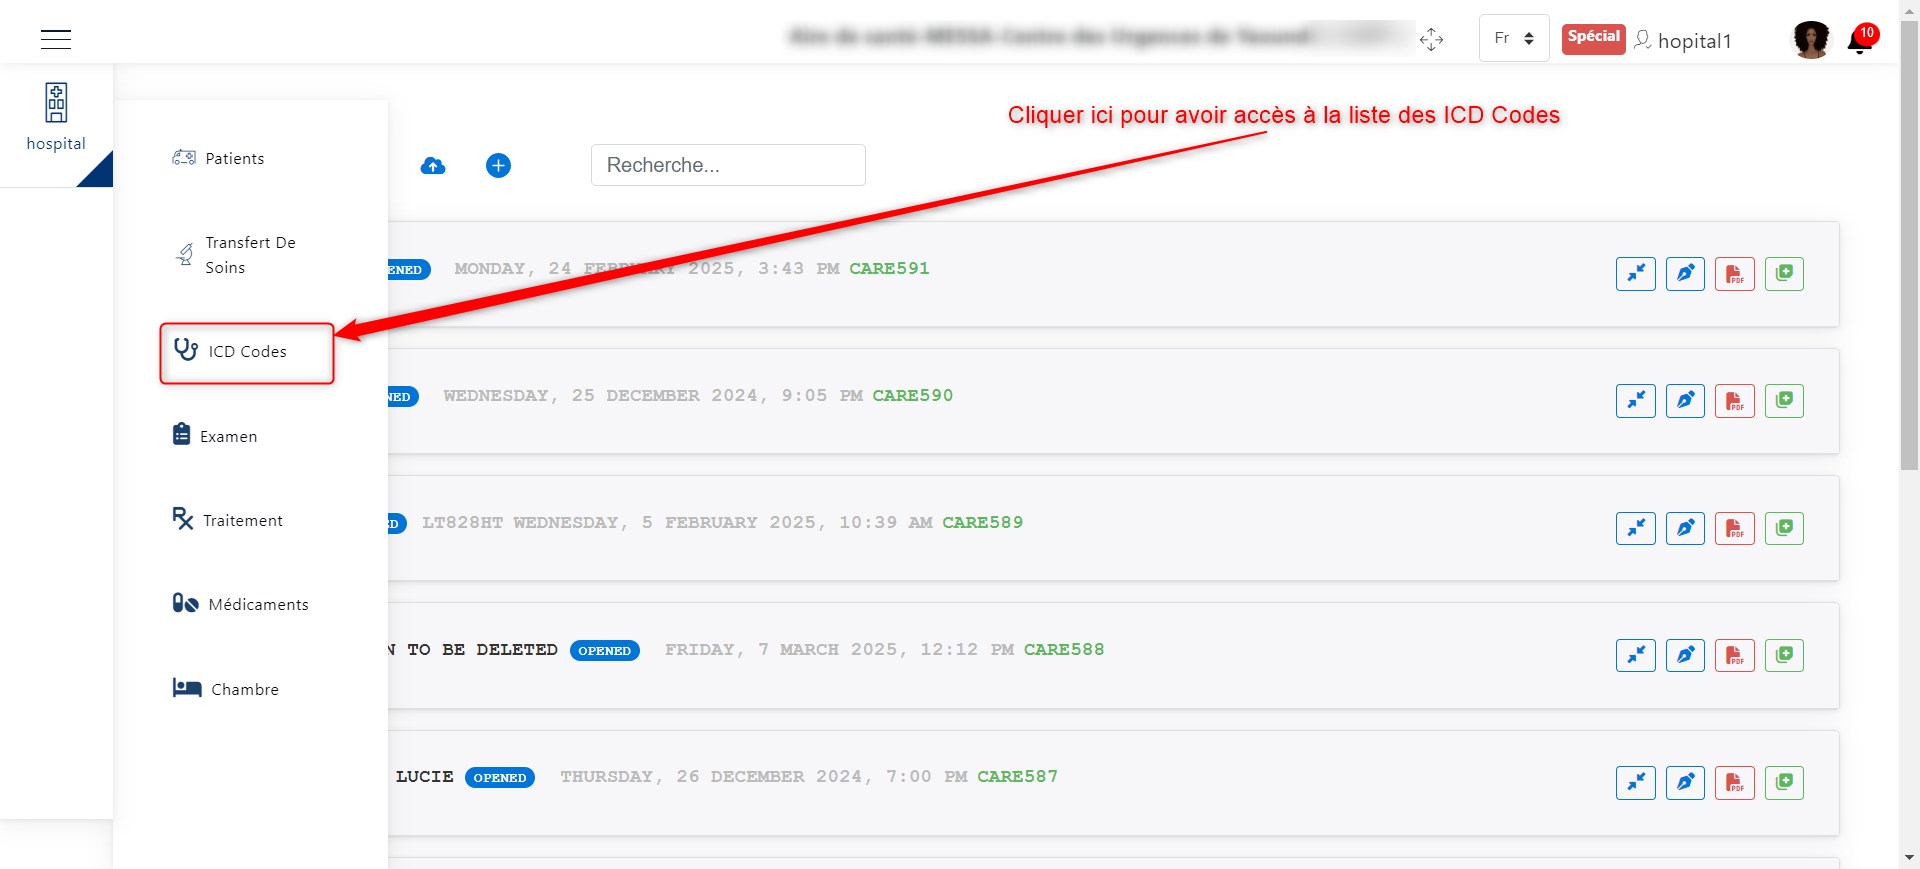
Access button to the ICD Codes list.
Once you have clicked on the ICD Codes button, you can view the list of ICD Codes.
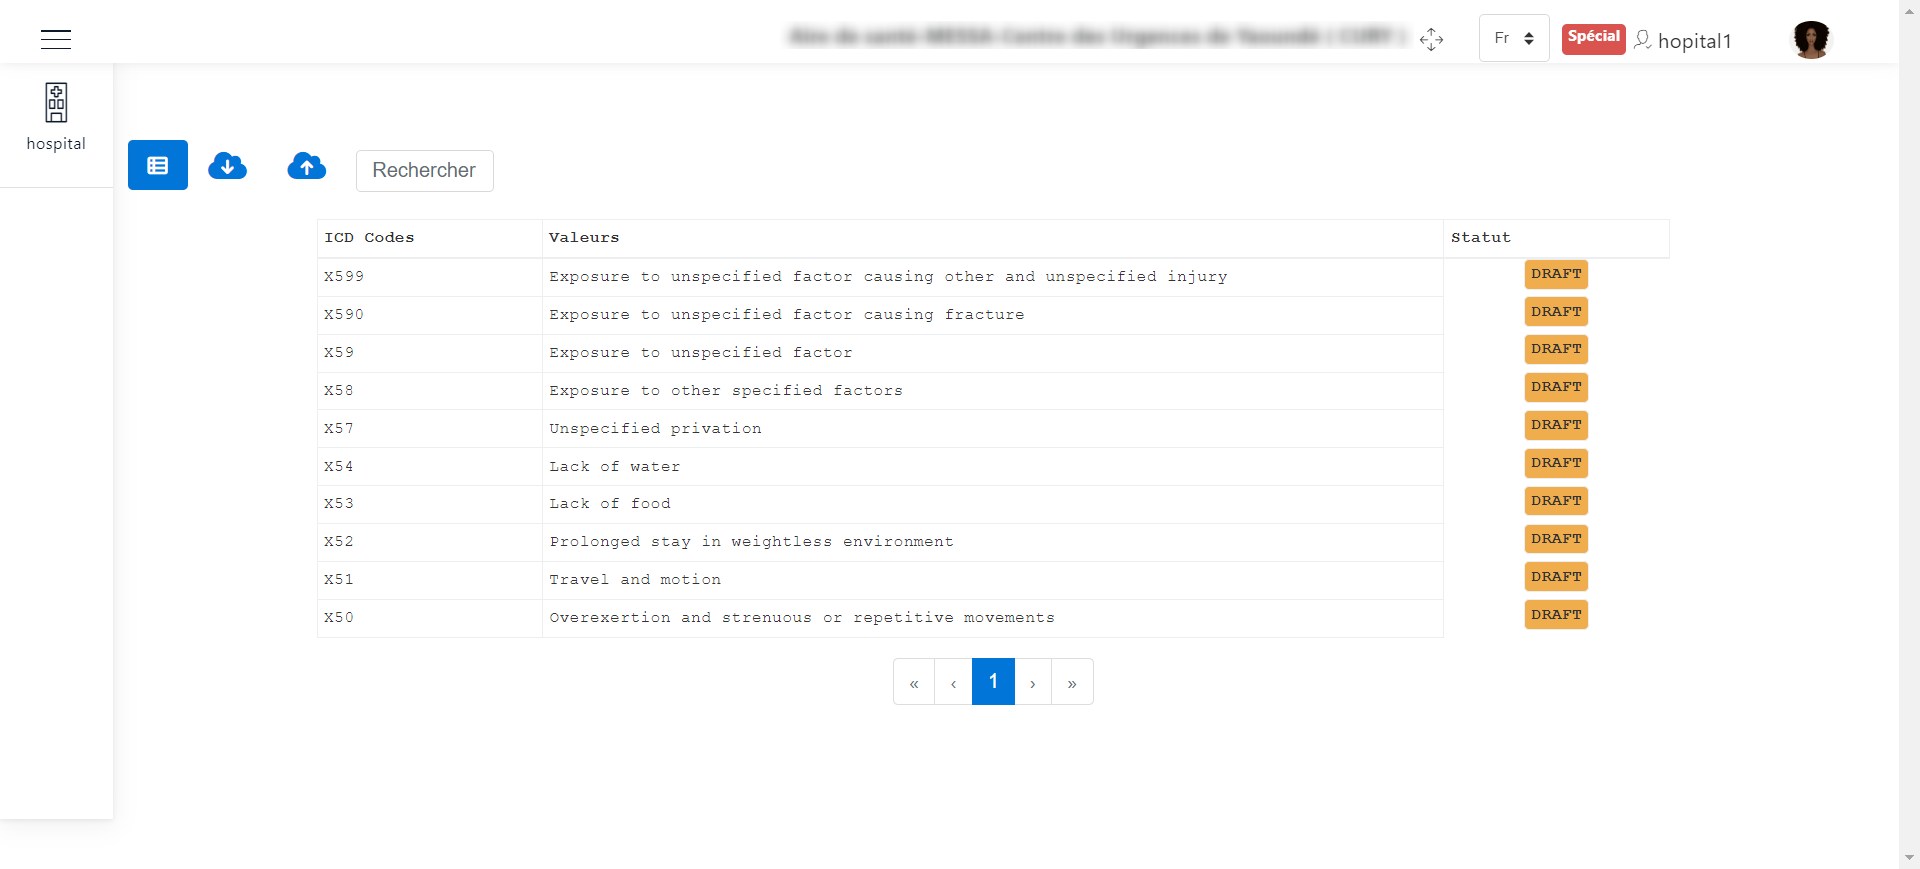
List of ICD Codes.